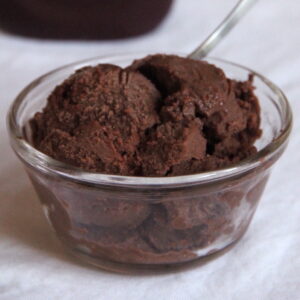
Chocolate Brownie Ice Cream
The perfect treat for chocolate lovers! This recipe for homemade chocolate ice cream with brownie pieces swirled throughout is incredibly easy to make too. Top with chocolate syrup or chocolate chips (or both!) for an extra decadent dessert! This ice cream is best if eaten the same day it’s made, but it’ll keep if stored in an airtight container in the freezer for at least 2 months. (It will turn somewhat icy and hard if left for too long in the freezer. However, you can minimize that by letting it thaw on the counter for a few minutes or microwaving it for 10-30 seconds, depending on the wattage of your microwave, before enjoying at a later date!)
Ingredients
- 2 ½ cups (600mL) nonfat milk, divided
- ½ cup (96) granulated sugar
- 1 tsp vanilla extract
- ⅓ cup (27g) unsweetened cocoa powder
- 3 tbsp (24g) cornstarch
- ½ to ¾ cup brownie bits, cut into ⅜" cubes (about 4 of these cakey brownies)
Instructions
- The night before you plan on making your ice cream, place the bowl of an electric ice cream maker in the freezer. Freeze for at least 12-16 hours.
- Add 2 cups of the milk, sugar, vanilla, and cocoa to a medium pot. Cook over medium heat, stirring frequently, until it begins to simmer.
- Whisk together the remaining ½ cup of milk and cornstarch in a small bowl. When the chocolate milk mixture begins simmering, add the cornstarch mixture to the pot. Continue stirring until it begins to boil. Let it boil for 1-2 min, or until the mixture thickens enough to coat the back of a spoon.
- Pour the milk mixture into a metal bowl or cake pan, and top with plastic wrap, ensuring that the wrap touches all of the milk mixture. Chill for 2-4 hours, or overnight.
- About 20 min before preparing the ice cream, place the brownie chunks on a metal pan, and place in the freezer.
- Working quickly, remove the ice cream maker bowl from the freezer. Place it on the ice cream maker, attach the paddle and the lid, and turn it on. With the ice cream maker turning, pour in the milk mixture. Let the ice cream maker churn for 10-15 minutes or until the ice cream is mostly frozen. About 5 min before the ice cream is done, remove the brownies from the freezer and add them in. Serve immediately (it will be the consistency of soft serve) or freeze for 2+ hours for a harder consistency.
Notes
MILK NOTE: I used nonfat milk, but you can try using almost any type of milk that you’d like. Higher fat percentages (ie 2%, whole milk, etc) typically yield a creamier consistency after storing the ice cream in the freezer.
COCOA POWDER NOTES: For more of a "dark chocolate" flavor, add an additional 2-3 tablespoons (10-15g) of cocoa powder.
I do not recommend substituting Dutched or special dark cocoa powder. These have a different acidity level, which can affect the flavor and consistency of your ice cream. They also tend to make this ice cream taste more muted and bland, compared to the really decadent and rich flavor of regular unsweetened cocoa powder.
DID YOU MAKE THIS RECIPE?I'd love to hear what you think of it in a comment below! If you take a picture, tag @amys.healthy.baking on Instagram or use the hashtag #amyshealthybaking.