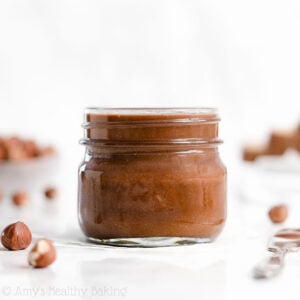
The Ultimate Healthy Homemade Nutella
This smooth and creamy hazelnut spread tastes just like the iconic original Nutella! It’s perfectly sweet with warm nutty flavors and rich chocolate tones. It’ll keep for at least 3 months if stored in an airtight jar in the refrigerator — if it lasts that long!
Ingredients
- 1 cup + 6 tbsp (165g) roasted, peeled, and unsalted hazelnuts (see Notes!)
- ½ cup granulated sweetener (see Notes!)
- 2 tbsp + 1 tsp (11g) unsweetened cocoa powder (measured like this)
- ½ tsp salt
Instructions
- Add the hazelnuts to a high-powered blender (see Notes!), and blend the hazelnuts until smooth and creamy, with a texture similar to thin honey, stopping to scrape down the sides as needed. Add the sweetener, cocoa powder, and salt. Blend until everything is fully incorporated and smooth. Transfer to a glass jar or airtight container, and refrigerate.
Notes
IMPORTANT BLENDER NOTES – READ BEFORE BEGINNING: You’ll want to use a blender (or food processor!) with very sharp blades and a strong motor. This ensures that your homemade Nutella turns out with the smoothest and creamiest consistency possible (without overworking your machine!). This is the blender that I own, and I absolutely love it! It’s worth every penny. (And if you check out this blog post, you’ll see lots more recipes of mine you can make with it!) Although my "blender bundle" is no longer offered, this is the same blender as mine, just with a lower price tag and smaller bundle. See the text of this blog post above for more information about the best blenders!
If your blender or food processor doesn’t have very sharp blades, then you’ll probably need to add a bit of neutral-tasting oil to make sure your healthy homemade Nutella turns out really smooth and creamy (instead of gritty). Any oil should work except for coconut oil.
IMPORTANT SWEETENER OPTIONS + NOTES – READ BEFORE BEGINNING: Many granular sweeteners should work, so I’d recommend using whatever granular sweetener tastes best to you.
I haven’t tried it with every single one, but my favorite is granulated sucralose. Other options like confectioners' style monk fruit, confectioners’ style erythritol, granulated stevia, coconut sugar, and even granulated or powdered sugar should be fine. You’ll need your sweetener’s equivalent of ½ cup of granulated sugar.
Some of these granulated sweeteners can sometimes impart a background flavor or aftertaste. If you choose a sweetener you haven’t worked with very much, taste a bit of it plain — before you add it to your blender! — to avoid ruining your batch.
If you prefer, 1 teaspoon of this liquid stevia may be used instead. However, do not substitute “regular” liquid sweeteners (like pure maple syrup, honey, or agave) because they’ll add too much liquid volume and make your homemade Nutella too thin and watery (almost like soup!).
IMPORTANT CONSISTENCY NOTE – READ BEFORE BEGINNING: For the thickest texture (stiff and scoop-able), wait at least 12 hours after refrigerating before using.
HAZELNUTS NOTES: I bought my hazelnuts online here. ← Those raw ones cost about half as much as the roasted hazelnuts, so I just roasted them myself! To do so, place your raw hazelnuts on a rimmed baking sheet lined with foil. Bake at 350°F for 15 minutes, stirring every 5 minutes. Let them cool completely before peeling them and adding them to your blender. (If you buy toasted or roasted hazelnuts, then skip this roasting step.)
Peeling the skins off of the hazelnuts does take some time, but it makes a huge difference in the consistency of your healthy homemade Nutella! If you skipped peeling off the skins, your homemade Nutella would have a grittier texture. Just rub your cooled roasted hazelnuts gently, and the skins should pop off! (Sometimes, small pieces of the skin don’t want to rub off. As long as those small bits are no larger than a few millimeters, it’s okay!)
Measure and weigh your hazelnuts after roasting and peeling off the skins!
COCOA POWDER NOTES: I use this regular unsweetened cocoa powder. I love how it tastes much richer than Dutched or special dark cocoa powder! These latter two have a blander and more muted flavor, as well as a different acidity level, so I don't recommend substituting them.
HOW TO STORE: Store it in an airtight container. (I really like using glass jars, like these or these.) You can easily leave it at room temperature for a week or two, maybe more, or store it in the refrigerator to make it last longer (more like months!).
{gluten-free, vegan, clean eating, low carb, dairy-free, sugar-free, paleo option}
DID YOU MAKE THIS RECIPE?I'd love to hear what you think of it in a comment below! If you take a picture, tag @amys.healthy.baking on Instagram or use the hashtag #amyshealthybaking.