Confession: I stole a set of measuring cups as a kid.
I wanted to be just like Mommy, flipping pancakes and baking chocolate chip cookies, so when she left the old tan set sitting on the counter, I slipped in, stood on my tippy-toes, and snuck off before anyone saw me. And despite banging them around my Fisher Price Kitchen for all of preschool, it took me another 13 years to finally figure out how to use them properly.
But I completely forgot to share those secrets with you!
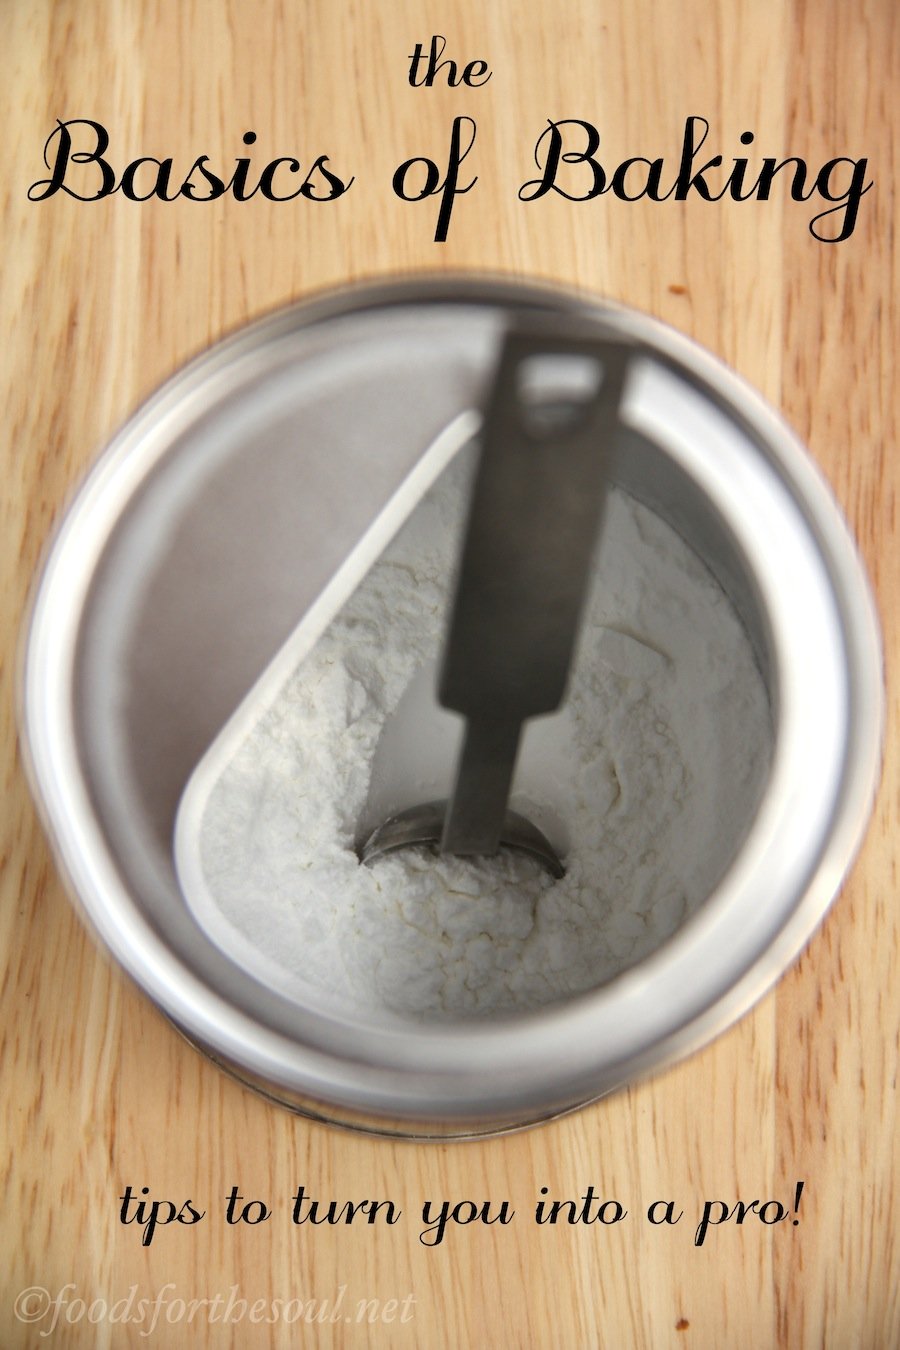
So today, we’re going back to the basics. Many of you may know these tips and tricks already, but skim through them anyway—every one of them will convert you from a beginner into a baking pro!
The Recipe
- Read through the recipe completely before beginning. I know, I know… You’re probably rolling your eyes at me. But raise your hand if you’ve ever dove straight into creaming butter or mixing muffin batter after only reading the ingredients list. (Both of my hands are high up in the air!) It only takes an extra minute or two, but reading through every step will save you time, flour, and lots of burned cookies.
- Watch out for commas! It’s a subtle point, but how the ingredients are written dictates how you prepare and measure them. For example, “1 cup sifted all-purpose flour” means sift the flour before measuring, whereas with “1 cup all-purpose flour, sifted,” you would measure first and sift after. Perform any tasks on the ingredients in the order that they’re written: anything that comes after the comma is done second.
- Understand the language. Sliced, diced, chopped, cut, broken, beaten… Each word means something slightly different, so if you aren’t familiar with any of the terms in a recipe, look them up!
The Measurements
A quick tip before we dive in… I highly recommend investing in a kitchen scale, especially for measuring dry ingredients! This is the one I own. It’s really affordable, and I’ve used it almost every day for 4+ years. It’s my #1 secret for making sure that my recipes turn out with the perfect taste and texture every time I make them!
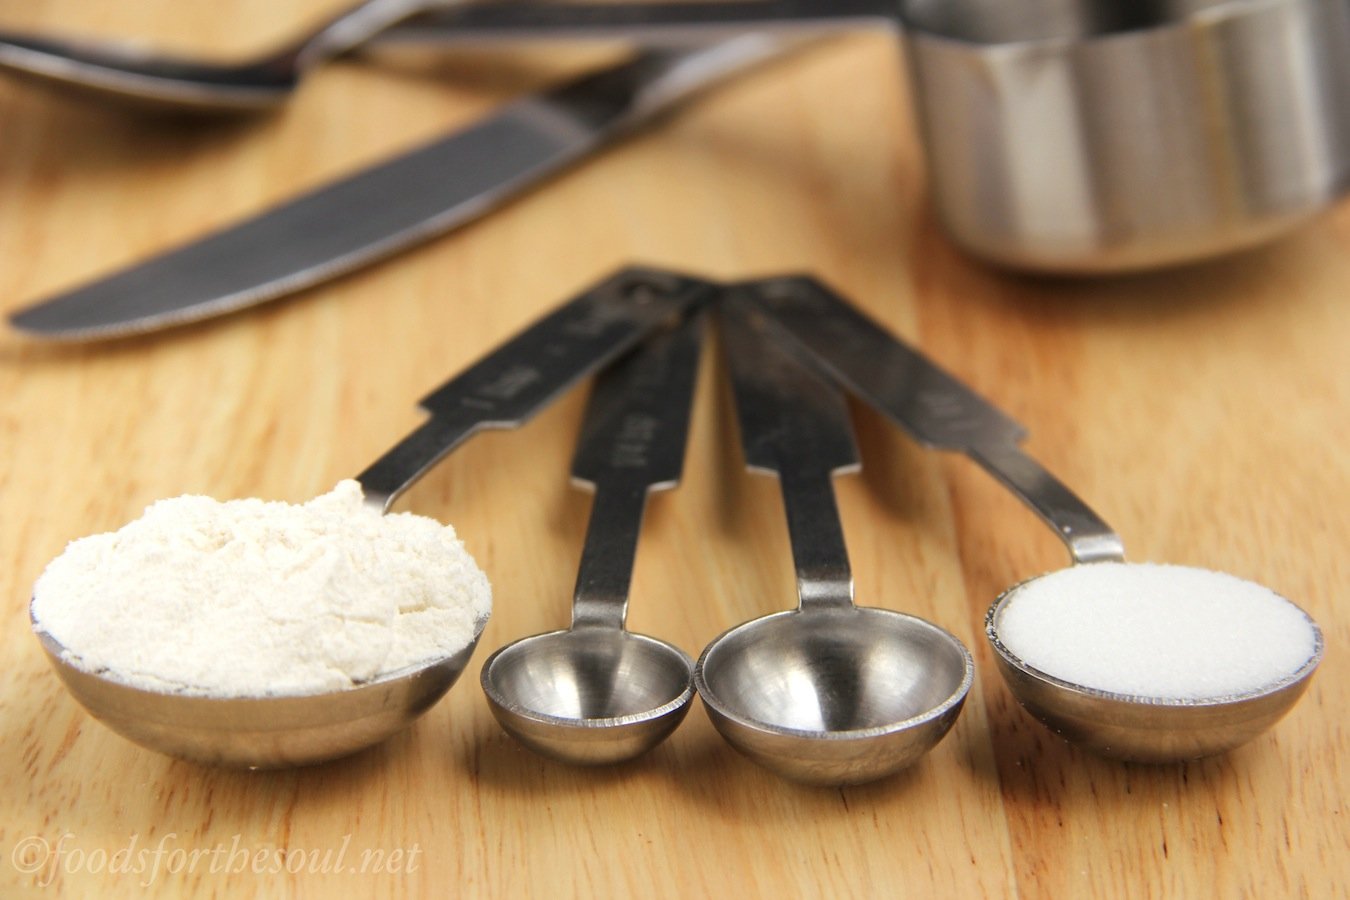
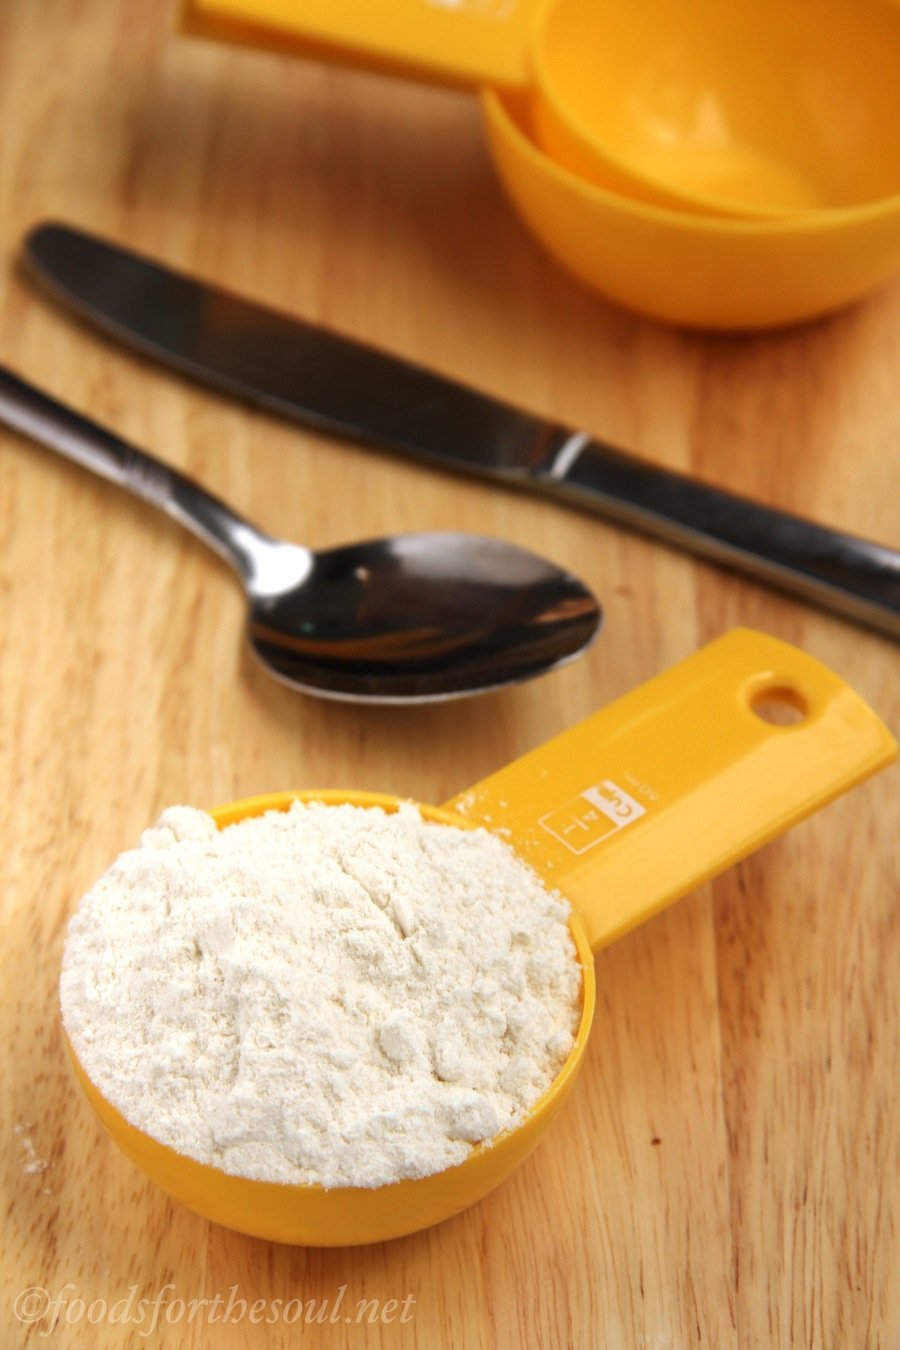
- Flours. All-purpose, whole wheat, gluten-free, peanut, almond, coconut, cocoa powder, and even oats are all the same. Use a fork to “scoop” up flour (or whatever you’re measuring!) from the container, and lightly shake the fork back and forth over the top of your measuring cup to transfer the flour into it (like you’d do with a hair drier!). Once there’s a small mound of flour extending above the rim of the measuring cup, then place the flat backside of a knife against the top of the measuring cup, and gently scrape it across the top to get rid of the excess flour. Never “pat” the flour down with the knife or fork, and never shake the measuring cup either. Also, do NOT scoop the flours, cocoa powder, or oats directly out of the container with the measuring cup or pack them in. This results in 1.5 times more than is required in a recipe, which dries out your baked goods and turns them crumbly. Not good! However, this fork method acts like a sifter (without dirtying another dish!) and guarantees you’ll add the correct amount of flour to your recipe!
- Leaveners. With baking powder and baking soda, lightly fluff the leavener with a measuring spoon before scooping it out and leveling with a knife. Some containers have a flat edge built in—that works too!
- Sugars. For white sugar, use the same technique described for flours, except use a spoon instead of a fork. With brown sugar, lightly pack it into the measuring cup using a fork or spoon until the cup is completely filled and level (unless the recipe states otherwise). When you invert the measuring cup, the brown sugar should be packed tightly enough to hold its shape.
- Salt and spices. Treat them like the leaveners: fluff, scoop, level.
- Butter and margarine. Most stick-style butters and margarines are wrapped in a label with tablespoons marked on the side. Count out how much you need, and cut through the stick with a sharp knife. You should avoid using a butter knife because the blade is duller and you won’t carve off as accurate of an amount. With tub-style butter, margarine, and shortening, press the necessary quantity into a measuring spoon or cup, and level with a knife.
- Liquids. Milk, oil, juice, honey, syrup, and extracts are a little tricky. If using regular measuring cups, place the measuring cup on the counter, pour in the liquid, and get down at eye level. The liquid at the edges tends to stick to the sides of the cup, while the liquid in the center curves upward ever so slightly. You want to make sure the center of the liquid is even with the rim of the cup for the most accurate measurement. You can also use a clear liquid measuring cup instead. Here, the liquid in the center sinks down a touch. (In science-speak, it’s called a meniscus!) The bottom of that concave meniscus should brush the top of the marking lines on the liquid measuring cup’s side, almost so it looks as if you’ve added slightly more of the liquid. For teaspoons and tablespoons, fill them to the brim but not overflowing or bulging out the top. And be careful when pouring the liquids into the mixing bowl! (Also, never use a kitchen scale to measure liquids. The “ounces” option on kitchen scales is for dry ounces, not liquid ounces!)

I may add to this post as new things come up in the future. But for now, it’s time to bake something sweet! Which of these recipes are you going to try next? I can’t wait to hear!! ♡

This looks really good. But, I’m sorry but gluten free flour is not the same as regular flour. It has a whole different way of acting in a recipe. You cannot use one for one gf flour either. The just don’t perform the same. GF flour are much more dense. Therefore you will not get a superior product. I have tried many times just substituting one for one. No bueno! I’ll have to work out how to replace the regular flour for gf. But this healthy cookie looks amazing!!
I really appreciate your interest in my recipe, Kathy! I’m not sure to which cookies you’re referring, but I completely agree. Just about all gluten-free flours act and taste a little different, and many have different textures too. That’s why I share the exact gluten-free flour or gluten-free flour blend that I use and recommend in the Notes section of my recipes! It’s located directly underneath the recipe box’s Instructions. I know it can be easy to miss, but check there! 🙂
I believe that the meaning of “are all the same” was meant as to how they get measured, not that they can be substituted one for the other. The wording is just a little confusing and I think that’s what Kathy was saying, but I hope I am clearing it up for both. Am I right, Amy?
Gluten-free flours are measured the same way, Cindy! Does that help clear things up? 🙂
That’s exactly what I meant but believed that Kathy misunderstood as it can also be read as they are the “same ingredients” as far as substituting one for the other…which is not the case as far as why you would want to eat one versus the other.
I can’t speak for others’ perspectives — only for my own! 😉 I’m happy to clear up any confusion I may have caused you though, Cindy! Do you have any additional questions about ingredients or measuring?
My son can only use bob mills gluten free all purpose baking flour no xanthan gum. Will this work or do I need to add something else?
You’re so thoughtful to make treats that work for your son’s dietary needs, Michelle! What’s the exact recipe of mine that you’re thinking of trying? Once I know that information, I’ll have a much better idea of whether this particular flour will work as a substitute!
I apologize, I thought when I asked it went straight to the recipe I was posting on. The apple cookies.
I completely understand, Michelle! People visit this Baking Basics 101 page and leave their recipe-specific questions and comments on it by accident all the time. 🙂
I have a couple of apple cookie recipes. If it was my Apple Pie Oatmeal Cookies or Apple Pie Oatmeal Breakfast Cookies, then Bob’s Red Mill Gluten Free All Purpose Baking Flour should work as a substitute. In general, I recommend adding xanthan gum because it creates a better texture in gluten-free cookies. (I’ve shared how much xanthan gum to include in these cookies on my Oatmeal Cookie FAQ Page, which is also linked to at the bottom of the Notes section of both recipes!) However, if your son can’t consume xanthan gum, then it should be okay to omit it from the cookies. They’ll have a subtly different consistency, but it shouldn’t be too noticeable!
I’d love to hear what you and your son think of the cookies if you end up making them!
Hi Amy, I am seeing 1 cup of oat flour with a different weight on numerous sites. One site says one cup is 120 grams, while another site says it is 90 or 92 grams. That’s a big difference!! I asked for a kitchen scale for xmas so I could be precise, but am wondering how to do that when the weight seems to differ. I know you specify in your recipes, but i have some recipes that only say 1.5 cups of oat flour or almond flour and so I was forced to look online for how to weigh these amounts and saw quite a huge difference when comparing how much 1 cup weighs ALL flours. Why is this? Your thoughts/advice?
We’re so honored that you’d ask here for advice, Cathy! This is such a great point, and great question!
First of all, we always do a mini cheer when we hear that our readers are using or planning to use a kitchen scale while baking! I’ve found it to be so helpful and takes a lot of guesswork out of many recipes! That being said, it can be frustrating when there are discrepancies in the weight of your ingredients.
Different flours can weigh different amounts per cup, depending on their densities! So to make it a little easier, let’s focus on the same type of flour… Like oat flour!
From researching, the two biggest factors that often influence why certain brands and websites list different weights for the same type of flour are (a) humidity and (b) whether the flour was sifted, stirred, or otherwise aerated prior to measuring.
Since flour is hygroscopic (meaning it can absorb moisture, including from the air!), it can weigh more per cup in a humid environment compared to a dry one. That environment can be the place that the flour was milled, the building in which it was measured, your kitchen at home, or someplace else.
When flour is sifted, stirred, or aerated prior to measuring, you’ll typically end up with a smaller gram measurement per cup because the flour isn’t as compacted compared to if you spoon it directly from the bag in which it came. (This is also why we recommend never scooping the flour directly from the container with your measuring cup — you can end up with up to 1.5x as much because it’s so compacted!) Some brands seem to sift or stir their flours more prior to weighing them for the grams-per-cup measurement, which will lead to a smaller gram number on the label and/or in the recipe.
When a recipe doesn’t list the metric measurements, and if it’s not obvious what flour brand the recipe creator used, I try to look up the weight of as many brands that I can find online, and I’ll often use the gram measurement that appears the most often.
I hope that helps and makes sense! We’d love to hear about how you like using your kitchen scale once you get a few recipes in the oven! 😉
for your zucchini/banana loaf, what changes do I need to make by omitting the banana?
I really appreciate your interest in my Zucchini Banana Bread recipe, Catherine! It was specifically designed to use mashed banana, so I don’t recommend omitting it. However, if you don’t care for bananas, I have some classic zucchini bread recipes that might be of interest! I’d suggest either this zucchini bread recipe (sugar-free) or this zucchini bread recipe (with or without the chocolate chips!).
I’d love to hear what you think if you decide to try either of those zucchini bread recipes! 🙂
I need to use Oat flour or coconut, Chickpea flour. Allergic to wheat nuts and seed flour.so what would you recommend? HELP PLEASE! Thank you
I really appreciate your interest in my recipes, Dawnette!
Oat flour will typically work as a 1-for-1 substitute for wheat flour in the majority of my cookie recipes and brownie recipes. I typically don’t recommend that substitution in my recipes that rise though. This is because gluten is the protein in wheat-based flours that helps baked goods rise and maintain their shape while cooling. Oat flour lacks that, so when you substitute it for wheat-based flours in my recipes that rise (like cupcakes, cakes, muffins, quick breads, etc!), your baked goods will often turn out denser and may collapse while cooling. However, if you don’t mind that texture difference with oat flour (where your baked goods may collapse and turn out denser), the flavors will still remain the same! (The reason oat flour works well in my cookie and brownie recipes is that they’re flat and don’t rise! 😉 )
Coconut flour is much more absorbent than any other flour, so it’s a bit trickier to substitute. I typically don’t recommend using it unless it’s explicitly called for as an ingredient, but I do have a selection of recipes that use coconut flour here!
In the Notes sections of my recipes, I often provide a homemade gluten-free flour blend as an alternative. If you’re up for experimenting some, you can try substituting oat flour for the millet flour and chickpea flour for the brown rice flour — at least as a starting point. Tapioca isn’t a nut or seed, so I hope that option will work for you as part of my homemade blends!
Otherwise, I highly recommend my friend Jane’s website, The Heritage Cook. She’s an incredibly talented gluten-free baker and can probably provide lots more guidance and tips. Just tell her I sent you!
These are AMAZING. I cannot stop making them and I cannot believe that they are so…. healthy. Thank you so… much for this great recipe. We love them. They do not last long in our house.
Thank you for such kind words, Aline! We’re honored that you’ve found a recipe of ours that has become a favorite! That’s the best compliment we could ask for. Do you mind letting us know which recipe you are referring to? This “Baking Basics” page is linked in several of our recipes, so sometimes the comments end up here and it’s hard for us to trace back! I’d love to know which recipe you’re enjoying! 😉
Sorry about that. I am referring to the Healthy Breakfast Peanut Butter Bars. Thanks. Aline
No worries, Aline! I’m so happy you like the peanut butter bars! Thanks for taking the time to let us know, it really means a lot! 🙂
How to measure the oats without a scale. There all good info on measuring flour, but what about the oats? use a fork or press down.
Great question! We always recommend using a fork (or a spoon would work for oats, too!) to scoop and level into your measuring cup for your dry ingredients if you don’t have a scale available. If you stick your measuring cup directly into your container of oats (and don’t use a spoon or fork!) and scoop up the oats, then level the top with a knife, you end up with 1.5 times as much as if you use the spoon-and-level method (aka scoop up oats with a spoon and gently transfer it into your measuring cup). This is because scooping with the measuring cup (or measuring spoon) compacts and compresses the oats as you scoop it up, which results in extra oats. Does that make sense?
Yes. I love the oatmeal cookie recipe. In fact I just bought a scale!
Great! I’m so happy to hear that you’re a fan of the oatmeal cookie recipe, Margaret! I’d love to hear what you think when you have a chance to use your scale. It was a little bit of an adjustment for me when I started using one for my baking, but now I can’t imagine my kitchen without one! 😉
I used it to make my olive oil cake and felt confident the measurements were correct! Only wish I was able to reduce sugar.
Yay!! I’m so happy that you found it was accurate with a recipe you’re familiar with already, Margaret! That’s a great way to test out your new scale. I hope you continue to find it a helpful tool in your baking like we do!
Reducing the sugar in a recipe can be tricky! Sugar plays a role in the structure of cakes (not just their sweetness!), so changing the amount can often change the texture as well. Often, reducing the sugar will make a cake denser and prevent it from rising as high, and the cake might not be as tender. Just something to keep in mind if you decide to experiment with your olive oil cake recipe! 😉
Hi Amy, the ‘Basics of Baking’ tips are so useful. I have been baking for many years and have never heard some of these. I will definitely be using them going forward and look forward to trying some of your recipes. Thank you 😊
I’m so happy that you’re finding these tips helpful, Sharon! It also means a lot that you’d consider trying some of my recipes. I’m excited to hear which ones you pick first and what you think of them! 🙂
Hi,
The scale that you recommend measuring dry ingredients is not available at the link you provide on Amazon.
Do you have another scale that you cam recommend?
or another website where we can find it?
Thanks.
M
Thanks for letting me know, Marianne! That’s disappointing. I really hope this is temporary and they restock their inventory. It’s such a great scale!
Unfortunately, I don’t have experience with other brands, so I can’t personally vouch for alternatives. The next time I purchase a new kitchen scale, two brands I check first will be OXO (like this one and this one) and Escali (like this one and this one). They’re known to be really reliable and offer wonderful products, so it might be worth looking at their kitchen scales!
If I am using a scale to measure my dry ingredients, is it still necessary to fork or spoon into a measuring cup?
I am new to all this and I appreciate all the baking basics information.
Thank you
It’s my pleasure, Bobbie! I’m so glad you’re finding this helpful. If you’re using a scale to measure your dry ingredients, then it isn’t necessary to use a fork or spoon to transfer them into a measuring cup. The number that the scale displays is the measurement and “acts” like the measuring cup instead. 🙂
Please feel free to let me know if you have other questions or if I can clarify anything else too. I’m happy to help!