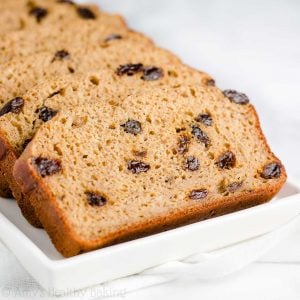
Healthy Cinnamon Raisin Banana Bread
I’ve made lots of banana bread in my life, but this recipe is one of the best I've ever made... And now one of my all-time favorites! It’s supremely tender with lots of bright banana flavor, cozy spices, and big pops of natural sweetness from the raisins. One of the best banana bread recipes ever! Leftovers will keep for at least four days (if not longer!) if stored in the refrigerator in an airtight container or tightly wrapped in plastic wrap.
Ingredients
- 2 ¼ cups (280g) white whole wheat flour or gluten-free* flour (measured like this)
- 1 ½ tsp baking powder
- ¾ tsp baking soda
- 2 tsp ground cinnamon
- ¼ tsp ground nutmeg
- ¼ tsp salt
- ½ tbsp (7g) unsalted butter or coconut oil, melted and cooled slightly
- 3 large egg whites (room temperature)
- 2 tsp vanilla extract
- ¾ tsp liquid stevia
- 1 tsp distilled white vinegar
- ¼ cup (60g) plain nonfat Greek yogurt
- 1 cup (260g) mashed banana (about 2 medium – and see Notes!)
- ½ cup + 1 tbsp (135mL) nonfat milk, divided
- ½ cup (80g) raisins (see Notes!)
Instructions
- Preheat the oven to 325°F. Lightly coat a 9x5” loaf pan with nonstick cooking spray.
- In a medium bowl, whisk together the flour, baking powder, baking soda, cinnamon, nutmeg, and salt. In a separate bowl, whisk together the butter, egg whites, vanilla extract, stevia, and vinegar. Add in the Greek yogurt, stirring until no large lumps remain. Stir in the mashed banana and 1 tablespoon of milk. Alternate between adding the flour mixture and remaining milk, beginning and ending with the flour mixture, and stirring just until incorporated. (For best results, add the flour mixture in 3 equal parts.) Reserve 1 tablespoon of raisins, and gently fold in the rest.
- Spread the batter into the prepared pan, and gently press the remaining raisins on top. Cover the top with foil, and try to push up the foil in the center to ensure it doesn’t touch the batter while baking. Bake covered at 325°F for 45 minutes. Acting very quickly, remove the pan from the oven, and remove the foil. Immediately put the pan back in the oven, and continue baking the banana bread for an additional 20-24 minutes (for a total of 65-69 minutes) or until a toothpick inserted into the center comes out clean or with a few crumbs attached. Cool in the pan for 10 minutes before carefully transferring to a wire rack to cool completely.
Notes
IMPORTANT MEASURING NOTES – READ BEFORE BEGINNING: It's extremely important to measure the flour with this method or a kitchen scale. (← That’s the one I own!) Too much will make your banana bread dry.
IMPORTANT BANANA NOTES – READ BEFORE BEGINNING: For best results, use the ripest, darkest, most spottiest bananas you have! (See my photo in the blog post above for reference!) The ones that are purely brown are ideal. They have a stronger and sweeter banana flavor than purely yellow bananas. They also yield a moister texture in your banana bread.
Measure the bananas by cups or grams, not by “two medium bananas.” Not all “medium” bananas are the same size!
The mashed banana and Greek yogurt combined need to measure 1 ¼ cups. If you have slightly more than 1 cup of mashed banana, then reduce the Greek yogurt by the same amount, and vice versa.
IMPORTANT FLAVOR NOTE – READ BEFORE BEGINNING: For sweeter-tasting banana bread, add an additional ¼ teaspoon of liquid stevia. Alternatively, substitute 1-3 tablespoons of pure maple syrup, honey, or agave for an equal amount of milk. (For example, add 1 tablespoon of pure maple syrup, and reduce the milk to ½ cup.)
IMPORTANT STEP 3 NOTE – READ BEFORE BEGINNING: You must cover the batter with foil during the first stage of baking. This allows the center to cook through without the top turning overly brown or burnt. Work very quickly when removing the foil! If you leave the pan out of the oven for too long, the loaf will start to collapse, and it won’t recover to fully rise properly.
FLOUR ALTERNATIVES: Whole wheat pastry flour, regular whole wheat flour, or all-purpose flour may be substituted for the white whole wheat flour.
EGG WHITE NOTES: This banana bread requires 3 egg whites. The protein in the whites helps prevent it from collapsing while cooling. If you'd prefer to use whole eggs, then use 3 large eggs and reduce the milk by 1 tablespoon to compensate for the added volume from the yolks.
STEVIA NOTES + ALTERNATIVES: I highly recommend using the liquid stevia! It’s one of my favorite ingredients (you’ll use it in all of these recipes of mine!), and I buy it online here because that’s the cheapest price I’ve found.
If you prefer not to use stevia, substitute 3 tablespoons (45mL) of pure maple syrup, honey, or agave for the liquid stevia AND reduce the milk to ¼ cup + 2 tablespoons (90mL) to compensate for the added liquid volume. (The batter should be fairly thick, similar to muffin batter.)
VINEGAR NOTE + ALTERNATIVE: The vinegar reacts with the baking soda to help the banana bread rise and create a more tender texture. Don’t skip it! (I promise you can’t taste it in the fully baked banana bread!)
If you don’t have or can’t find distilled white vinegar, try to find another vinegar with a similar pH level of around 2.5 to maintain the same texture. Lemon juice has a pH level around 2-3, so it should also work.
MILK ALTERNATIVES: Any milk may be substituted for the nonfat milk.
RAISINS NOTE: I highly recommend hydrating your raisins first. It makes them really plump and juicy! To do so, add the raisins to a microwave-safe bowl, cover them with water, and cover the top of the bowl with a lid or plastic wrap. Microwave on high for 1 minute. Let the raisins sit for 10-15 minutes (or while you measure and mix together the rest of the ingredients). Thoroughly drain the excess liquid before folding them into the batter.
GLUTEN-FREE OPTION: For the gluten-free flour, use as follows: 1 cup (120g) millet flour, ¾ cup (90g) tapioca flour, ½ cup (60g) brown rice flour, and 2 teaspoons xanthan gum. Many store-bought gluten-free flour blends (I love this one from Bob's Red Mill!) will also work, if measured like this.
HOW TO STORE: Store leftover banana bread in the refrigerator tightly wrapped in plastic wrap (I love this one because it seals more tightly than other brands!) or inside of an airtight container. It should keep for at least four days, if not a week or longer.
For more information, read the tips in my blog post here and watch my video directly above that recipe! (← It's a slightly different recipe, but the process is the same!)
{gluten-free, clean eating, low fat}
DID YOU MAKE THIS RECIPE?I'd love to hear what you think of it in a comment below! If you take a picture, tag @amys.healthy.baking on Instagram or use the hashtag #amyshealthybaking.