
This past weekend, I flew to Minnesota to attend a food photography workshop put on by Lindsay, who writes the blog Pinch of Yum. If you’re following me on Snapchat (@AmyBakesHealthy) or Instagram, you already saw a few sneak peeks of the event and what we ate—hello gorgeous cupcakes!—and I’m going to share more about my amazing trip in the next few days.
But for now, let’s just say that I felt a twinge of first-day-of-school jitters the night before. I tossed and turned for half of the night, too excited and slightly nervous to truly fall into a deep sleep. What will Lindsay be like? What will my classmates be like? What are we going to learn? Am I going to fit in?
I shot out of bed the moment my alarm rang on Saturday, and I quickly rode the elevator to the hotel’s fitness center to squeeze in a quick workout. Although most of my nerves had resolved overnight, a little exercise always helps me relax into a calmer state of mind!
After showering, I walked three blocks over to a different hotel, where I met two of the other bloggers attending. We drove over to the studio space together, and as soon as we spotted the pretty gold balloons outside of the door and checked in with Abby, I inhaled with excitement all over again. I made it! This was really happening!

Lindsay was even sweeter than I imagined, and she made all of us bloggers feel right at home. She started off the workshop with a long breakfast bar with lots of delicious options: coffee, orange juice, fresh fruit, DIY yogurt parfaits with nuts and granola, and…
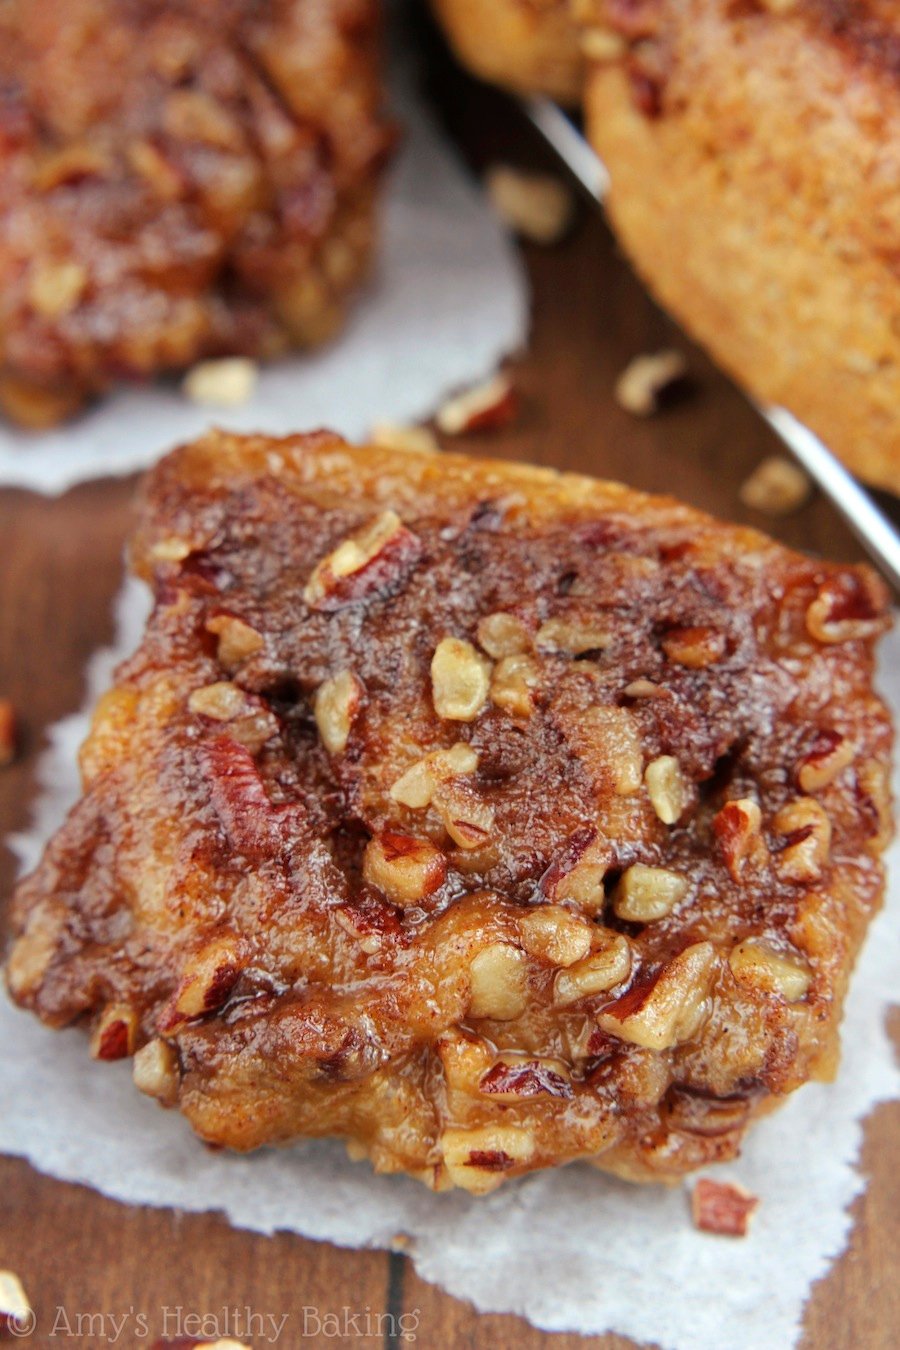
Donuts. Big, soft, fluffy pillows of perfection. Old fashioneds, sprinkled, glazed, cinnamon sugared, pure chocolate, little holes… You name it! They were provided by a local family-owned donut shop, and seeing that big box of pastries reminded me of my favorite donut place back home, which offers a very similar menu as well as sticky buns and cinnamon rolls the size of my face.
And somehow, I started craving cinnamon rolls.

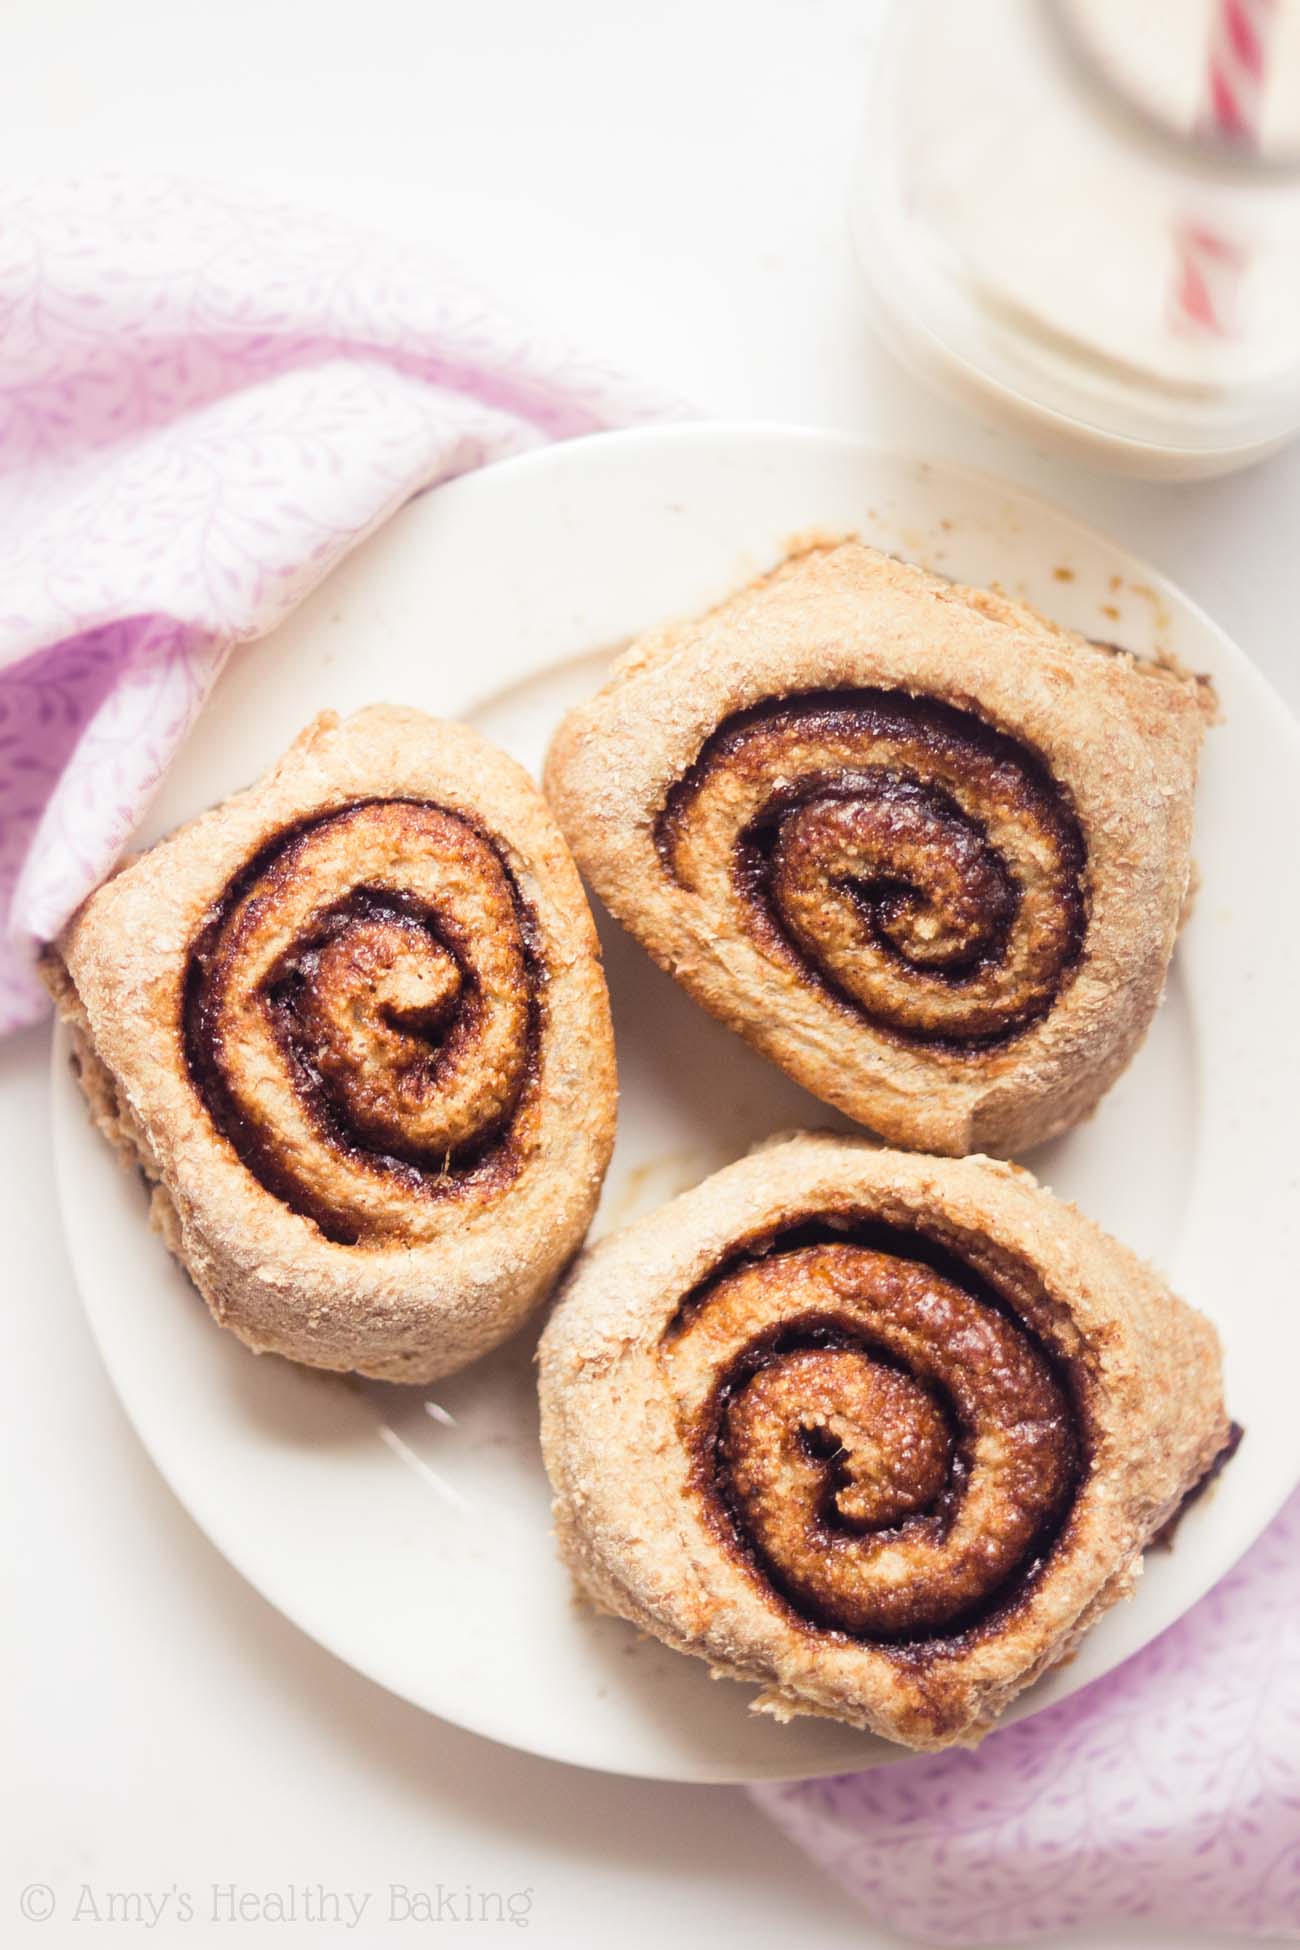
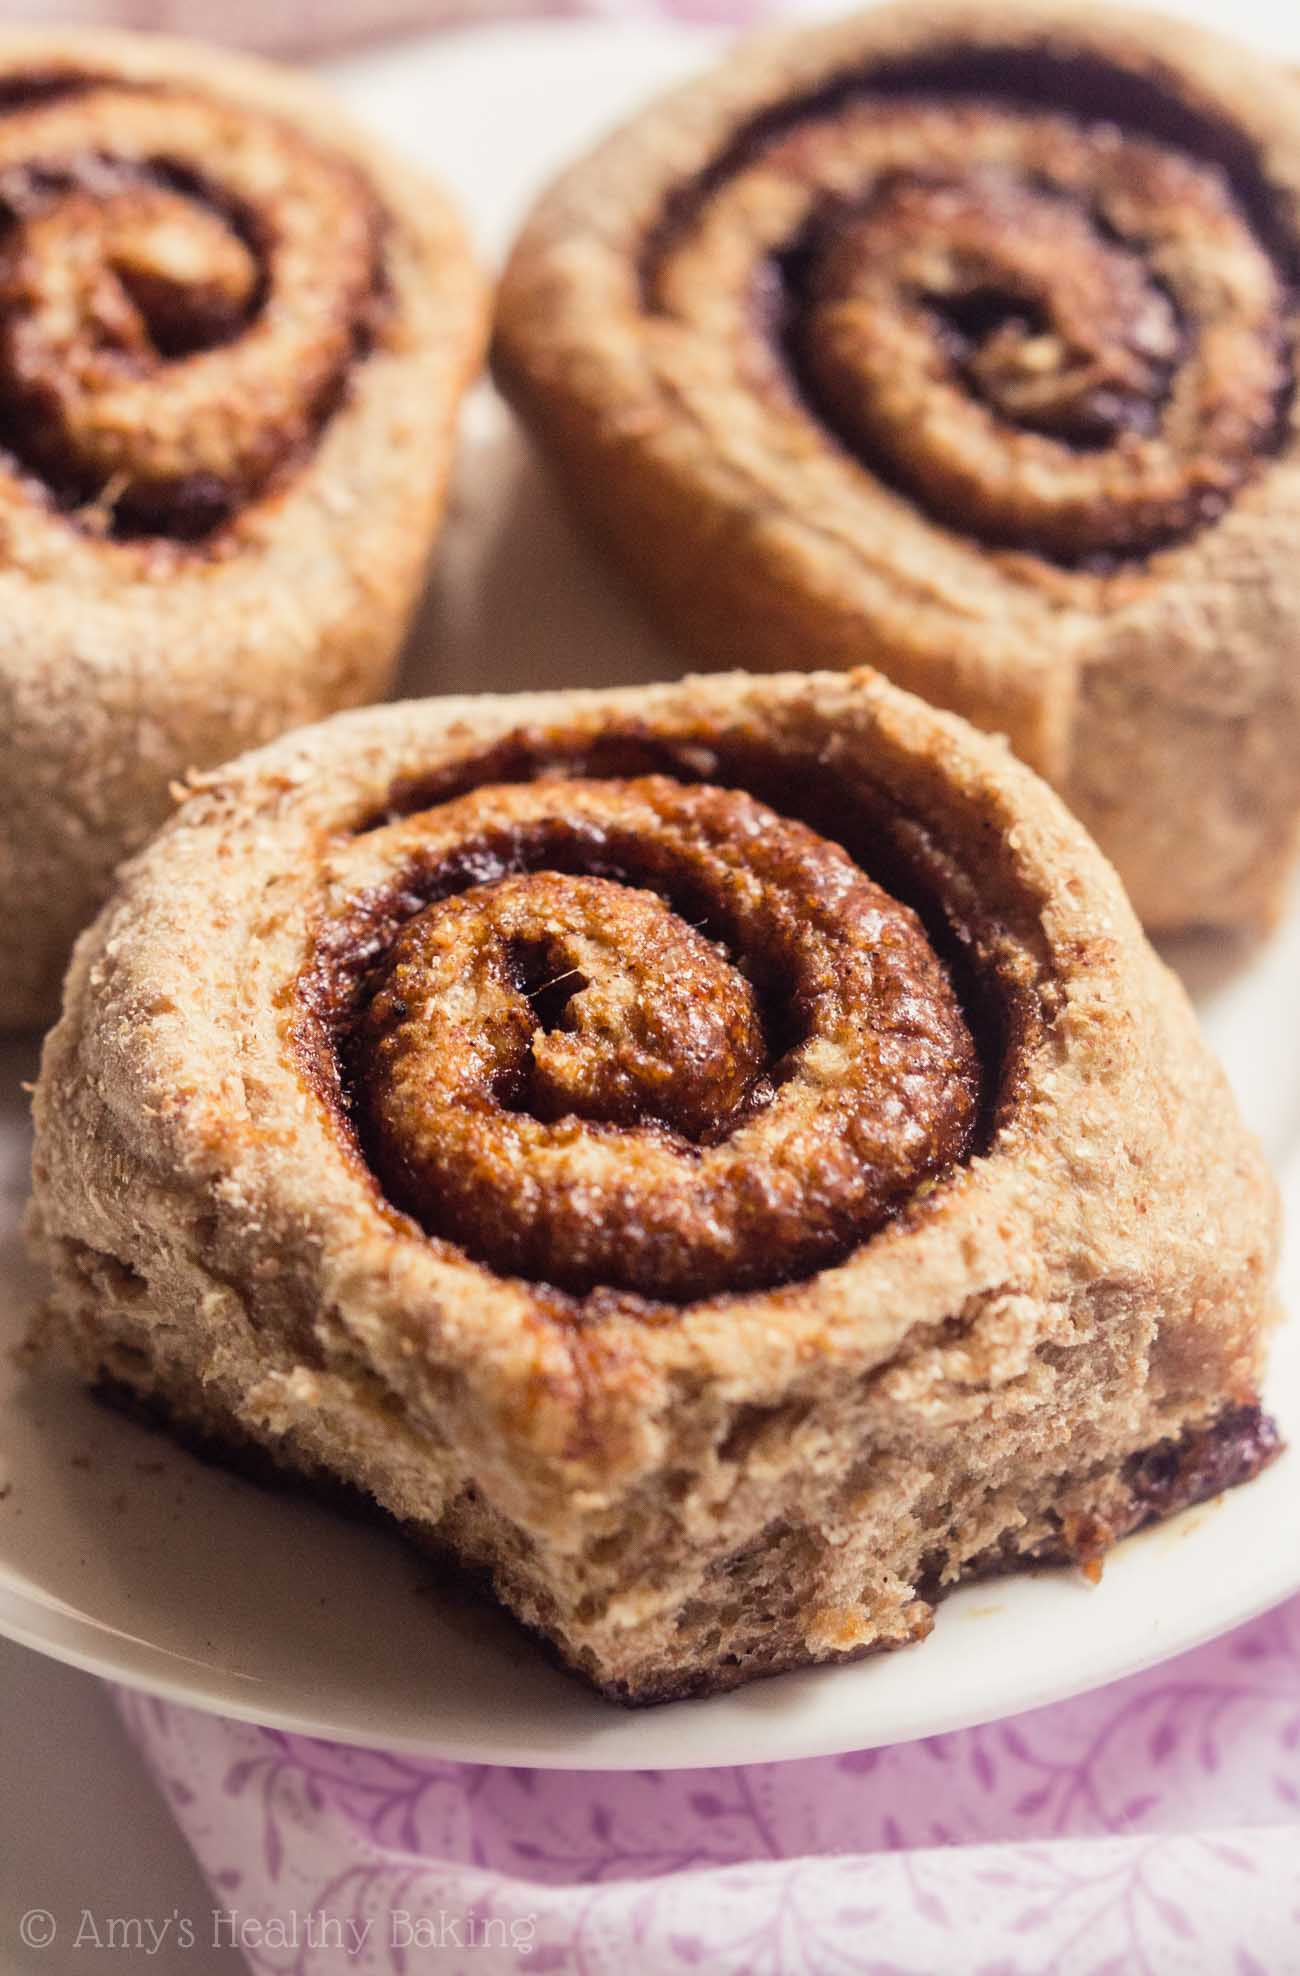
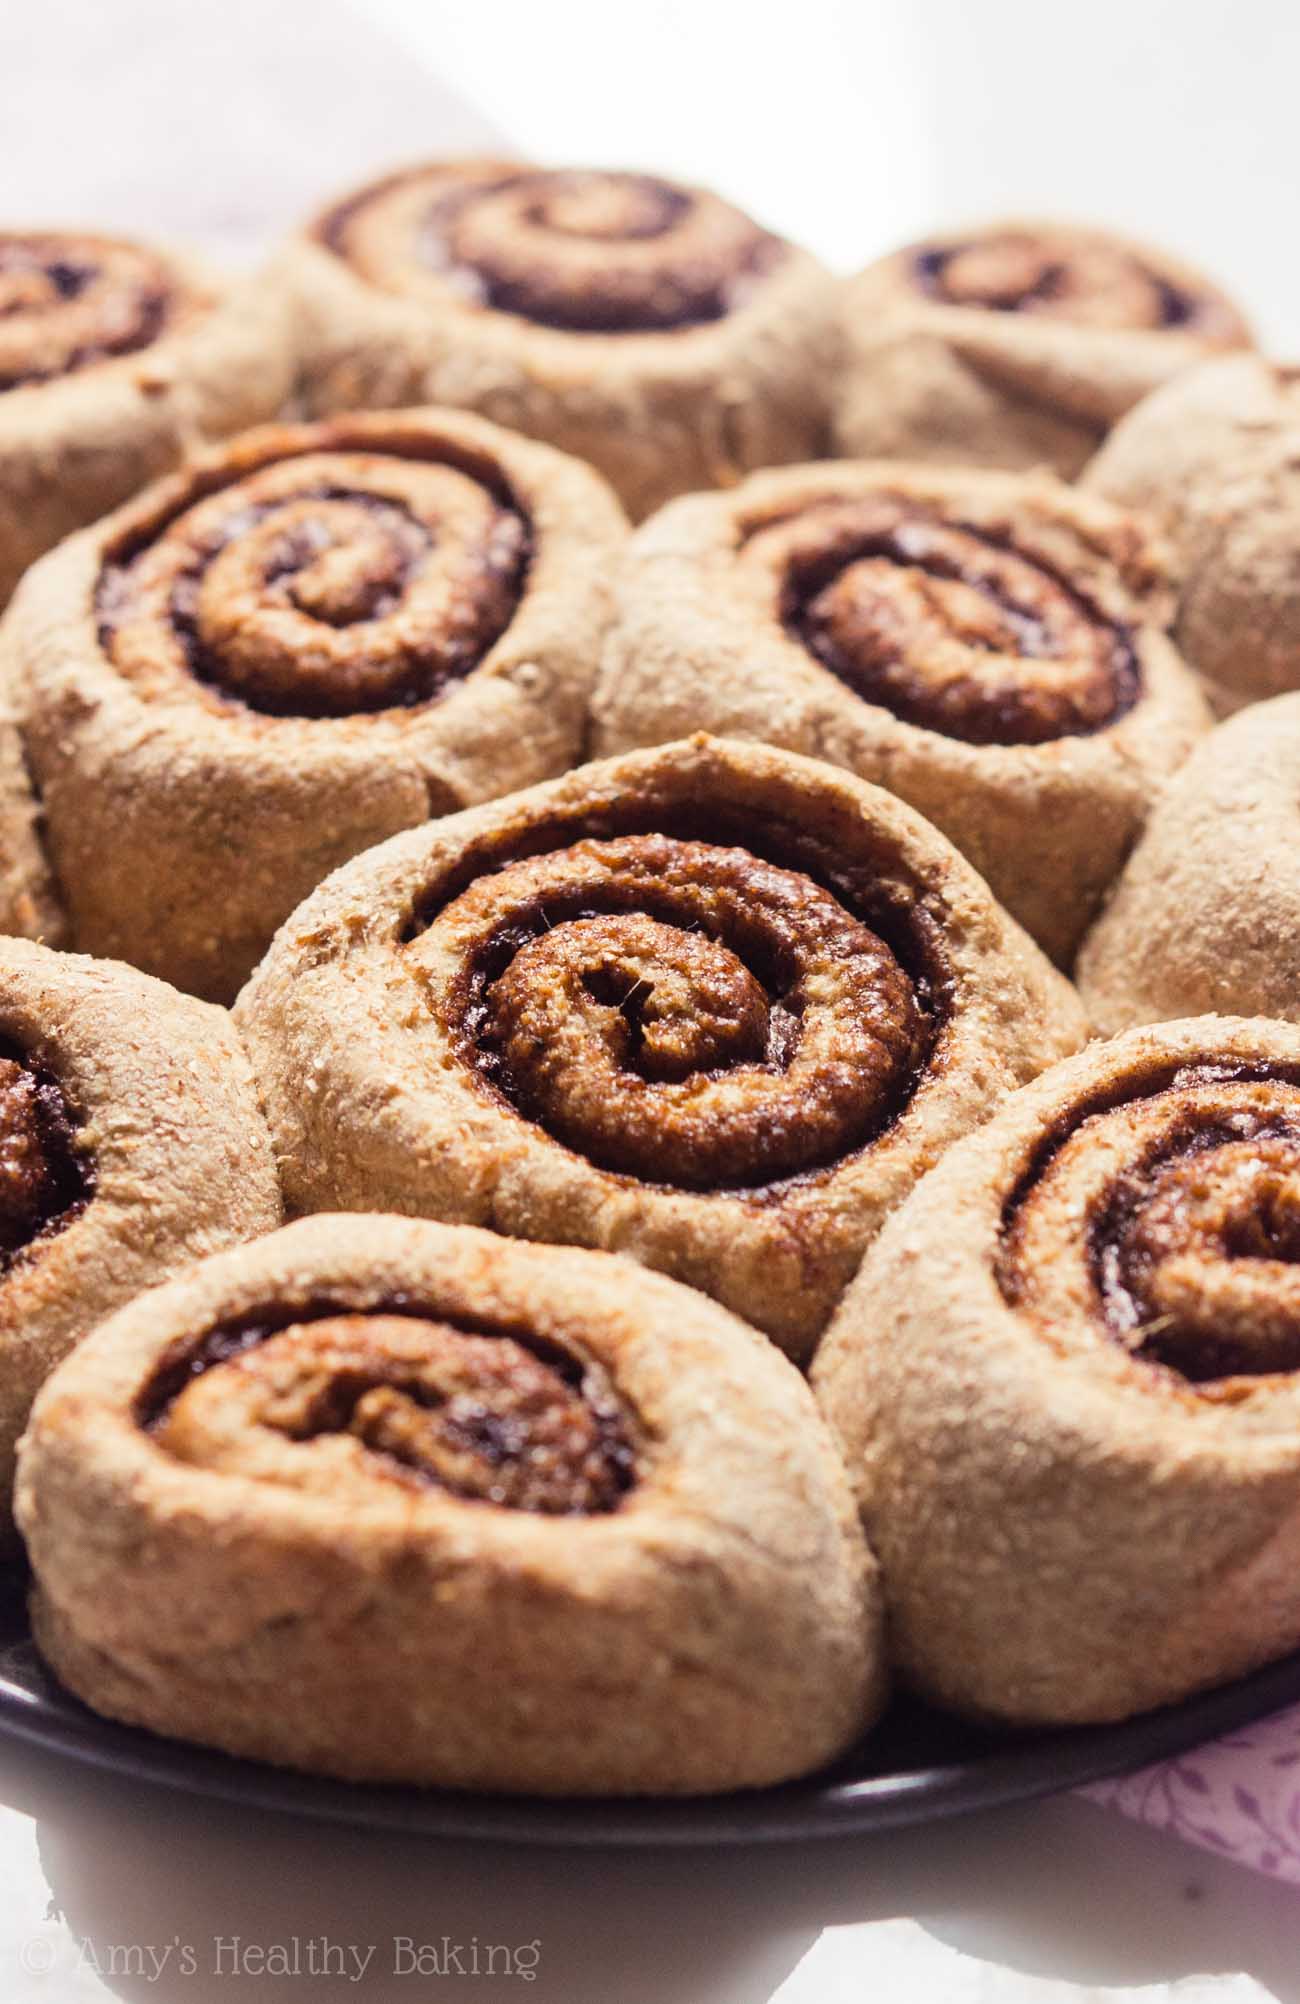
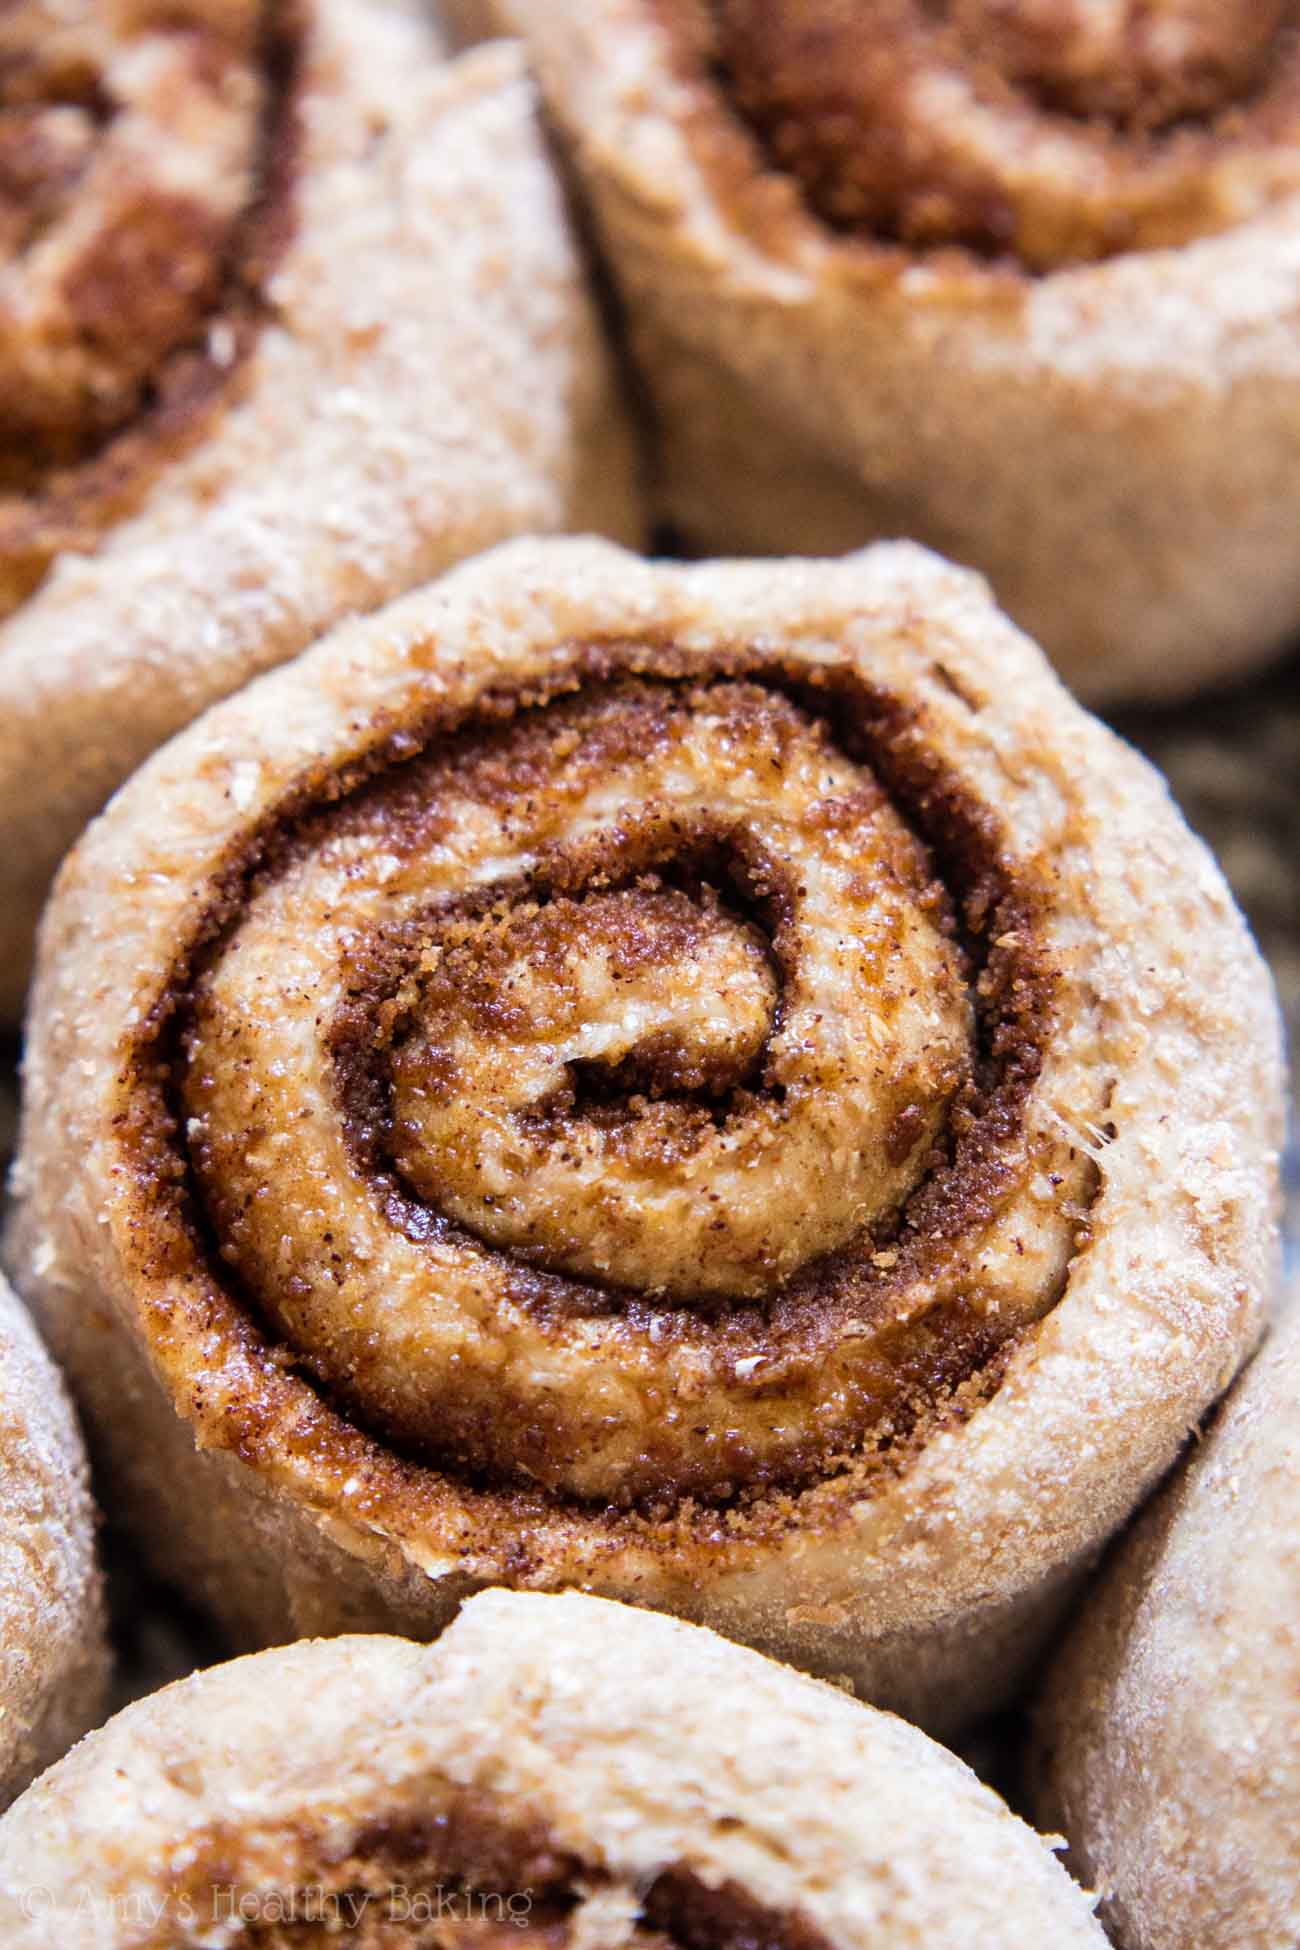
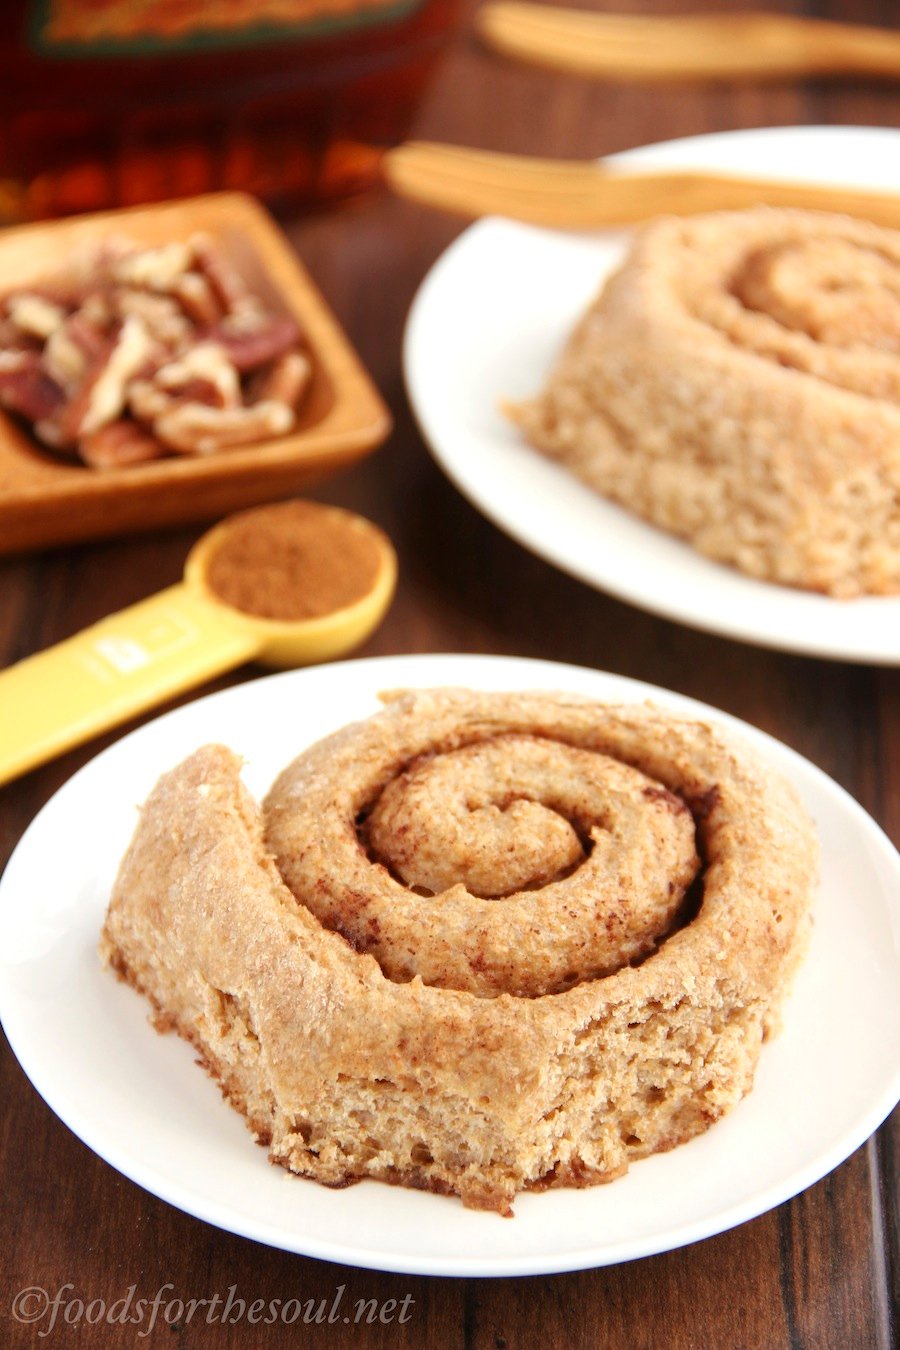
So when I arrived home after the incredible weekend away, that was the first thing I baked, and these Healthy Classic Cinnamon Rolls tasted even better than the ones from our California donut shop! My family walked in while the pan sat cooling on the counter, and although they know the drill—no eating until after the treats have been photographed!—they swooped in as soon as I finished, and 8 of the cinnamon rolls had disappeared in the blink of an eye. My family couldn’t stop raving about them!
Yes, I know. “Cinnamon rolls” and “healthy” in the same sentence? How can that be?
Unlike traditional recipes, this one contains no refined ingredients! Instead, we’ll use 100% whole wheat flour in place of all-purpose and substitute coconut sugar for granulated or brown. This is the coconut sugar that I buy, and it’s fairly easy to find in grocery stores in the US. Walmart and Target almost always stock it too!
Oh, and these cinnamon rolls contain a lot less butter than traditional recipes too. Just 1 tablespoon for all 12 rolls!

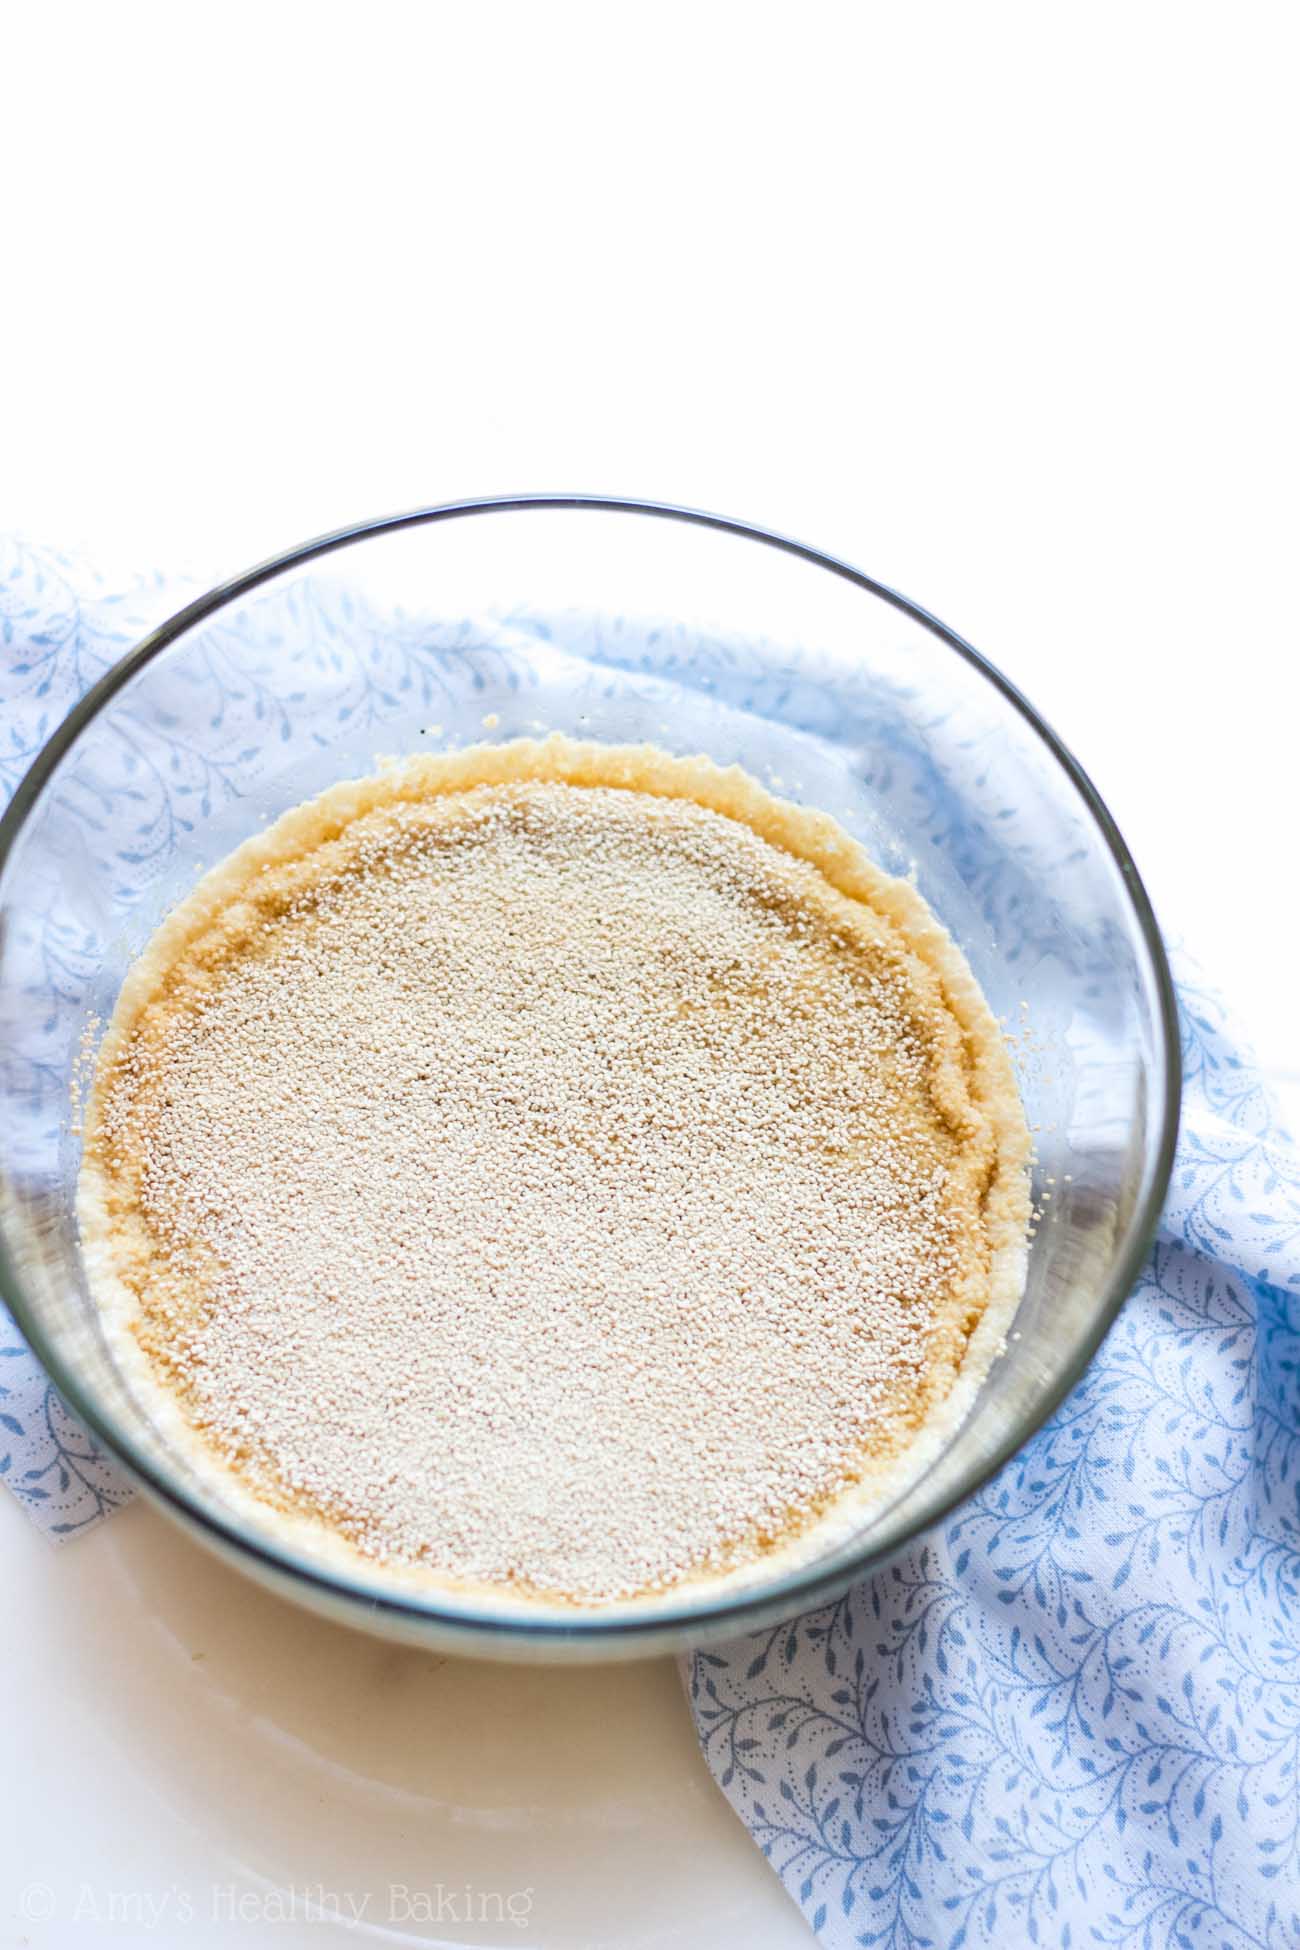
Now I know that this is a yeast-based recipe, but don’t be afraid! Yeast is actually really easy to work with. It’s just another leavener like baking powder or baking soda, but instead of reacting with acid to create air bubbles and make your treats rise, it’s activated with sugar and warm liquid. We’ll let the yeast sit in its bubble-bath-in-a-bowl until it looks a little frothy, and then we’re all set to make these rolls!
I have a secret trick to slicing the cinnamon rolls: I use dental floss! If you have unflavored, that usually works the best. Cut off a long piece of floss, and slide it under the rolled up log of dough. Bring the two ends of floss upward, cross them over the top of the log, and pull. Ta da! A nice, clean cut without squashing the rolls.
If you’re a visual person, watch my video demo here!
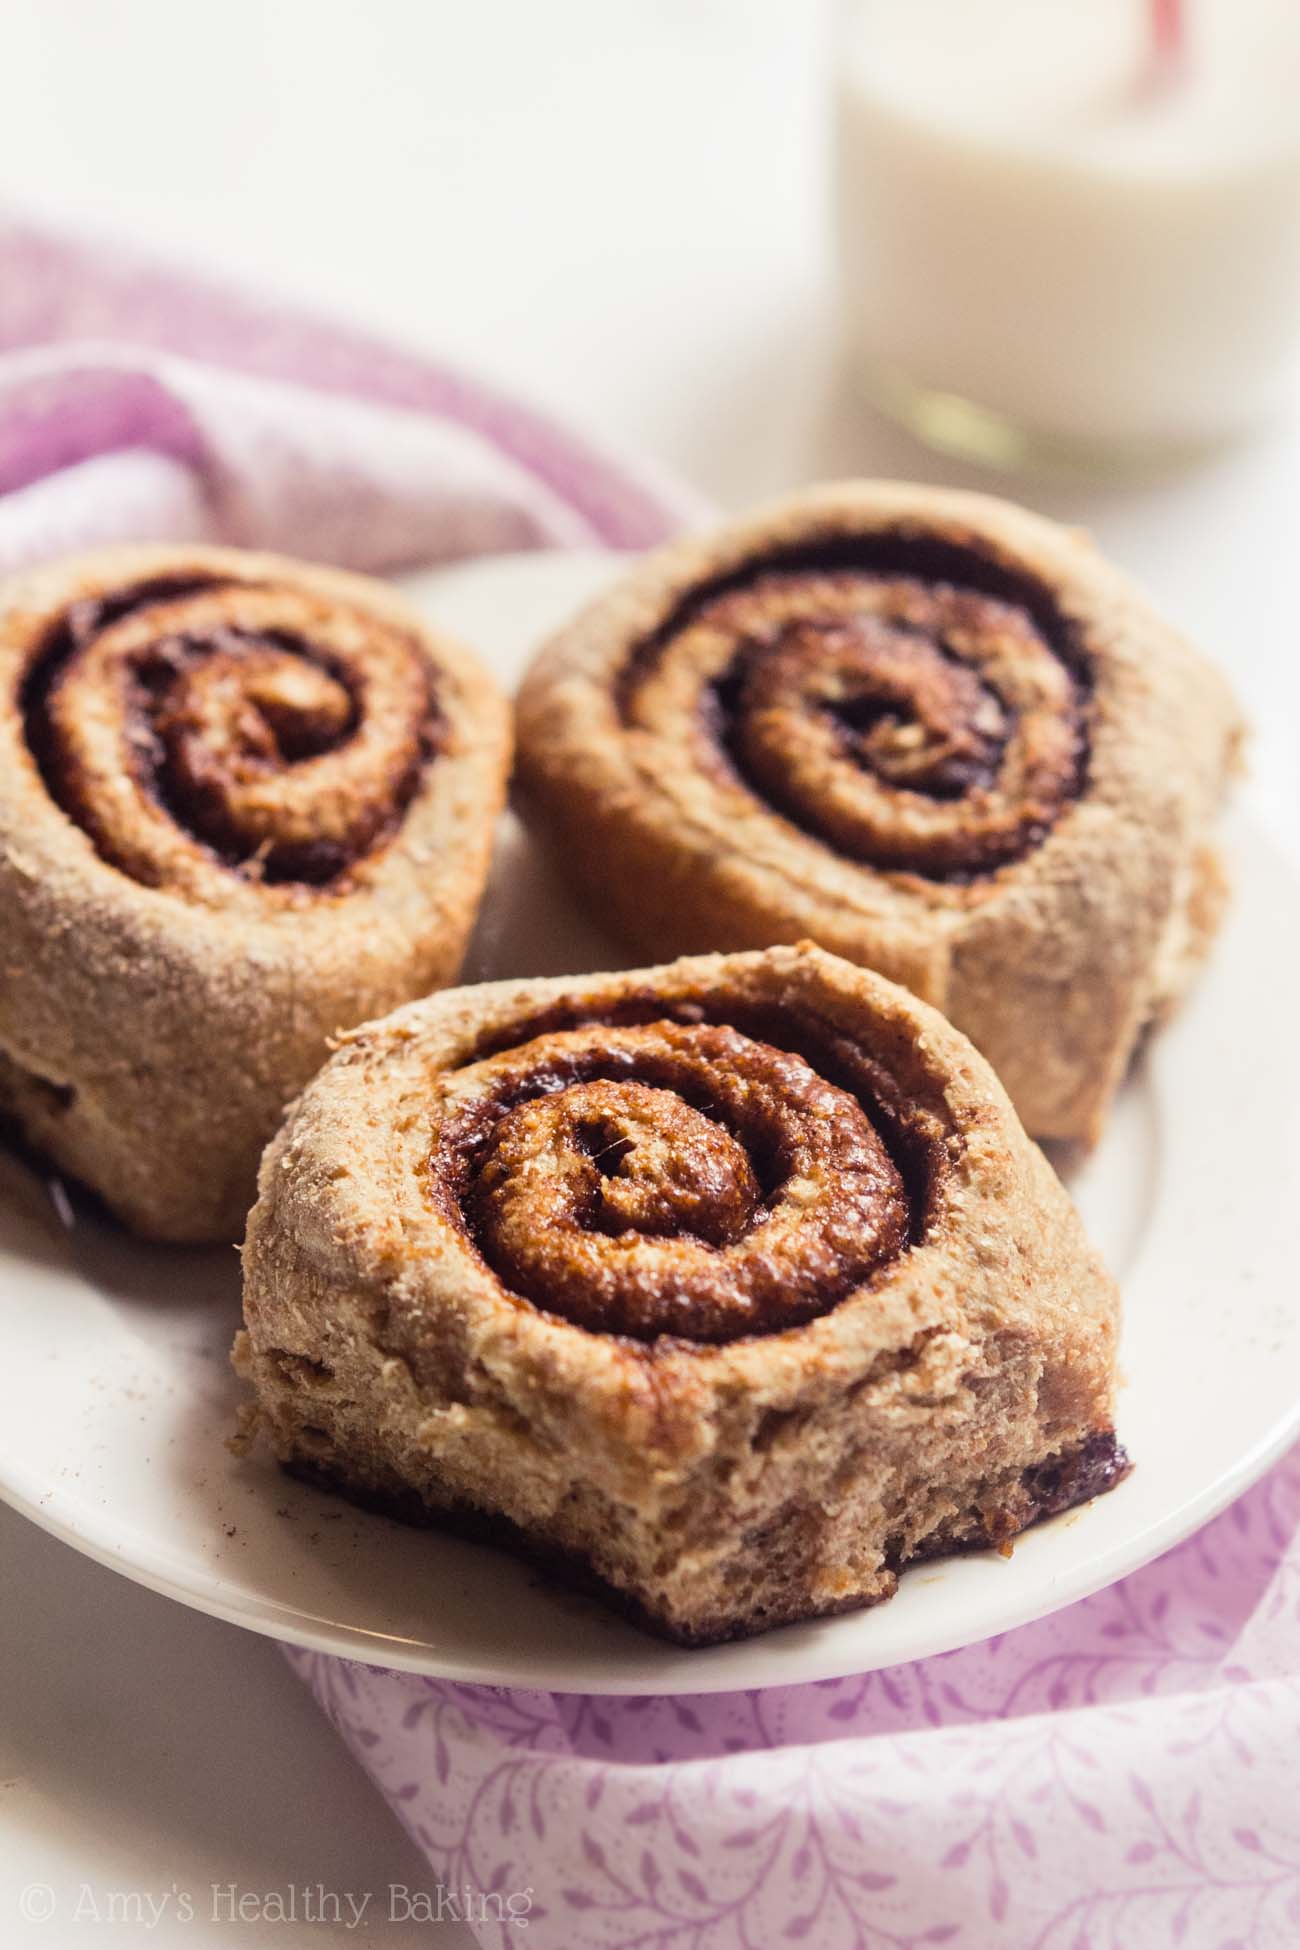
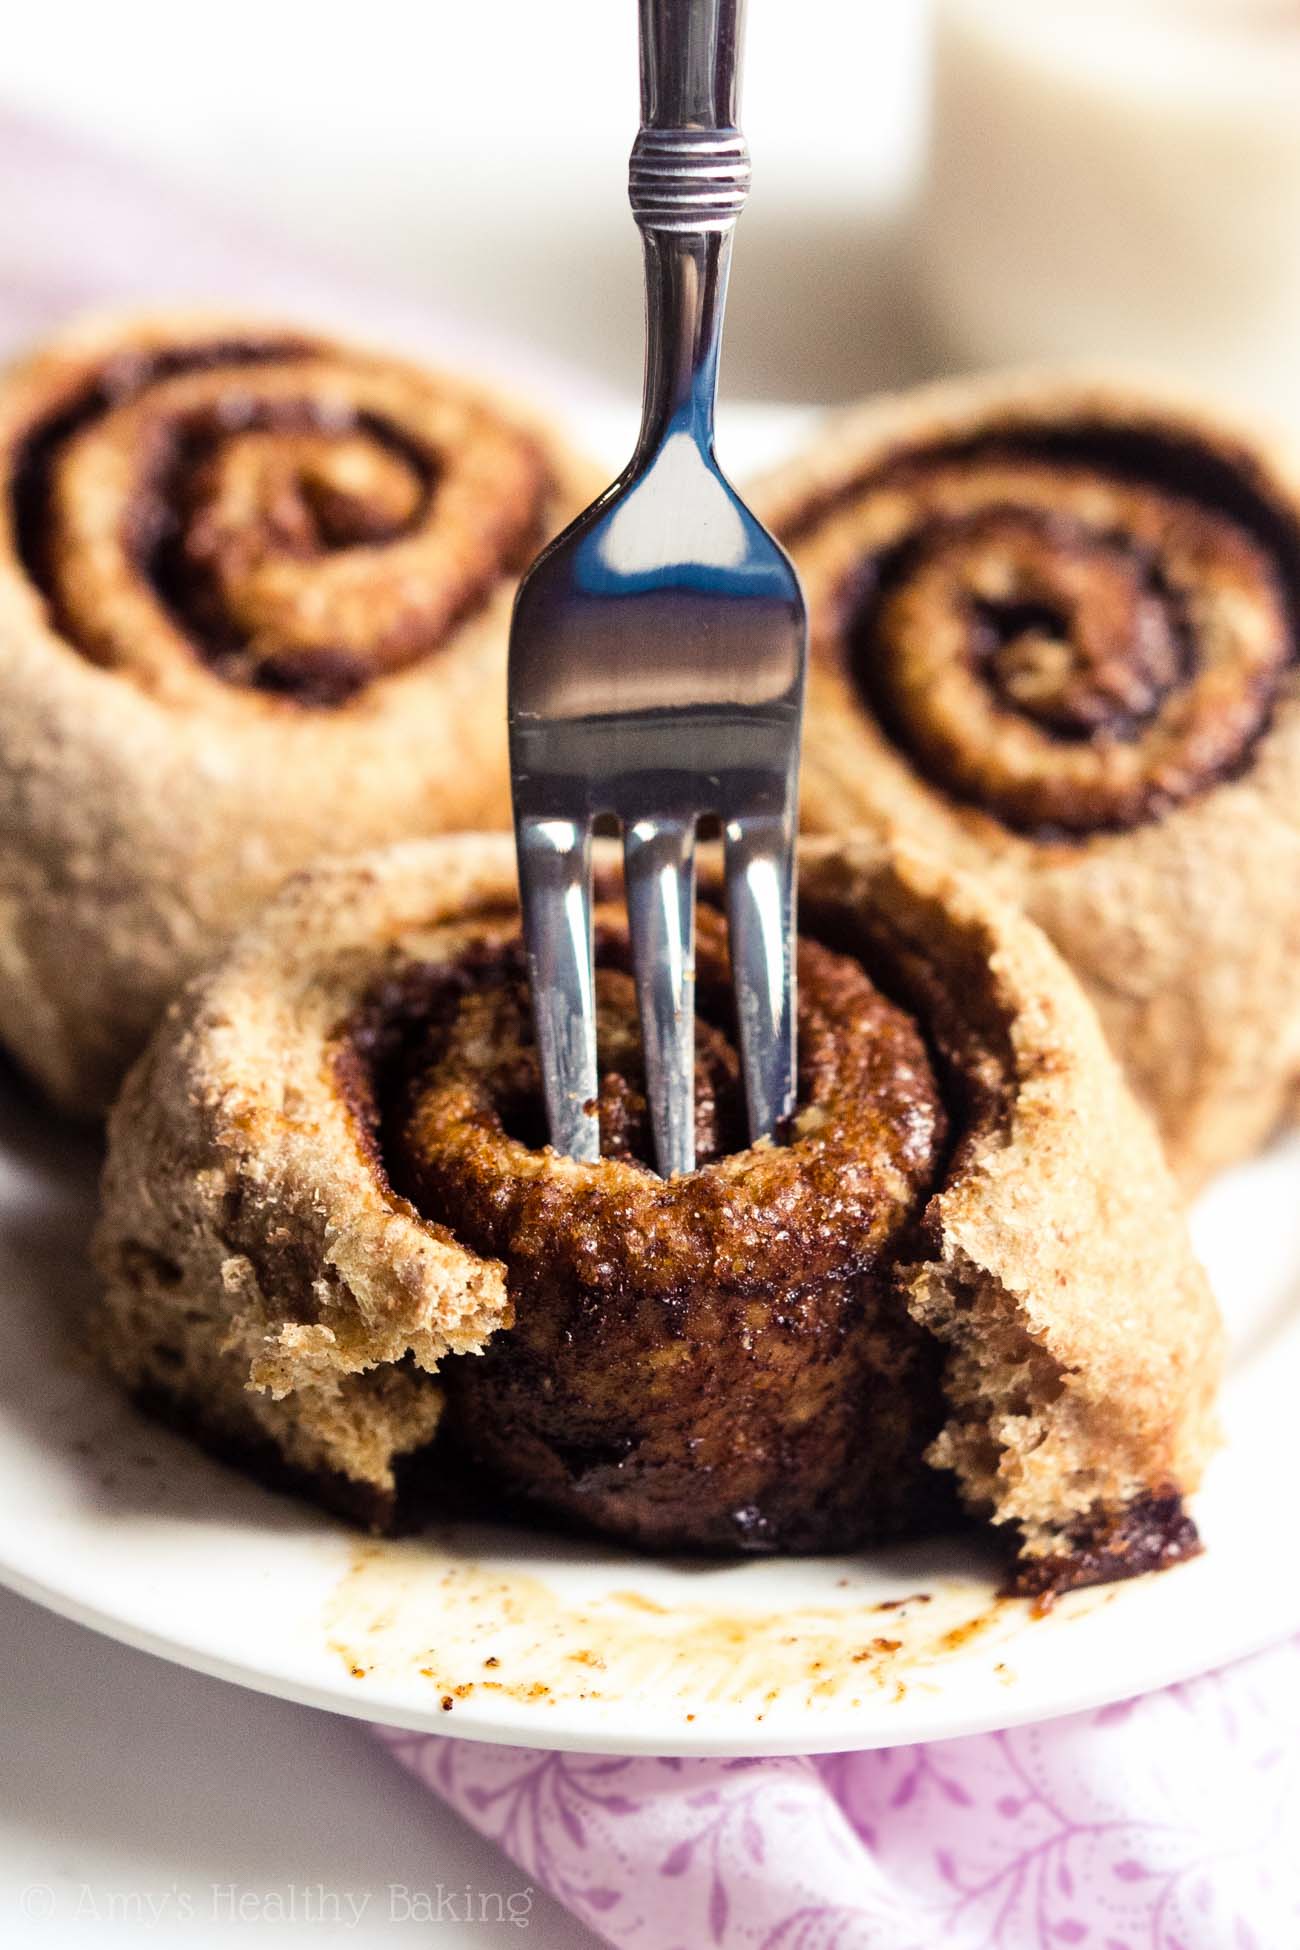
After a short rise and a quick trip to the oven, these healthier cinnamon rolls are all ready to be devoured. And if you don’t want to share… I don’t blame you one bit!
And when you make your own, remember to snap a picture and share it on Instagram using #amyshealthybaking and tagging @amyshealthybaking IN the photo itself! (That guarantees I’ll see your picture! ?) I’d love to see your cinnamon rolls and feature them in my Sunday Spotlight series!
| Healthy Classic Cinnamon Rolls | | Print |
- for the dough
- ¾ cup (180mL) warm nonfat milk (100-110°F)
- ½ tbsp (7g) unsalted butter, melted
- 2 tbsp (24g) coconut sugar
- ½ tsp salt
- 2 ¼ tsp (7g or one ¼-oz package) dry yeast
- 2 – 2 ½ cups (240-300g) whole wheat flour
- for the filling
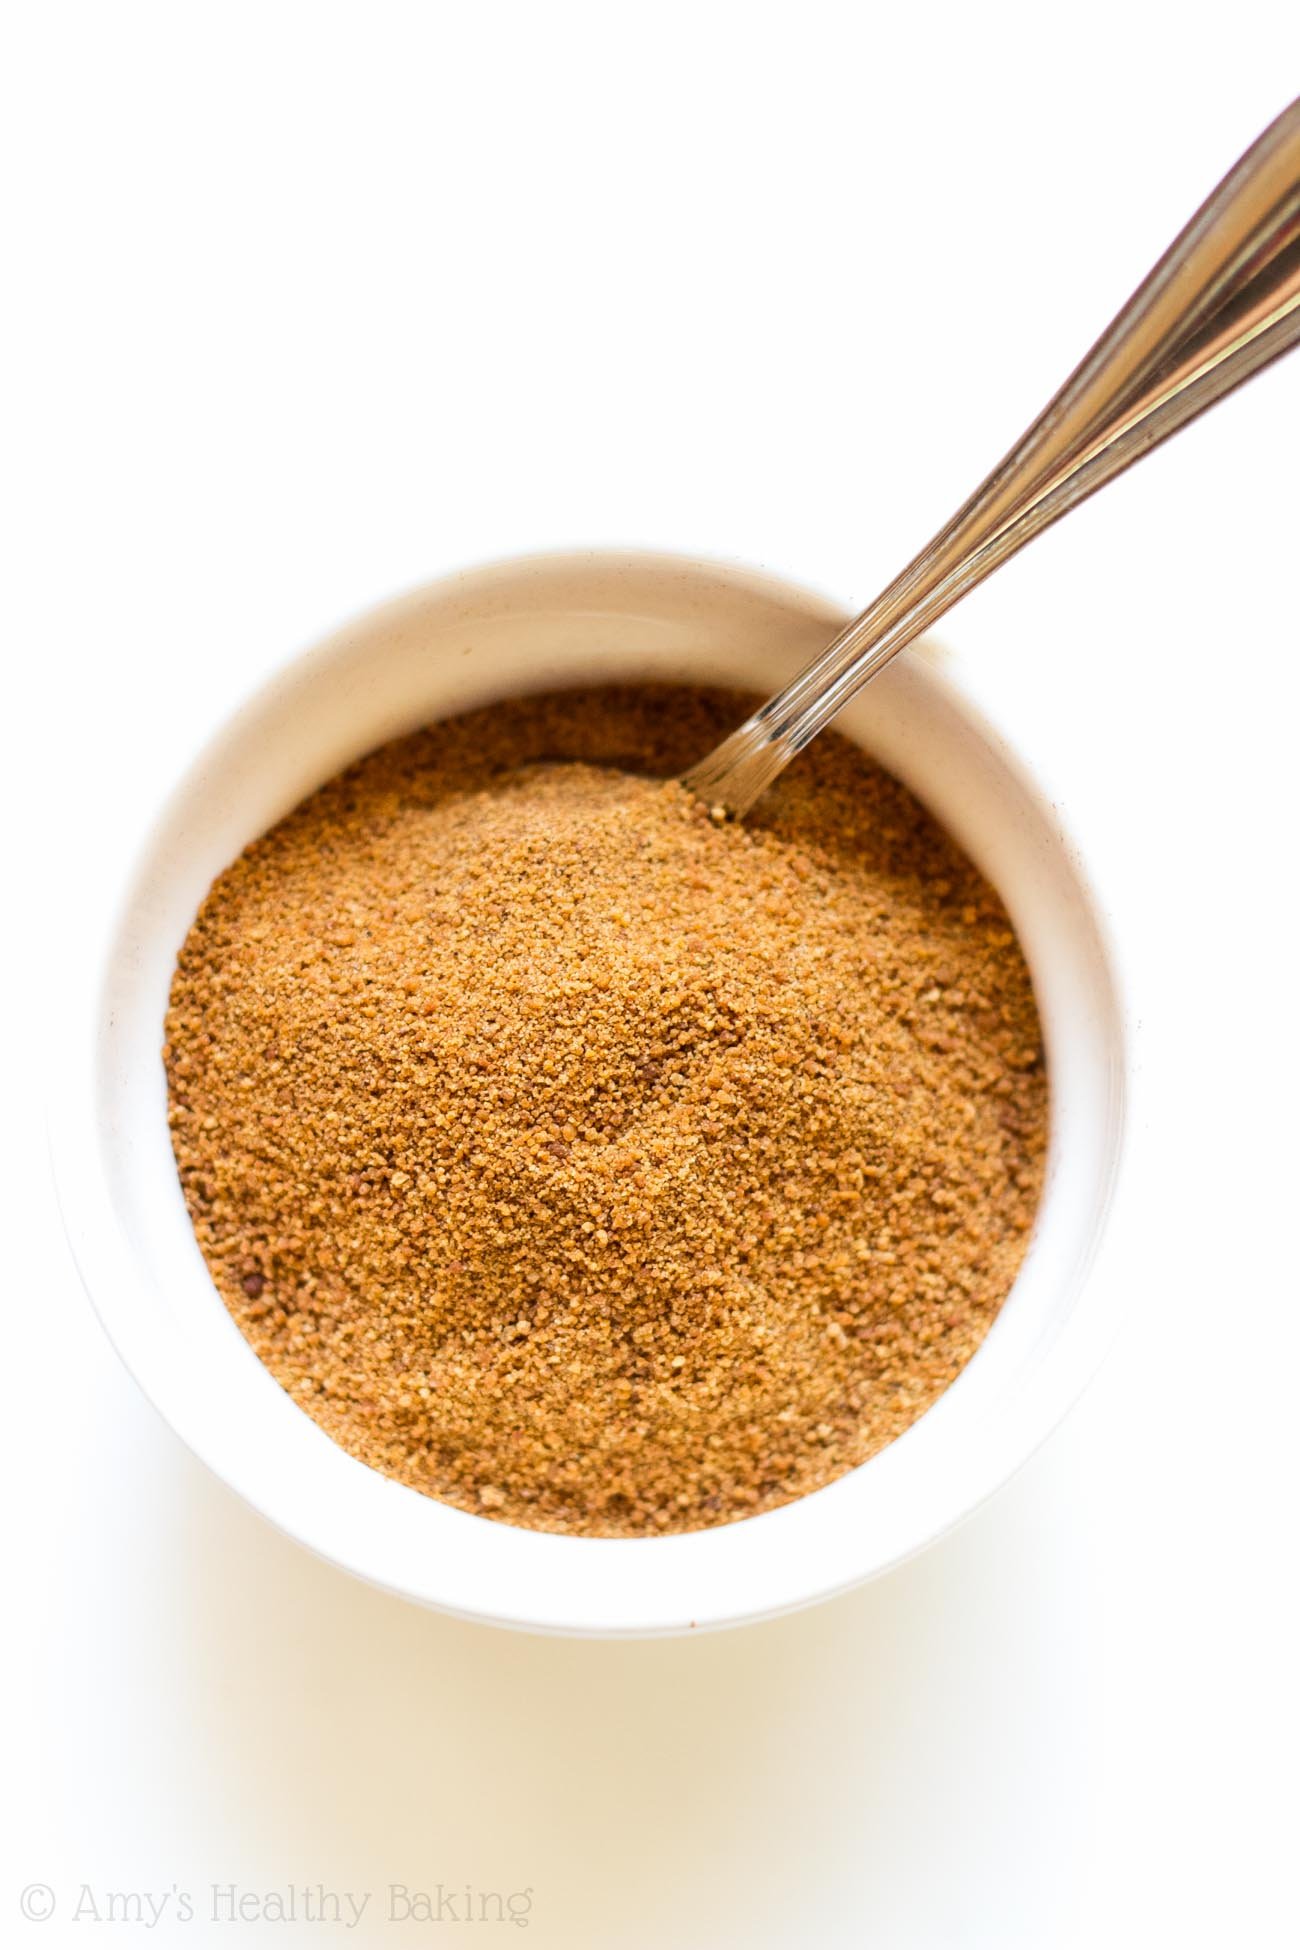
- 6 tbsp (72g) coconut sugar
- 2 tsp ground cinnamon
- ½ tbsp (7g) unsalted butter, melted
- Lightly coat a 9”-round cake pan with nonstick cooking spray. Set aside.
- In a large bowl, stir together the milk, butter, sugar, and salt. Sprinkle the yeast on top, and wait 10-15 minutes or until the mixture turns frothy. Mix in 1 ½ cups of flour. If the dough is still wet, continue stirring in flour 2 tablespoons at a time until the dough begins to pull away from the sides of the bowl.
- Turn the dough out onto a well-floured surface, and knead for 3-5 minutes or until the dough springs back most of the way when you gently press your index finger into it. Let the dough rest while preparing the filling.
- To prepare the filling, stir together the coconut sugar and cinnamon in a small bowl.
- On a clean, well-floured surface, roll the dough out into a 16x10” rectangle. Brush with the melted butter, leaving a 1” border on the two longer sides. Sprinkle with the cinnamon sugar, leaving a 1” border on the two longer sides again. Carefully roll up the dough into a log, starting at one long edge and rolling towards the other one. Pinch the ends to seal. If the dough won’t stick together, gently brush the second longer edge with water before pinching to seal.
- Slice the log into 12 pieces using dental floss or a sharp serrated knife. Place the rolls into the prepared pan, and cover the pan with a clean towel. Set the pan in a warm, draft-free spot, and let the rolls rise for 30-45 minutes or until doubled in size.
- Preheat the oven to 350°F. Bake the cinnamon rolls for 18-22 minutes or until the filling is bubbling and the sides feel firm. Cool in the pan for at least 10 minutes before serving.
For the yeast, I used Red Star® Active Dry Yeast. It performs the best out of any yeast I’ve used, so I highly recommend it!
Brown sugar may be substituted in place of the coconut sugar, but the rolls will no longer be clean-eating friendly.
For more tips on kneading the dough and slicing the cinnamon rolls, watch my video here located above the recipe.
{vegan, clean eating, low fat, low calorie}


Thanks for the advice. Will definitely try the make-ahead suggestion.
It’s my pleasure Roz! I’m always happy to help. I’m really excited to hear what you think of these cinnamon rolls!
CAN WE ADD COCONUT OIL INSTEAD OF UNSALTED BUTTER IN THE BATTER
I really appreciate your interest in my recipe Mahesh! You may substitute coconut oil for the butter, but the yeast will not turn frothy in Step 2. As long as your milk is warm and your yeast is fresh, it shouldn’t affect the cinnamon rolls’ texture! 🙂 I can’t wait to hear what you think of these if you try making them!
Does the milk need to be warm?
Yes! Otherwise the yeast won’t activate properly, and your cinnamon rolls won’t rise correctly. 🙂 I’d love to hear what you think if you try making these cinnamon rolls Simona!
Hi! Would 2% milk work instead of nonfat? Thanks!
Yes, 2% milk is fine! I can’t wait to hear what you think of these cinnamon rolls Sheetal! 🙂
Hi Amy,
Thanks for all the amazing recipes! My daughter wants to give this a go today and we only have quick rise yeast at home. Would that work?
I’m honored that your daughter wants to try making these cinnamon rolls Tasha! Yes, quick rise yeast will work just fine. 🙂 I’m so excited to hear what both of you think of them!
Hi Amy,
Thank you for this recipe, they were a hit!
Have you tried adding Apple to this recipe before? I’m curious to see how it will turn out.
Cheers
Nancy
I’m so glad you enjoyed these cinnamon rolls Nancy! I actually have an apple version here. 🙂 I’d love to hear what you think of those apple-filled cinnamon rolls if you decide to try making them too!
These were so yummy and fun to make! Not sticky sweet like the store bought ones and totally guilt free! Love these, will 100% make again!
I’m so glad you enjoyed these cinnamon rolls, Bella! That truly means a lot to me that you already think that you’ll make them again. Thank you so much for taking the time to let me know — hearing that made my day!! 🙂
Can I use Stevia instead of coconut sugar?
I’m honored that you’d like to try this recipe of mine too, Aileen! The texture of the filling will actually be pretty different if you substitute stevia. Stevia doesn’t “melt” or turn gooey and caramel-like the same way coconut sugar does, so depending on the exact stevia product that you use, the filling will stay granular and almost raw-like. Does that make sense? 🙂 What’s the exact stevia product that you were considering substituting?
It’s beautiful but I have substituted one third of the whole wheat flour with oat flour and it has turned out very well .. thnx for the recepie ❤️
I’m so glad you enjoyed these cinnamon rolls, Shaimaa! Thank you so much for taking the time to let me know! 🙂 I really appreciate you including your oat flour modification too. I always love hearing what recipe tweaks work!
Can you make these and store them in the refrigerator before baking? For instance, the night before baking? Forgive me if it says somewhere, I didn’t see it!
I’m honored that you’d like to try my recipe, Katy! I haven’t had the best luck with that method; these particular cinnamon rolls don’t rise nearly as high when prepared that way. However, they do reheat really well! So my first recommendation would be to bake them the night before and either (a) reheat individual cinnamon rolls in the microwave in the morning or (b) leave them in the pan, cover the top with foil, and pop that in the oven in the morning until they’re warmed through. 🙂 I’d love to hear what you think if you try these cinnamon rolls!