

Last Friday afternoon, I played hooky from blog work and chauffeured my guy an hour south to the Bay Area, where he planned to catch a ride from friends down to a conference in LA. We locked our front door at noon, arrived at the movie theater parking lot meet-up spot by 1:45 pm, and casually tilted our seats back to wait for the other car to pull up.
The other driver texted my guy shortly after we started lounging, explaining that they had fallen behind schedule and were just about to leave San Francisco at 2. We checked Google Maps, and several accident notifications popped up on the freeway at the same time as their departure. Oof.

With two hours to kill, we strolled around the strip mall across the way, skipping over the Ulta and Dress Barn (sorry Mom!) but pausing to peek into Party City. I’m always on the lookout for fun straws or cute napkins for photo shoots! After meandering down every aisle, I admitted defeat, only finding gaudy graduation-themed gift bags and neon Cinco de Mayo paper plates.
I convinced my guy to visit TJ Maxx before wandering back to the car, and I practically sprinted to their home goods section. They always offer incredible deals on fancy dishes and baking pans! I slowly scoured the shelves, searching for the perfect photo props, and just like every other visit, I ended up clutching at least half of the assorted gadgets and platters like my food blogger life depended on them, before putting all of them back.

But I nearly walked out with a boxed set of adorable mason-jar mugs. I literally came this close… They came with stenciled chalkboard labels on their sides—I had been lusting after those for months! However, after realizing I didn’t actually need 4, nor did our kitchen contain a single inch of shelf space for them, I reluctantly placed them back on the display… Behind 14 other boxes.
Just in case.

As a compromise, I turned down the aisle with single mugs for sale, hoping to find a lone mason jar that I could justify purchasing. With their slim selection, I struck out, but I still discovered another mug that made me smile…

I immediately thought, Wow—that’s brilliant! Someone actually printed a mug cake recipe on the side. Perfect marketing! But then I skimmed through the recipe, and my brain changed its mind… That’s horribly unhealthy! ¼ cup of sugar? And almost ¼ cup of fat between the oil and egg yolk?? I automatically assumed mug cakes were meant for one person, but that recipe was a heart attack—or at least a stomachache—in a coffee cup!

Chocolate truffles also have a bad reputation for being highly unhealthy. Packed with butter, heavy cream, and melted chocolate—plus a sweet sugary filling—they’re irresistibly tempting but not exactly bikini-friendly. Although after a little tinkering in my kitchen, I managed to come up with a 5-ingredient recipe for deliciously decadent truffles with less than half the fat and calories of regular ones!
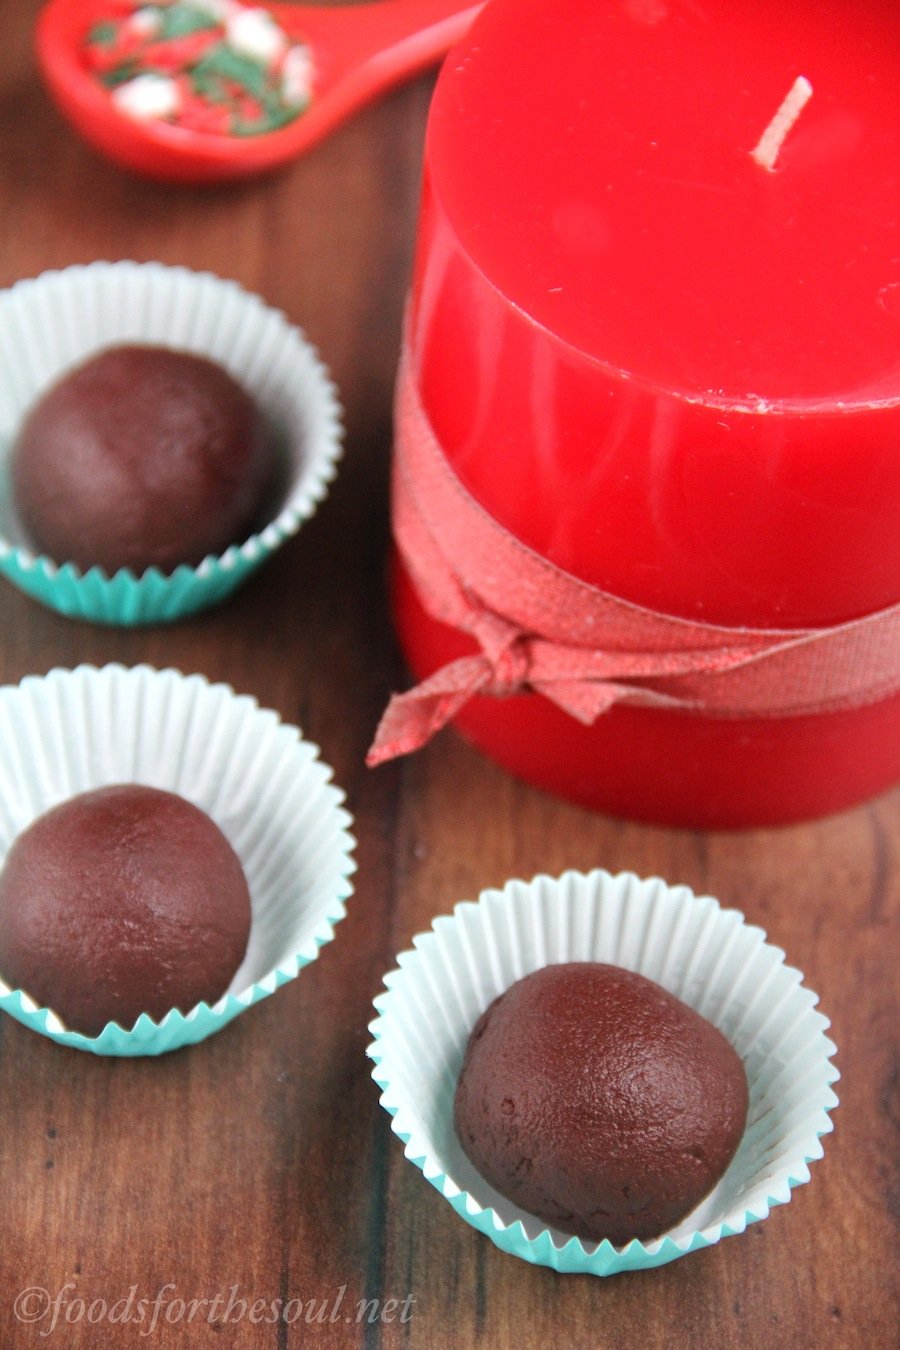
These Dark Chocolate Peanut Butter Truffles positively exude rich chocolaty flavor. With their luxurious fudgy exterior and sweet creamy filling, these treats are guaranteed to be a guilt-free indulgence: made from purely wholesome, clean-eating friendly ingredients, each large truffle only contains 43 calories!

This truffle recipe is the easiest one you’ll ever make. Just stir together cocoa powder, applesauce, honey, and vanilla together in a bowl with a fork, and chill the mixture. That’s it! No butter to melt, no heavy cream to heat. However, it’s incredibly important to chill the chocolate mixture for at least 1 hour. It’s initially fairly tacky (and will stick to your hands like glue), but the longer you wait, the easier it is to shape. If left for more than 24 hours, the chocolate mixture begins drying out and crumbles when rolled, so just don’t wait too long!
Despite chilling, assembling the truffles is still a slightly messy process. You’ll end up with a small layer of chocolate stuck to your palms—did you see mine?—but it washes off easily. (Or scrape it off with a spoon to sample… guess which option I chose!)

Before beginning, get everything ready! Line a large plate with wax paper; then grab two small spatulas, set out a spoon, and open the jar of peanut butter. I eyeballed the ½ teaspoon of peanut butter for the filling, but if possible, err on the side of slightly less PB to make it easier to seal the truffles shut.
Note: I thought about taking step-by-step photos or filming a video, but… I actually shaped these truffles at 11:30 pm with the worst artificial lighting imaginable. Instead, I’ll describe the process below. It sounds a little complicated—and it looked fairly comical—but you’ll still end up with really decadent results!

First, divide the chocolate mixture into 16 equal segments. Working with one at a time, flatten it into a circular shape in the palm of one hand. Using your free hand, dip the spoon into the peanut butter jar, scoop out a little, and transfer the spoon into the fingers of your hand with the truffle mixture. Grab a spatula with your free hand, scrape off the PB, and drop it into the center of the flattened truffle mixture.
Whew, you got through the hard part! Now set down the spoon and peanut butter spatula. Carefully fold the edges of the truffle mixture up over the peanut butter filling, pinching together and rolling to seal. If the chocolate sticks to your hand like superglue and refuses to budge, use the second spatula to scrape it off of your hand before shaping the truffle into a sphere.
Then place the finished truffle onto the wax paper, and start on the next one!

After rolling out all of the chocolate truffles, stick them back in the fridge until you’re ready to eat serve them. Chilling helps them stay firm, but if you plan on saving them for more than 24 hours, (a) store them in an airtight container to prevent them from drying out and (b) share your self-restraint secrets with me!

These decadent Dark Chocolate Peanut Butter Truffles taste just as indulgent as the ones you’d buy in sophisticated candy shops. With their rich fudgy exterior and sweet creamy filling, they remind me of a dark chocolate Reese’s peanut butter cup—but in truffle form!
So treat yourself to these guilt-free truffles—you deserve it!
P.S. Don’t forget to enter the giveaway to win free shortbread too!

| Dark Chocolate Peanut Butter Truffles | | Print |
- 1 cup (80g) unsweetened cocoa powder (measured correctly)
- ½ cup (126g) unsweetened applesauce
- 3 tbsp (45mL) honey
- ¼ tsp vanilla extract
- 8 tsp (43g) creamy peanut butter
- In a small bowl, stir together the cocoa powder, applesauce, honey, and vanilla until smooth. Chill for at least 1 hour (or up to 18 hours, maximum).
- Line a large plate with wax paper.
- Divide the chocolate mixture into 16 equal parts. Working with one at a time, flatten to a circular shape in the palm of your hand. Place ½ teaspoon of peanut butter in the center. Fold up the edges, pinch shut, and roll into a ball between your palms. Place onto the wax paper. Repeat with the remaining chocolate mixture and peanut butter. Store in the refrigerator, and if saving them longer than 24 hours, place in an airtight container to prevent the truffles from drying out.
You may also like…
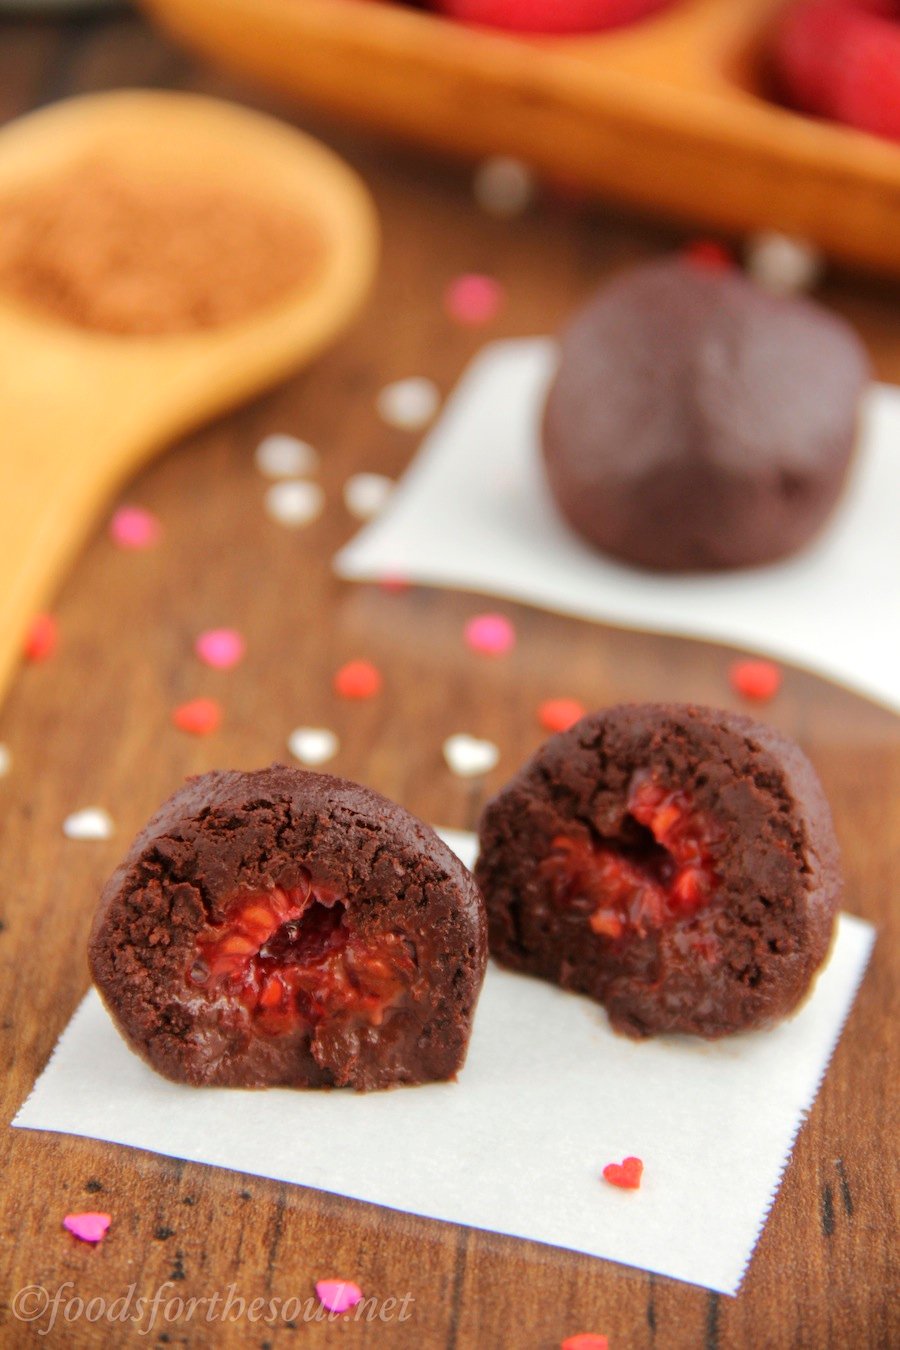
Dark Chocolate Raspberry Truffles
Dark Chocolate Peppermint Truffles
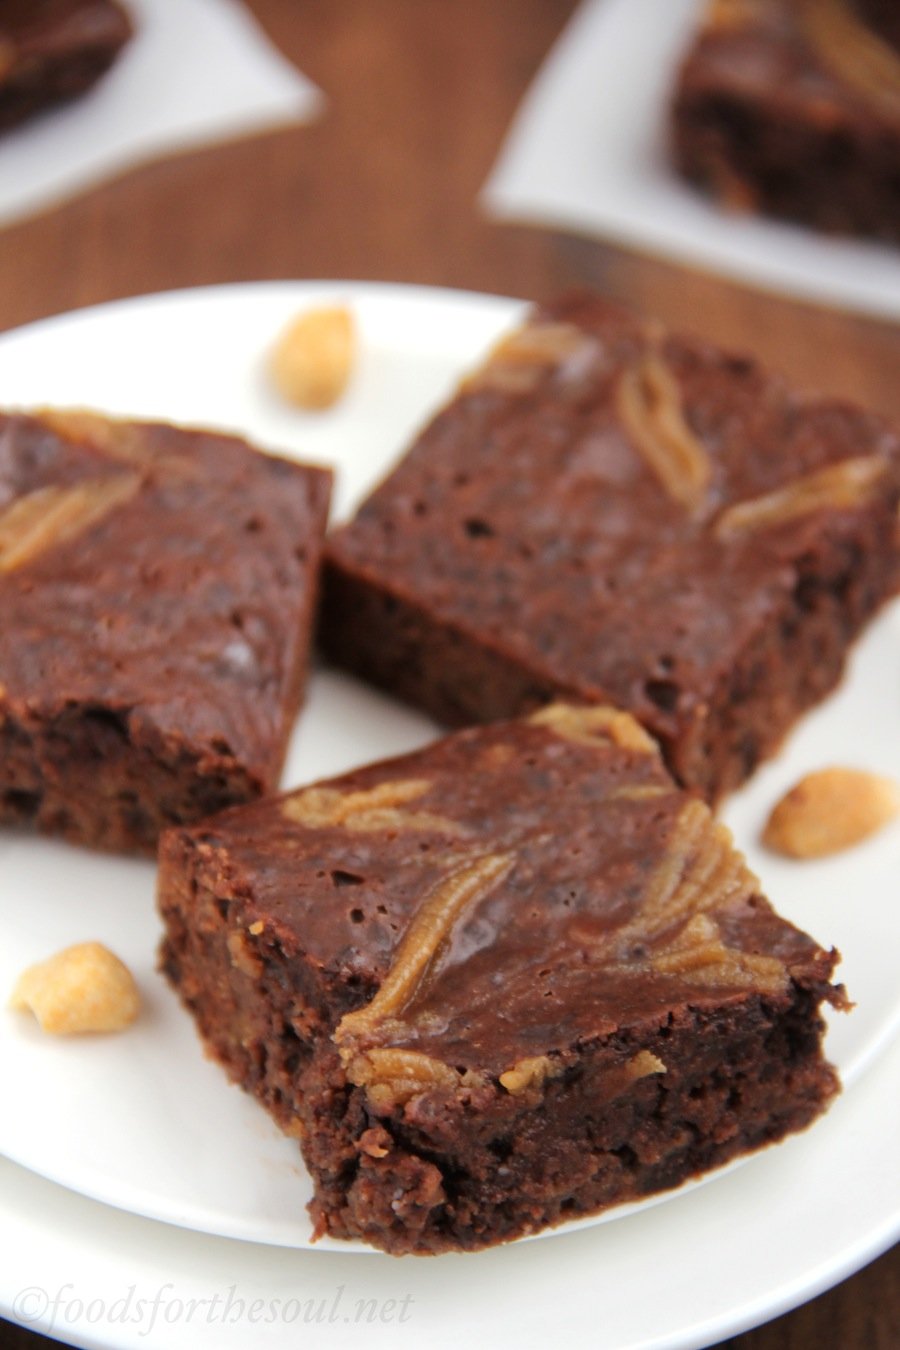
Fudgy Double Peanut Butter Brownies

These are amazing, Amy! I recently experimented with adding peanut butter to the center of muffins, so I can’t wait to try it in these truffles, even if they’re a little messy 😉
Thanks Megan! I love the sound of PB-stuffed muffins… Those would be SO dangerous for me to have around, and to make too! I’d eat just as much PB as I put into the muffins while preparing the batter. 😉
I’m practically drooling just looking at your pictures! These truffles looks so delicious, Amy! Love the fact that there is no cream or butter in them. I have all the ingredients in my kitchen so I’m definitely going to to test these babies out soon! 🙂
Thanks Gayle! I’m excited to hear what you think of them. I’m all about simple recipes, and the less heating/extra dishes I have to do, the better! 😉
I love how you can make healthy look so decadent Amy! I simply must try this recipe!
Thanks so much Trish! 🙂 I really hope you enjoy them!
Amy! So funny!! I saw this exact mug no more than a week before you posted this!! And I, of course, thought it was cute, but also noticed how unhealthy the recipe was… 3 T of oil in a ONE serving recipe?! Ouch! Your version is much better!!
Of course we would both stop and stare at the same mug… We’re basically twins! 🙂 Seriously, 3 tbsp of oil, 1/4 cup of sugar, AND an entire egg? I’ll just eat a regular dark chocolate bar and call it good!
Great recipe! Sharing it with family/friends. Did you use raw honey?
Thanks Sara! No, I didn’t use raw honey for this particular recipe; I just used the store-bought variety. My guy’s grandfather is a bee-keeper, so he gives us fresh honey on occasion, but we had completely ran out when I started making these truffles! I’m sure raw honey would work just fine though. 🙂
Oh, these look just heavenly – like a grown-up version of peanut butter cups! Love your description of the process of filling them too – it does sound like a slightly involved process, but a smart technique, and it looks like it would be well worth the effort!
Thank you so much! That was exactly my thought — grown-up peanut butter cups! I can never get enough chocolate and peanut butter. 😉
…
I am left speechless at how 5 guilt-free ingredients can create something so rich, decadent, and chocolaty. I’ll admit that I was a bit worried at the beginning of the recipe, trying to force the cocoa powder to blend in properly with the rest of the ingredients, but now I know that I should never doubt you! Everything worked out, and I got delicious truffles out of it too! Thank you, Amy!
I’m SO happy you enjoyed the truffles Bianca!! I should’ve mentioned that it takes a little muscle power and lots of stirring to get all the cocoa powder in; I’m really sorry for worrying you. Hopefully you’ll enjoy one for me! 🙂