Throughout high school, my band director scheduled marching practice every Tuesday night, starting before school even opened and running clear through Christmas—aka “Marching Band Competition Season.” Those evenings, the parking lot began filling with cars around 5:30, and by the time the minute hand hit 0, we stood on the football field ready to begin.
Our three-hour session started with warm-ups to Dr. Beat, the portable earsplitting metronome carried around by either the assistant band director or a marching specialist, which threatened to render you deaf for the next half hour if he stood directly behind you for too long. We marched in perfect 8-to-5 steps, or sometimes double-time in 16-to-5s, listening to their commands for the box drill, circle drill, and occasionally small sectional drills.
From there, we moved on to practicing the field show, usually a three-song production where we moved around the artificial football turf in various lines and patterns almost like a ballerina dances around the stage—just with regular marching instead of graceful leaps and pirouettes! We always ended Tuesday nights by running through as much of the show as we had learned (for the first few weeks) or the entire thing (by mid-September) before dashing up the stadium steps to drive home, fall asleep, and report back to the field at 7 am the following morning.
Because practices lasted from 6 to 9 pm, the time most people enjoy dinner, it took me a while to figure out what to do about that meal! For my first year or two of high school, I tried eating before our Tuesday sessions, but I felt rather full and sluggish for most of practice. Yet if I waited until the session ended, I’d take forever to fall asleep while my stomach digested. And I definitely didn’t want to eat during our two five-minute breaks down on the field!
During my senior year, I finally figured out a system that worked: I ate a medium-sized snack both before and after practice that added up to a full meal. As a result, my mom started a new tradition. Right around 9 pm, she preheated the oven, and a few minutes later, she popped in a pan of buttermilk biscuits. By the time I drove my brother and myself home, she was just pulling them out. We always finished off every single one by ourselves… Even though they were just the canned kind, they tasted amazing hot from the oven after a cold night of marching practice on the football field!
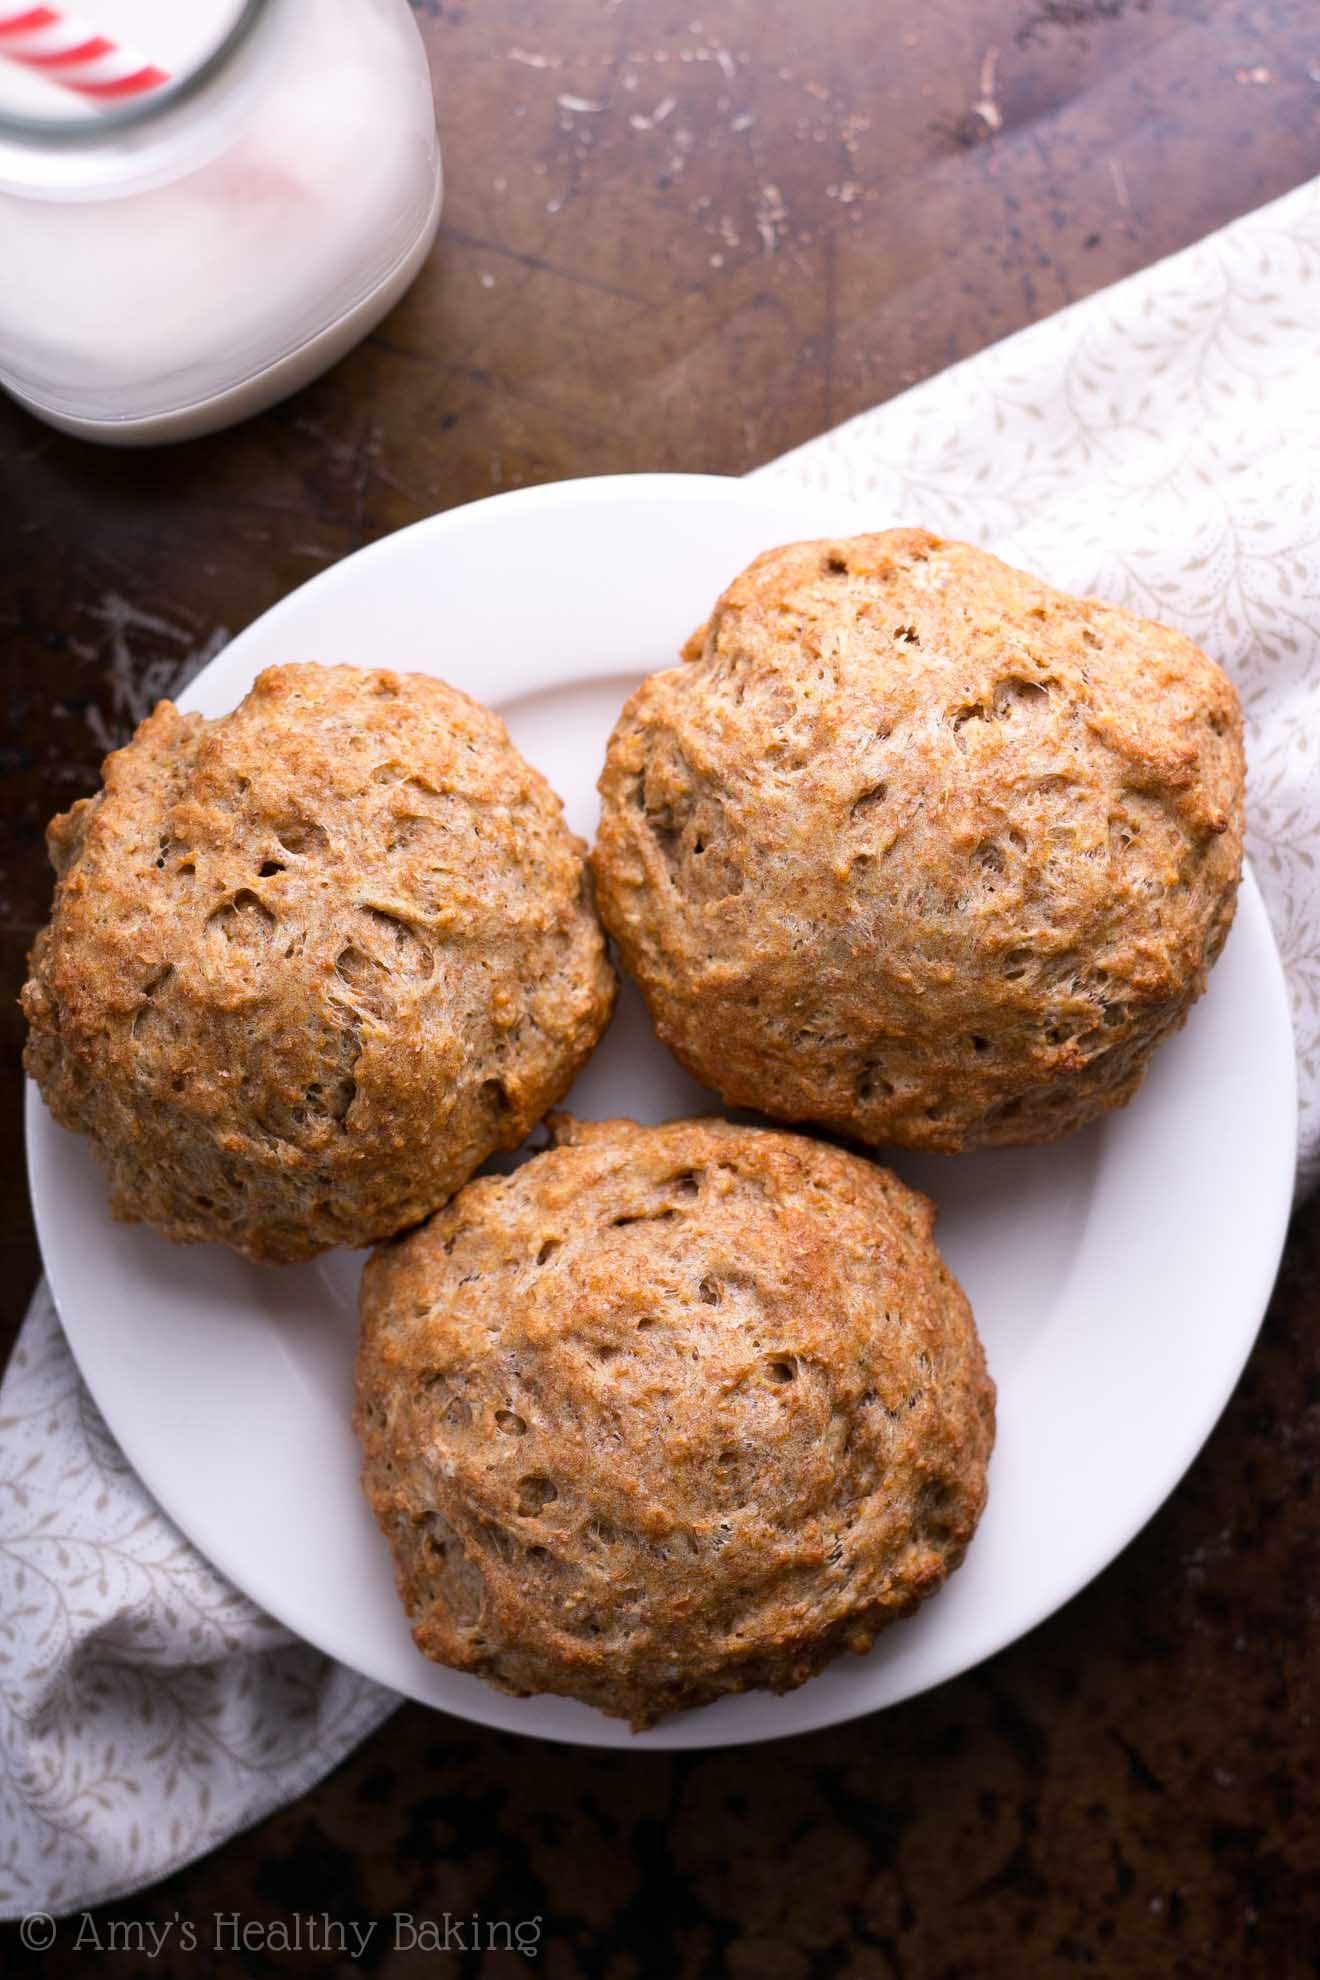
Those memories resurfaced after I recently caught up with a few of my high school band friends, so I decided to create a healthier version of my own. The result? These Whole Wheat Buttermilk Biscuits! They’re much healthier than those store-bought ones I ate after our marching practices, made entirely from wholesome ingredients instead, yet they’re just as irresistible—especially fresh from the oven!
Like their name suggests, these clean eating biscuits begin with whole wheat flour. That’s right, just regular ol’ whole wheat flour! To that, you’ll add a little salt and baking soda. The baking soda reacts better with the acidity of the low-fat buttermilk, as compared to baking powder, which makes these biscuits rise taller and gives them a more tender texture.
So yes, these biscuits do require buttermilk! However, since it’s not an ingredient I typically buy from the grocery store, I have two great alternatives for you. The first is this powdered buttermilk, which is what I typically use for all of my buttermilk-containing recipes. It’s inexpensive, shelf-stable (if stored in the fridge!), keeps for a really long time, and really simple to use. Even better, it still gives your recipes that iconic rich buttermilk flavor!
The second alternative is to make your own “buttermilk” by mixing whatever milk you typically buy with a little lemon juice or vinegar. While this substitute works, it won’t give your biscuits the same flavor… So I highly recommend getting your hands on real low-fat buttermilk or this powdered substitute, if you can!
Unlike many traditional recipes that call for an entire stick or more of butter (yikes!), this one requires just 2 tablespoons of butter. Yes, that’s right! The rest of their tender texture comes from one of my favorite ingredients in healthier baking: Greek yogurt. Greek yogurt provides the same moisture as extra butter for a fraction of the calories, and it gives these biscuits a little protein boost, too!
Because the dough is rather sticky, these are drop-style biscuits, and to shape them into circles (if you’d like!), use a small spatula (this is the adorable one that I own!). Just before popping the baking sheet in the oven, brush the tops and sides with a little more buttermilk. It creates a slight crust on the outsides, which contrasts beautifully with the soft, tender interiors.
Don’t those look amazing?? And when you make them, be sure to snap a picture and share it with me on Instagram using #amyshealthybaking! I’d love to see them!
P.S. My dad wanted me to tell you… He says that it’s basically mandatory to serve them hot with a little pat of melted butter! Yes, it’s a little more indulgent, but I completely agree—it makes them taste out of this world!!
| Whole Wheat Buttermilk Biscuits | | Print |
- 1 ½ cups (180g) whole wheat flour (measured like this)
- 1 tsp baking soda
- ½ tsp salt
- 2 tbsp (28g) unsalted butter, cold and cubed
- ½ cup (120g) plain nonfat Greek yogurt
- ¼ cup + 2 tsp (70mL) low-fat buttermilk
- 1 tbsp (15mL) honey
- 1 tsp vanilla extract
- Preheat the oven to 425°F, and line a baking sheet with a silicone baking mat or parchment paper.
- In a medium bowl, whisk together the flour, baking soda, and salt. Cut in the butter with a pastry cutter or the back of a fork until the mixture resembles fine crumbs. Stir in the Greek yogurt, ¼ cup of buttermilk, honey, and vanilla.
- Drop the dough into 8 equal-sized portions onto the prepared baking sheet. Using a small spatula, shape them into ¾”- to 1”-tall circles. Brush with the remaining buttermilk. Bake at 425°F for 12-14 minutes, or until the tops are lightly golden. Cool on the pan for 5 minutes before transferring to a wire rack to cool completely.
Whole wheat pastry flour, white whole wheat flour, or all-purpose flour may be substituted for the white whole wheat flour.
In a pinch, solid-state coconut oil may be substituted for the butter, but I warn against doing this, if at all possible, because the biscuits’ texture won’t be quite the same.
If you don’t want to purchase a carton of buttermilk, I recommend this powdered buttermilk! It’s shelf-stable in the refrigerator and keeps for ages, has the same iconic buttermilk taste, and is really easy to use. For this recipe, you’d add 1 tablespoon of the powdered buttermilk to the flour mixture and ¼ cup of water along with the Greek yogurt. Alternatively, mix ¾ teaspoon of white vinegar with ¼ cup of milk (preferably nonfat or low-fat, but any type should do) and use in place of the buttermilk. Regular buttermilk or one of these substitutes is required because you need their acidity to react with the baking soda to make the biscuits rise.
Pure maple syrup or agave may be substituted for the honey.
{gluten-free, clean eating, low fat, low calorie}


ALWAYS such a process to figure out what works and doesn’t work when it comes to eating!! SHEESH! These look like the perfect snack, hearty and the perfect canvas for whatever spread! I’d choose NUT BUTTER!
We really are twins at heart Brittany… I’m eating nut butter from a spoon as I type this! ?
Wow – what a sweet tradition your mom had for you! And that is crazy long practice hours for high-school! I did orchestra but our schedules were nothing like that!
Biscuits are sooo yummy, so I’m totally going to put these on the meal list – since they are drop biscuits they’d be so great to go with anything!
What did you play in orchestra Phi?? I’m so curious! And yes, our practices were crazy… Those 3-hour Tuesday nights were in addition to our A period marching class and concert band class during the day. 😉 You’re so sweet to put these on the meal list!! I’m touched!
Amy these were wonderful! They will be a staple.
I’m so glad you enjoyed the biscuits Mandy, and I’m touched that you say they’ll be a staple! That means a lot to me — thank you for sharing that! 🙂
These are WONDERFUL, and so EASY to whip up! Winner, winner! thanks!
I’m so glad you enjoyed the biscuits Angie! 🙂
Thanks for the recipe. The site is nearly IMPOSSIBLE to navigate with super large photos and of course, ads everywhere. FOREVER getting recipe.
I’m excited to hear what you think of the biscuits Rhonda! Since my blog is my full-time job and full source of income, the ads are what enable me to keep all of the recipes free to you to use. 🙂
Amy, can you recommend a substitute for the Greek yogurt? I’m out and wanna make these. I have everything else though.
The best substitute would be regular or non-dairy yogurt. I’m excited to hear what you think of the biscuits Judi!
Thanks so much for this recipe. I’ve been trying to find a decently healthy biscuit that still tastes great, and this is this the one. Like another reviewer said, these will be a staple in my house.
I’m so glad you enjoyed these biscuits! That really means a lot to me that you think they’ll become a staple at your house — thank you for sharing that with me! 🙂
Do you know if these freeze well?
Yes, these buttermilk biscuits freeze really well once they’ve been baked! I’d love to hear what you think if you try them Dawna! 🙂
Happy late Thanksgiving! Hope your holiday was a good one.
Yesterday chicken and veggies were for dinner, so I wanted a good biscuit to go with them. This recipe was 100% right for the job (I had to substitute regular milk with lemon juice for the buttermilk, which is typical for my kitchen). I would never have thought of honey and vanilla for regular savory biscuits, but they added such a perfect subtle sweetness. I’ll be returning to this recipe often – so quick, easy, and delicious! PS: your dad was right about serving them warm with butter! 😀
You’re so sweet — thank you Celina! I hope you had a lovely Thanksgiving too! 🙂 I’m truly honored that you tried yet ANOTHER recipe of mine — that means the world to me!! Especially that you already plan on making these biscuits again in the future. That’s the best kind of compliment! ♡ PS I’ll let my dad know you approve! 😉
Oh yes, you’re my go-to for new recipes! I can always expect to have all ingredients on hand, and for the recipes to be easy, healthy, and tasty. Thank you, and cheers!
You’re just the sweetest Celina!! I’m truly honored — you just made my whole day! Thank you!! ♡
Another winner! Having never made a biscuit before in my life, I just whipped up my second batch of these because the first went so fast. (Okay, I didn’t “whip” them up–I’m super slow–but once I get more comfortable baking I’m sure I’ll speed up.) These are delicious!
Two batches already?? That’s a huge compliment — I’m so glad you love these too, Jennifer! Thank you for taking the time to let me know! 🙂
And please, don’t get down on yourself for one second about being slow! I’m still one of the slowest bakers out there. I’m practically a tortoise! 😉