
As a little girl, I loved peanut butter sandwiches. No jelly, no jam, no honey, no bananas… Just plain creamy peanut butter. My parents didn’t seem to mind; it made mealtimes much easier!
I especially looked forward to when Dad fixed up my lunch. He slathered on the peanut butter about three times as thick as Mom, and it probably would’ve glued my mouth shut if I didn’t have milk or a juice box to wash it down!

During one lunchtime recess at school, I pulled my sandwich out of my insulated lunch tote, and it looked completely normal: a slice of whole wheat bread cut in half and spread with an extra thick Dad-style layer of peanut butter. But when I took my first bite…
My teeth hit something small and hard. Startled, I looked down at the sandwich in my hands as I chewed. By the time I swallowed that first bite, I had solved the mystery… We probably ran out of my favorite creamy peanut butter, and Dad must have improvised with some of his own crunchy peanut butter instead!

So I made this Healthy Easy Blender Crunchy Peanut Butter in honor of my dad! You just need two ingredients and five minutes to make it. So simple! And unlike those store-bought jars from my childhood, this healthy homemade crunchy peanut butter contains no sugar or hydrogenated oil—and it tastes so much better!
And… I definitely wouldn’t blame you for eating a spoonful straight from the jar like I did!

To make this healthy homemade peanut butter, you’ll need a blender (or food processor!) with a strong motor and sharp blades. I absolutely love my Ninja blender! I actually bought it online here. It makes the best homemade nut butters! (You can find all of my homemade nut butter recipes here!)
It’s important to use a blender with a strong motor and sharp blades so you don’t overwork or overheat your blender. Some low-end blenders start to smell a little funky, like melting plastic, when you run them for too long while making homemade nut butters!

You’ll add roasted unsalted peanuts (like this!) to your blender, and pulse a few times. (I prefer unsalted ones so I can control the amount of salt!) Once the peanuts start to break into smaller pieces, remove 3 to 5 tablespoons to be the “crunchy” part of your homemade crunchy peanut butter.
Can you see the difference in the peanuts in the picture above versus the picture below?

I prefer my crunchy bits on the smaller side, which is why I pulse the peanuts a few times first. If you enjoy big crunchy pieces in your peanut butter, simply reserve those 3 to 5 tablespoons before adding the peanuts to the blender, and skip the pulsing step!
However, if your blender blades aren’t that sharp, then I definitely recommend pulsing the peanuts first, before reserving some of the broken peanut bits. Not-so-sharp blender blades don’t do such a good job at breaking up big peanut chunks that are added back in at the end!
But I’m getting ahead of myself…
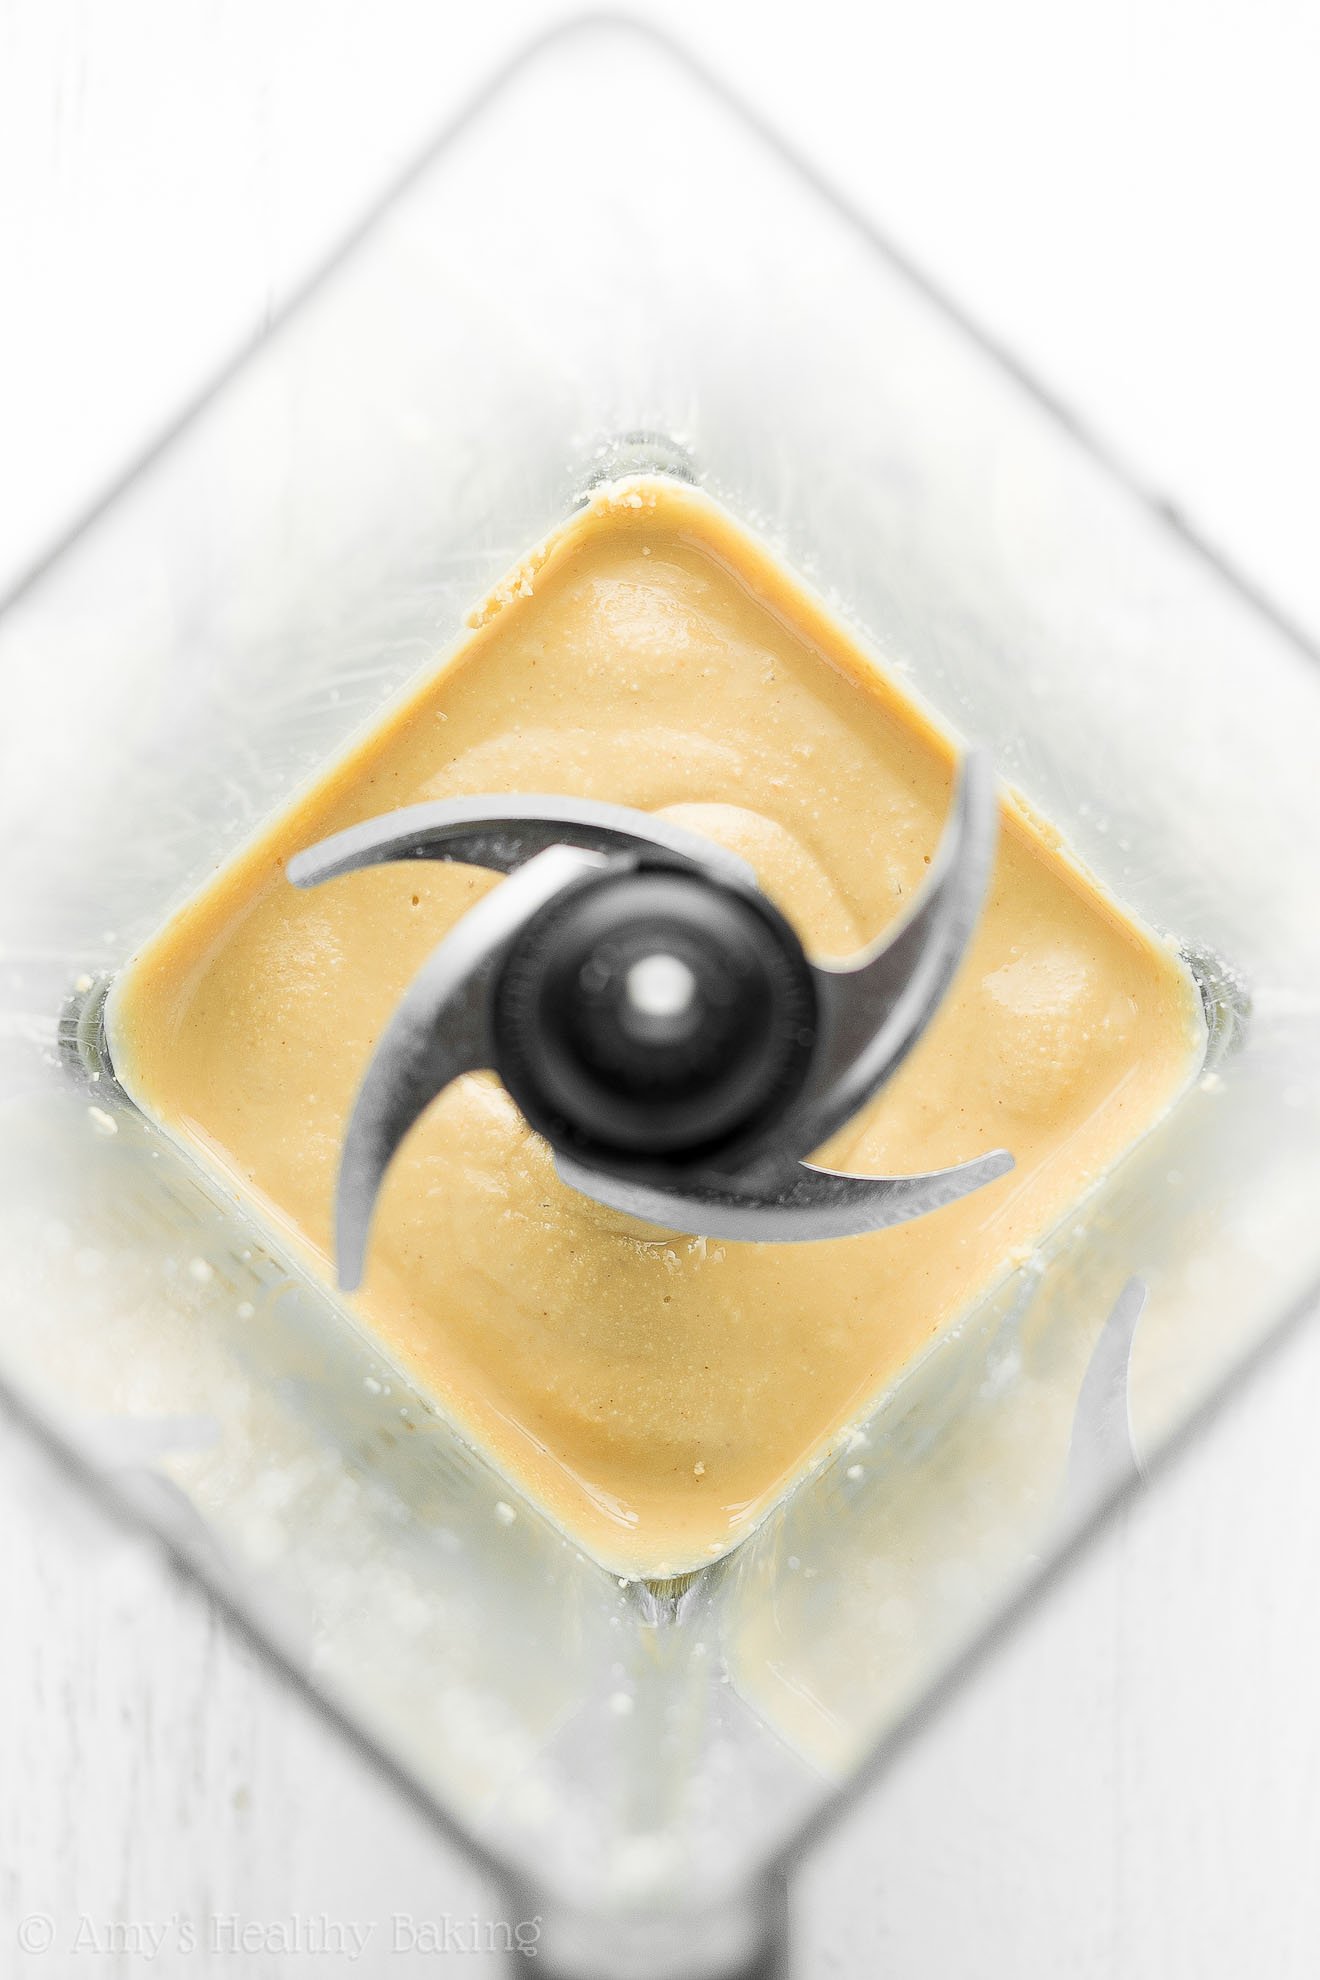
Now you’ll blend the remaining peanuts until they’re smooth and creamy! With my Ninja blender, that only takes a couple of minutes. Once you have perfectly creamy peanut butter, then add those reserved peanut bits back in, and pulse just a few times until they’re evenly distributed.

Don’t over-blend at this point! You don’t want to pulverize those crunchy bits… Just get them incorporated. If you’re worried about over-blending, then just remove the blender’s blades (if that’s possible, like with my blender!), and gently swirl in the peanut bits with a knife.
Then transfer your healthy homemade crunchy peanut butter to a jar, and pop it in the fridge. Chilling it gives it a thick texture just like those store-bought jars—especially if you wait for at least 12 hours before dipping in your spoon!

I know it’s hard to wait that long… But I promise it’s worth it! ?? And when you make your own, remember to snap a picture and share it on Instagram using #amyshealthybaking and tagging @amyshealthybaking IN the photo itself! (That guarantees I’ll see your picture! ?) I’d love to see your crunchy peanut butter!
| Healthy Easy Blender Crunchy Peanut Butter | | Print |
- 2 cups (292g) roasted unsalted peanuts
- ¼ - ½ tsp salt, or adjusted to taste
- Add the peanuts to a high-powered blender, and pulse 3-5 times or until the peanuts start to look broken up. Remove 3-5 tablespoons of peanut bits. (See Notes below!)
- Blend the remaining peanuts until smooth and creamy, with a texture similar to honey. Add the salt. Blend until everything is fully incorporated and smooth. Add the reserved peanut bits, and pulse 2-3 times or until evenly distributed. (See Notes below!) Transfer to a glass jar or airtight container, and refrigerate.
You’ll want to use a blender (or food processor!) with very sharp blades and a strong motor. This ensures that the peanut butter turns out smooth and creamy without overworking your machine. This is the blender that I own, and I absolutely love it! I bought it online here. It’s worth every single penny, and I use it every day. (And if you check out this blog post, you’ll see lots more recipes of mine you can make with it!) See the text of this blog post above for more information about the best blenders!
I prefer my crunchy bits on the smaller side, which is why I pulse the peanuts a few times first. If you enjoy big crunchy pieces in your peanut butter, simply reserve those 3 to 5 tablespoons before adding the peanuts to the blender, and skip the pulsing step!
However, if your blender blades aren’t that sharp, then I definitely recommend pulsing the peanuts first, before reserving some of the broken peanut bits. Not-so-sharp blender blades don’t do such a good job at breaking up big peanut chunks that are added back in at the end.
Don’t over-blend after adding in the peanut bits! You don’t want to pulverize those crunchy bits… Just get them incorporated. If you’re worried about over-blending, then just remove the blender’s blades (if that’s possible, like with my blender!), and gently swirl in the peanut bits with a knife.
For the thickest texture, wait at least 12 hours after refrigerating before dipping in your knife or spoon!
{gluten-free, vegan, clean eating, low carb, sugar-free}
View Nutrition Information + Weight Watchers Points
You may also like Amy’s other recipes…
♡ Healthy Easy Blender Creamy Peanut Butter
♡ Healthy Easy Blender Cashew Butter
♡ Healthy Easy Blender Almond Butter
♡ Healthy Chai Spice Cashew Butter
♡ Healthy Pumpkin Spice Peanut Butter
♡ Healthy Dark Chocolate Almond Butter


My dad used to make me crunchy peanut butter sandwiches too when I was a child! Always on toasted whole grain bread 🙂 Another awesome recipe and story here.
Awww how fun Liz!! Our dads sound similar, at least in their sandwich making preferences! 😉
Amy;
Your homemade peanut butter looks so good and at the end of March when I buy a much better blender than the one I have now I am going to make your peanut butter,and I will let you know how much I like and enjoy eating it on our whole wheat bread and rye bread,and I might try it on half an apple as a small snack with my tea or healthier smoothie.
Kim
I can’t wait to hear what you think of this peanut butter Kim! I love the sound of spreading it on whole wheat or rye bread — yum! 🙂
I would like to try this. How long will it keep and do you recommend refrigerating it?
I really appreciate your interest in my recipe Rose! I’ve actually covered that already in the text directly beneath the recipe title in the recipe box. It can be easy to miss! 🙂 I can’t wait to hear what you think of this peanut butter!
Along with avocado, peanut butter is my favorite healthy fat and these look amazing! I have never tried anything like them and after tasting it plain I would definitely put it on a sweet potato or a banana. Thanks so much for the giveaway. I am a new follow and like reading about your blog.
I’m so glad you enjoyed this homemade peanut butter Mohit! 🙂 I can’t wait to hear what other recipes of mine you try!