
During my first year of graduate school, I started making oatmeal for breakfast when the weather turned cooler. There was something that felt so cozy and satisfying about enjoying a hot breakfast after returning from a run in the brisk autumn air… Especially when it took barely any effort to make!
I’d pour quick-cooking oats and water into a bowl, along with a little sweetener, and pop that in the microwave. Less than two minutes later when the timer rang, I’d stir in a generous amount of cinnamon (I love it as much as chocolate!), and I sometimes added in some fresh fruit or raisins.
The latter was my favorite… It made my breakfast taste like oatmeal raisin cookies!

When the next term began, I had to sign up for classes that started at either 7:30 am or 8 am almost every day of the week, which barely gave me enough time to exercise and shower before running out the door. As a result, I traded my bowls of oatmeal for a banana and a tupperware of dry cereal or an English muffin with peanut butter.
I needed something portable that I could easily take to campus, and back then, I just couldn’t figure out a way to do that with my “oatmeal cookie” breakfast bowl!
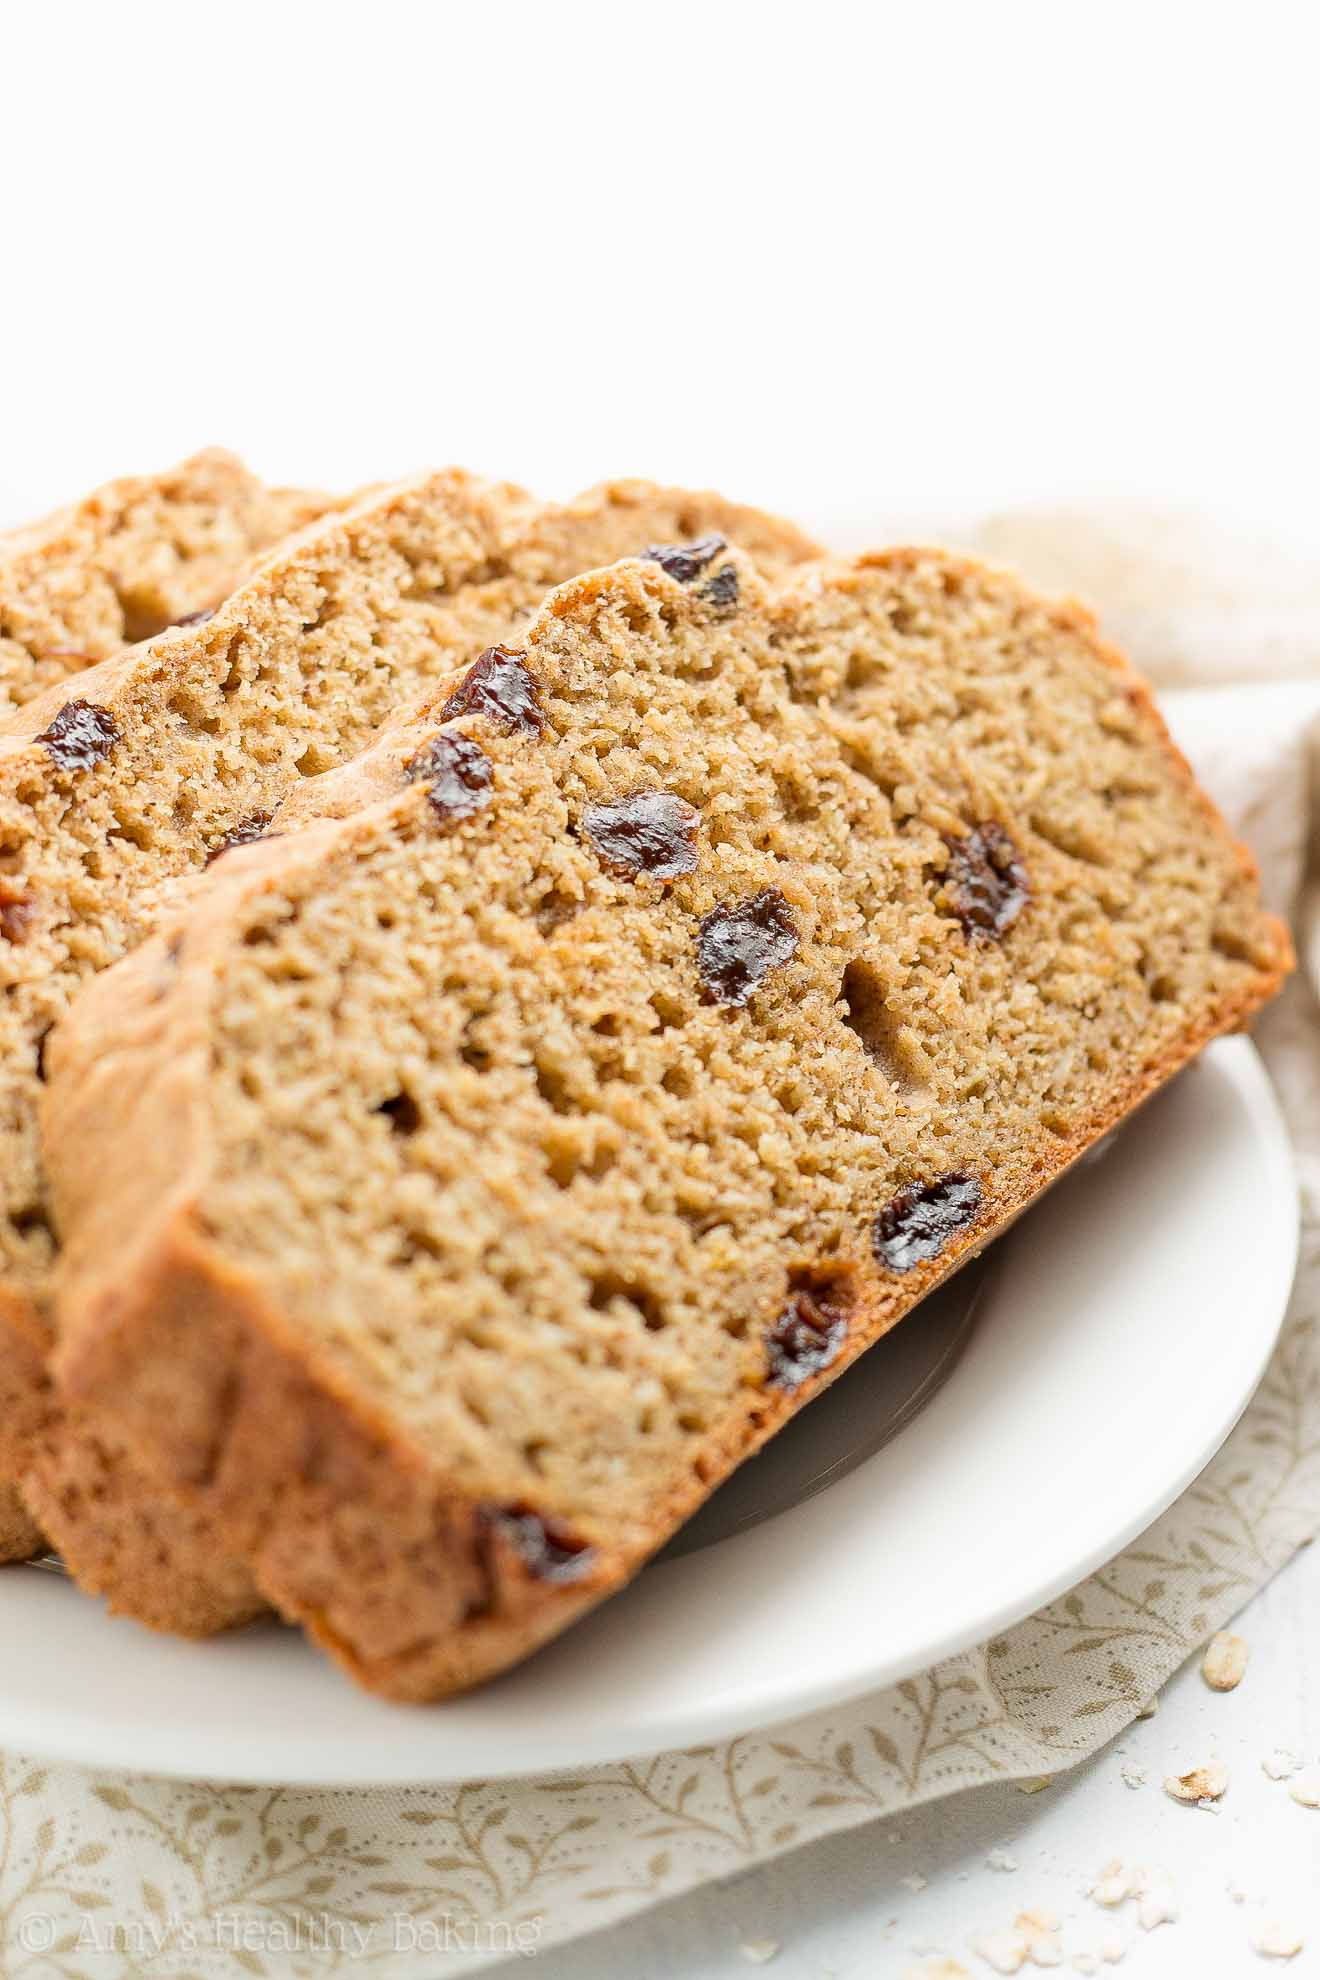
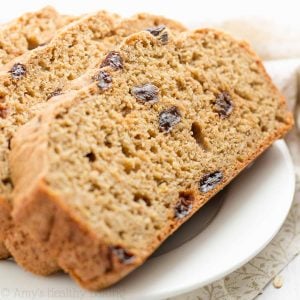
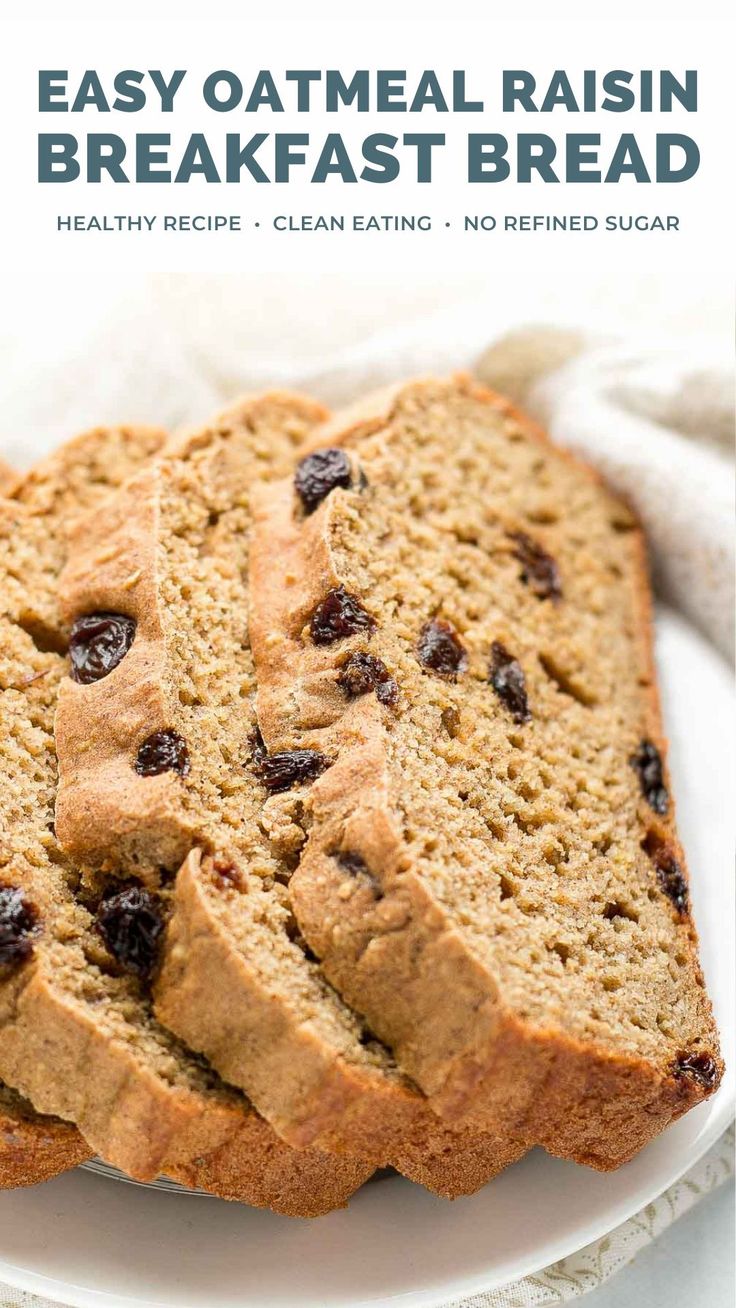
Finally, too many years later, I came up with a solution… This healthy oatmeal raisin breakfast quick bread! With its tender texture and cozy spices, it still tastes like oatmeal raisin cookies (hooray!), and it’s really easy to cut a slice or two as a healthy-yet-portable breakfast. This quick bread is also perfect for make-ahead breakfast meal prepping, if your schedule is as busy as mine was during that second term!
Now if only I could go back in time… My college self would be thrilled to nibble on slices of this on those cool and early mornings!

KEY INGREDIENTS TO MAKE A HEALTHY OATMEAL RAISIN BREAKFAST QUICK BREAD
Let’s talk about the key ingredients that you’ll need to make this healthy oatmeal raisin quick bread! Since you probably have staples like baking powder, vanilla, and salt in your kitchen already, we’ll stick with the more interesting items for now.
Oats. For this recipe, you’ll use instant oats. They’re also called “quick cooking” or “one-minute” oats, and they’re smaller and thinner than old-fashioned oats. That size difference is important! It means they soften faster, which gives your oatmeal quick bread the best moist and tender texture.
Tip: You can find instant oats in containers right next to the regular old-fashioned rolled oats at the grocery store. If you don’t see “instant” oats, then check for bags or canisters with their other names: quick cooking or one-minute oats!
Hint: Instant oats are not the ones that come in individual packets with flavors like apple cinnamon or maple brown sugar. Just like old-fashioned rolled oats, they only contain one ingredient: oats!
Flour. To make this oatmeal quick bread healthier, I opted for white whole wheat flour. Yes, such a thing actually exists — and it’s not a combination of white (aka all-purpose) flour and whole wheat flour!
Here in the US, white whole wheat flour is made by finely grinding a special type of soft white wheat (hence the name!), whereas regular whole wheat flour comes from heartier red wheat. White whole wheat flour boasts the same health benefits as regular whole wheat flour, like extra fiber and micronutrients, yet it also has a lighter taste and texture. That lets the oatmeal cookie-like flavors really shine in this healthy breakfast bread!
Hint: It’s similar to red and green grapes. Noticeably different appearance, slightly different flavors, but similar health benefits!
Spices. That’s right — plural! You’ll add both cinnamon and nutmeg to the batter. Cinnamon provides that familiar and extra cozy flavor, while nutmeg creates a deep richness and “comfort food” taste. Don’t skip it!
Tip: This is currently my favorite cinnamon! It has a slightly stronger, richer, and sweeter flavor than regular cinnamon, which I absolutely adore. It’s basically the only kind I use in my baking now!

Egg whites. The white contains the majority of an egg’s protein, and that protein helps (a) prevent your oatmeal quick bread from collapsing and (b) maintain its structure while it cools.
Greek yogurt. Even with merely ½ tablespoon of butter or oil, your healthy oatmeal quick bread will still turn out incredibly moist and soft. Greek yogurt is the reason why! It’s one of my favorite healthy baking ingredients. In this recipe, Greek yogurt adds the same moisture to the batter as extra oil or butter — but for a fraction of the calories! — and it also gives your oatmeal quick bread a protein boost.
Sweetener. You’ll sweeten this healthy oatmeal quick bread with another one of my favorite ingredients: liquid stevia. Stevia is a plant-based, sugar-free, no-calorie sweetener that contains nothing refined or artificial (aka it’s clean-eating friendly!), and it’s very concentrated. You just need 1 ½ teaspoons for this entire loaf!
This is the kind I use because I love its sweet flavor and don’t notice any strange aftertaste. Although you can find it at many health-oriented grocery stores, I buy mine online here because that’s the best price I’ve found. (And you’ll use it in all of these recipes of mine, too!)
Tip: Many stevia brands and products have different sweetness levels, so they’re not necessarily 1-for-1 substitutes for each other. I highly recommend using the same one that I do for the best flavor!
Raisins. These just might be my favorite part of this healthy quick bread… I love the bright pops of natural sweetness that they add — and how every time I bite into one, I almost feel like I’m eating an oatmeal raisin cookie!

HOW TO MAKE A HEALTHY OATMEAL RAISIN BREAKFAST QUICK BREAD
Time to go over how to make the best healthy oatmeal raisin quick bread! This recipe is easy and straightforward (I promise!), and I have some tips to share to ensure your loaf turns out perfectly.
Measure correctly. When measuring the oats and flour, it’s extremely important to do it properly. Use this method or a kitchen scale. (← That’s the one I own!) As tempting as it may be, do NOT scoop either one directly from the container with your measuring cups. This can lead to adding up to 1 ½ times as much… Which yields a bland and dry loaf. Not good!
If you take the time to measure correctly (try my special trick — or bonus points if you opt for a kitchen scale!), your oatmeal quick bread should turn out beautifully moist, soft, and tender with an irresistible cozy and sweet flavor. Yum!
Hydrate the raisins. This is one of my special baking tricks! I do this whenever I use raisins, and it makes a huge difference in their texture and flavor.
Unless you bought your raisins yesterday, there’s a very good chance they’ve been sitting in your pantry for a bit… And the longer raisins sit, the stiffer and drier they get. Yes — dried fruit often continues to dry out at your house!
But hydrating the raisins immediately fixes that! It’s super easy to do. Add them to a microwave-safe bowl, and pour in water until the raisins are fully submerged. Tightly cover the top with plastic wrap or a lid, and pop that in the microwave for 1 minute. Let the raisins sit for at least 10 minutes while you prepare the rest of the ingredients. Just before adding them to your mixing bowl, drain them — and voila! Perfectly plump, really juicy, exceptionally sweet, absolutely irresistible raisins!

Soak the oats. I’ve already built this into Step 2, but I wanted to cover why you’re doing this. You’ll mix the oats with the Greek yogurt, some milk, and the vanilla extract before whisking together any of the other ingredients. This lets the oats start soaking up moisture ahead of time. Just like how overnight oats recipes work, the oats naturally start to soften when combined with liquid ingredients, which then yields an even softer and moister texture in your oatmeal quick bread.
Hint: It’s the same trick I use in all of my oatmeal muffin recipes and bran muffin recipes!
Mix by hand. Put away your stand mixer and hand-held mixer! Those tend to overmix low-fat and sugar-free batters, like this one. Overmixing leads to tough, gummy, rubbery, or dense textures… Not good! But if you mix by hand and use a gentle touch, your healthy oatmeal quick bread should turn out really soft and moist.
So use a whisk where explicitly instructed and a fork for everything else. Yes — a fork! The open spaces between the fork’s tines allow the ingredients to pass through and mix more efficiently, compared to the wide flat side of a spoon or spatula, so this also helps guard against overmixing. It may be unconventional, but it’s why a fork is my preferred stirring utensil!
Bake + cool. Your healthy oatmeal quick bread is done when the top feels firm and a toothpick inserted into the center comes out clean or with some crumbs attached. Once you’ve transferred it to a wire rack, let it cool completely before slicing it.
Yes, completely. Utterly, totally, fully, and completely to room temperature. The inside structure of a quick bread (or cake!) hasn’t fully set until it cools, so if you slice into it while it’s still warm, you’ll disrupt that process. Be patient and wait for the best soft and tender texture!

How tempting does this healthy oatmeal raisin breakfast quick bread look?? And when you make your own, remember to snap a picture and share it on Instagram using #amyshealthybaking and tagging @amyshealthybaking IN the photo itself! (That guarantees I’ll see your picture! 🙂 ) I’d love to see your healthy oatmeal raisin breakfast quick bread!
Healthy Oatmeal Raisin Breakfast Quick Bread
Ingredients
- ¾ cup (75g) instant oats (gluten-free if necessary and measured like this)
- ½ cup (120g) plain nonfat Greek yogurt
- 1 cup + 2 tbsp (270mL) nonfat milk, divided
- 2 tsp vanilla extract
- 2 cups (240g) white whole wheat flour or gluten-free* flour (measured like this)
- 2 ½ tsp ground cinnamon
- ½ tsp ground nutmeg
- 1 ½ tsp baking powder
- ¾ tsp baking soda
- ½ tsp salt
- ½ tbsp (7g) unsalted butter or coconut oil, melted and cooled slightly
- 2 large egg whites, room temperature
- 1 ½ tsp liquid stevia (see Notes!)
- ⅓ cup (53g) raisins (hydrated first – see Notes!)
Instructions
- Preheat the oven to 350°F, and coat a 9x5” loaf pan with nonstick cooking spray.
- In a medium bowl, stir together the oats, Greek yogurt, 6 tablespoons of milk, and vanilla extract. In a separate bowl, whisk together the flour, cinnamon, nutmeg, baking powder, baking soda, and salt. In a third bowl, whisk together the butter, egg whites, and liquid stevia. Stir in the oat mixture, mixing until no large lumps remain. Alternate between adding the flour mixture and remaining ¾ cup of milk, beginning and ending with the flour mixture, and stirring just until incorporated. (For best results, add the flour mixture in 4 equal parts.) Gently fold in the raisins.
- Spread the batter into the prepared pan. Bake at 350°F for 40-50 minutes or until the top feels firm to the touch and a toothpick inserted into the center comes out clean or with crumbs attached. Cool in the pan for 10 minutes before transferring to a wire rack to cool completely.
Notes
View Nutrition Information + Weight Watchers Points
You may also like Amy’s other recipes…
♡ Healthy Blueberry Oatmeal Breakfast Quick Bread
♡ Healthy Carrot Cake Breakfast Quick Bread
♡ Healthy Blueberry Lemon Breakfast Bread
♡ Healthy Oatmeal Raisin Scones
♡ Healthy Oatmeal Raisin Breakfast Cookies
♡ Healthy Oatmeal Raisin Snack Cake
♡ The Ultimate Healthy Oatmeal Muffins
♡ …and the rest of Amy’s healthy quick bread recipes!


Hi Amy! I made this bread and would love some advice.
1. I baked it in a countertop multifunction convection oven, so I took the temp down to 300F. However this was still too hot and caused it to rise unevenly, plus overbake just slightly in the crust. Should I try again at a lower temp? Or what do you think?
2. I love the texture of this bread but I felt the raisins somehow got lost in mine. I want to taste a raisin in every bite. Am I missing a tip in the folding process? Or how might you recommend increasing the raisins?
3. I’m so sorry but I can definitely taste that vanilla stevia (same exact brand), and it is off-putting to me. I like stevia in my coffee, for example, but this was my first time baking with it, and I’m sad I don’t like it. I see your subs, but do you have any other stevia ideas? I don’t want to give up on it.
Thanks so much! I love the detail and explanations you give; it is a big help to me.
It means a lot that you tried our recipe and appreciate the detailed explanations too, Joan! Thank you for taking the time to let us know! We’re happy to help with those things too. In order to provide the best possible advice, we have some questions for you! 🙂
For your countertop convection oven, how wide and deep is it inside?
When you place your 9×5″ loaf pan on the wire rack, what’s the distance between the top of the pan and the top of the oven? (If you’re able to share the exact brand and model number, we’re happy to do a little sleuthing on our end too!)
When you baked the quick bread in your countertop convection oven, did you rotate the pan partway through, by any chance?
Was the entire crust overbaked? Or was it mainly centralized to the top crust? Or the crust touching the loaf pan?
When you reduced the temperature to 300°F, did you use the same baking time, or did you need to increase it to ensure the center was baked all the way through?
We’re so glad you at least enjoyed the texture! We want to make sure we understand what happened with your raisins. Did all of them seem to sink to the bottom? Or were they evenly dispersed throughout the batter, and you’d just prefer to add more?
If the latter, it should be fine to add more raisins! Anywhere from ½ cup to ⅔ cup should work.
No need to apologize! We completely understand that some people are more sensitive to the taste of stevia than others. If you use a different stevia for your coffee than the vanilla stevia that we used in this recipe, what’s that exact stevia brand and product? It sounds like that’s one that you enjoy, so we’d be happy to investigate whether it’s possible to use in this quick bread too!
We really appreciate your patience too — we’ll have a much better idea of recommendations for your next quick bread once we know your answers to these, Joan! 🙂
Hi Stacey! Thanks so much for your reply. I’ll answer your questions below. And yes, this bread has a lovely texture (and smell!), so I’m determined to improve my outcome.
The countertop convection oven is 12” wide and 12” deep. It’s an “Instant Omni Plus 19QT/18L Toaster Oven Air Fryer, 10-in-1 Functions.”
When I placed the bread in, it was on the bottom rack that is indicated for baking and roasting. The middle position is for toasting and air frying, and the top is for broiling.
I did not think to rotate the bread! I appreciate the tip.
Overbaking was centralized to the top crust. It was not too brown or burnt, just harder to the touch than I would expect.
I did use the same baking time indicated in the recipe, but at 300F.
The raisins didn’t sink to the bottom, but they didn’t disperse the way Amy’s pictures appeared. I bet adding more raisins will help in my case, and I really appreciate the guidance on how much more would work in the recipe.
The sweetener I like to use in my coffee is “Truvia Sweet Complete Granulated All-Purpose Calorie-Free Sweetener from the Stevia Leaf.” I see it’s a blend, though, not all stevia.
Again, thank you so much for replying. It’s a big help to me!
We’re happy to help, Joan! We’re so glad you enjoyed its texture and smell, and we’re honored that you’d want to make it again. Thank you for sharing these very thorough answers too. It’s really helpful!
We researched the air fryer toaster oven that you have, and it looks like the owner’s manual recommends flipping food partway through while using the baking function. If you do that, it should help ensure your quick bread bakes more evenly!
If it was only the top that was overbaked, not the sides, then 300°F sounds like the right temperature for your particular toaster oven. Because toaster ovens are substantially smaller than standard baking ovens, their metal sides (which conduct heat!) are much closer to the baked items, especially for something made in a loaf pan. This closer proximity is probably what caused the top of yours to turn hard! The toaster oven’s metal top may have almost acted like a pseudo-broiler because it was so close to the top of your quick bread.
However, that’s easy to fix! You can cover the top with foil towards the end of the baking time to prevent it from overbaking and turning as hard as before. (The other alternative is to bake your quick bread in a regular oven instead of a toaster oven — its sides are far enough away that the top shouldn’t overbake! 😉 )
Thank you for sharing your preferred sweetener! You’re right; this particular Truvia product is a blend of two sweeteners, erythritol and stevia, which may be why you don’t notice a stevia aftertaste when using it. If you’d like to use that same sweetener to make this quick bread, then you’ll need ¾ cup of Truvia’s Sweet Complete Granulated All-Purpose Sweetener. You’ll also need to reduce the amount of milk to about 1 cup. We’d recommend beginning with ¾ cup + 2 tablespoons to start, just to be safe! Since you’ve already made this quick bread once, you know what the batter’s consistency should be — so if it seems too dry, go ahead and add more milk (1-2 teaspoons at a time!) until it reaches the same consistency as before.
Does all of that make sense? I’m happy to clarify anything if needed, and we hope that adding more raisins helps too! We’re really looking forward to hearing how your next quick bread turns out! 🙂
How would you adapt this recipe for muffins?
ow would you adapt this recipe for muffins?
We really appreciate your interest in this recipe, Frederick! This recipe can be easily adapted to make muffins! It should yield 12 muffins, and we’d recommend baking them at 350°F for 20-24 minutes or until the tops feel firm and a toothpick inserted into the center comes out clean or with crumbs attached. No other changes should be needed!
I’d love to hear what you think if you decide to make some! 🙂
Thank you
Happy to help! 🙂