


Every year, I look forward to Thanksgiving more than any other day of the year, even compared to my birthday or Christmas. As the holiday where it’s perfectly acceptable—encouraged, even!—to spend all day in the kitchen cooking and baking cozy, flavorful dishes to share with loved ones, Thanksgiving creates warm fuzzy feelings in my heart and brings peace and joy to my soul.
My dad is usually the one in charge of our feast’s menu, and I volunteer as the “sous chef” to help him with whatever vegetable chopping, pot stirring, sausage browning, potato mashing, dough kneading, thermometer finding, and dish washing that he needs. Since we’re both borderline workaholics and put in 50-60 hours a week at our respective jobs, I always feel really lucky to spend that much time in the kitchen with him, doing something that we both love.

Throughout my childhood, we always made the same dishes year after year after year. Turkey cooked on the Webber, sans gravy (almost nobody in my family enjoys it!), Great-Grandma’s cranberry salad with oranges and pecans, green bean casserole with fried onions, sweet potato casserole with green apples and toasted marshmallows, Great-Grandma’s sausage stuffing with plenty of pecans and celery, Dad’s whole wheat rolls from the recipe he created in graduate school, classic mashed potatoes, Great-Grandma’s pecan pie with lots of extra nuts, and Libby’s pumpkin pie with a side of whipped cream.
Whew!

Tradition is very important to many members of our family, so it wasn’t until I reached my senior year in high school that we began tweaking the menu. We never modified or replaced any of Great-Grandma’s recipes—those were classics and the family would mutiny!—but Mom and I started out slowly by swapping sautéed green beans for the casserole, a healthier maple sweet potato casserole for the 1950’s recipe, and eventually roasted Brussels sprouts and a spinach salad for the green beans.
In college, I asked if I could play around with the pumpkin pie recipe, and my parents hesitantly agreed, under the condition that I would never tweak their favorite pecan pie. I tried a gingersnap crust, which disappeared twice as fast as the usually Libby’s recipe; adding a layer of melted dark chocolate, which everyone but one grandmother adored (we’re a family of chocoholics, after all!); and even a crustless version.
However, the one year that I suggested omitting the pumpkin pie altogether in favor of a pumpkin cheesecake, my parents immediately offered that we could have two pumpkin desserts instead. Apparently, different versions of pie were okay—but not entirely different pumpkin desserts!

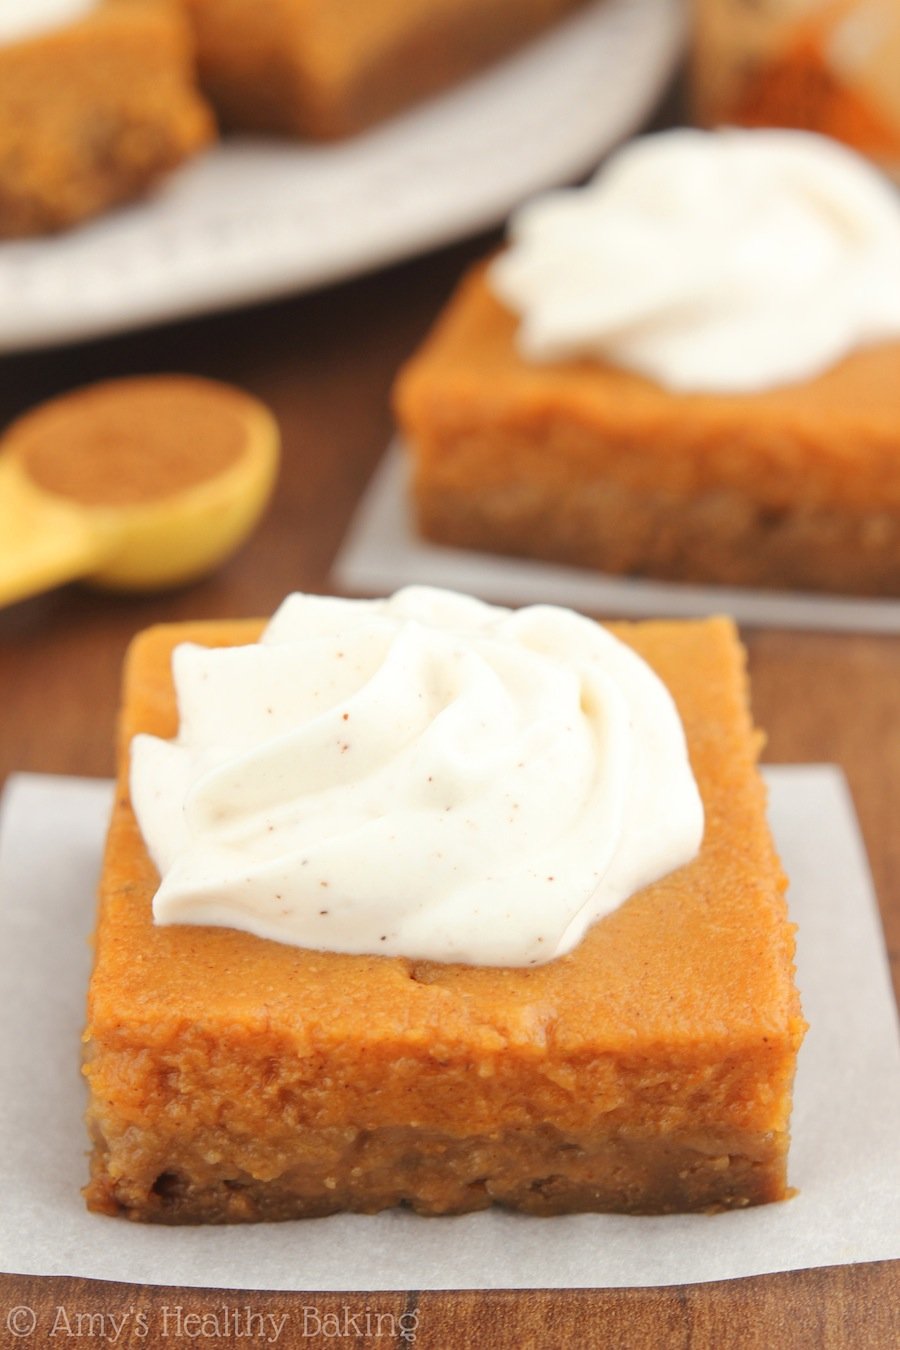
So this year when I started craving fall-flavored cheesecake, I made these Healthy Pumpkin Cheesecake Bars well in advance of Thanksgiving instead. (I already promised my parents that I’d make this insanely good pie!) But with their creamy texture and cozy spices, these cheesecake bars still made my parents think twice about their Thanksgiving desserts!
Even better? These sweet cheesecake bars are entirely clean eating friendly! No refined, artificial, or crazy stuff in these… Just good, wholesome, healthier ingredients.


HOW TO MAKE HEALTHY PUMPKIN CHEESECAKE BARS
They start with the crust. Instead of graham crackers, you’ll use brown rice cereal as the base. I know, I know… It sounds strange, but it works! Pulse the cereal into crumbs in your food processor or blender, and mix them with melted butter and milk. They actually start to smell really comforting in the bowl, before you even press the crust into the pan to bake!
Because the cereal is more absorbent than graham crackers, you’ll bake the crust for a lot longer than usual. Use your best judgment, and if the crust still feels wet to the touch, you can let it bake a little longer. Mine finished at around 20 minutes, but if you prefer a crunchier crust, leave it in the oven for a few more minutes.

The base of the cheesecake filling is a combination of Greek yogurt and Greek yogurt cream cheese. Greek yogurt cream cheese has fewer calories and more protein than regular cream cheese, but it still has the same iconic taste. I found mine at Safeway (their own Lucerne brand), and some Walmart stores carry the Greek Mountain Farms brand, too. Remember to buy the brick-style block, not the tub!
Note: If you can’t find Greek yogurt cream cheese, substitute Neufchâtel cream cheese (⅓-less fat) instead.

The cheesecake is sweetened with one of my new favorite products: liquid stevia. Stevia is a plant-based, no-calorie sweetener that’s clean eating friendly. It’s a much more concentrated sweetness compared to regular sugar, so a little goes a long way! I love this one because it has a lovely sweet flavor, and I don’t notice any strange aftertaste. I’ve found it at many health-oriented grocery stores, but it seems like it’s the cheapest online. (← That’s the best price I’ve found, and you’ll use liquid stevia in all of these recipes of mine too!!)
And of course… You can’t have pumpkin cheesecake bars without the pumpkin! You’ll need regular ol’ pumpkin purée, not pumpkin pie filling. The latter contains refined sugar, which we’re avoiding in this healthier recipe! To round out the cozy fall flavors, you’ll also mix in the best trio of spices: cinnamon, nutmeg, and ginger.
Like with regular cheesecake, you’ll bake these bars low and slow at 300°F. However, they bake much faster than traditional larger round ones, and they’re done after just 20 minutes! It’s really important to let them cool completely before covering them with plastic wrap and chilling for 3 hours. The chilling allows the bars to set, which creates the best texture, as well as gives the spice flavors time to meld.

Now who’s ready for dessert?? And when you make your own, remember to snap a picture and share it on Instagram using #amyshealthybaking and tagging @amyshealthybaking IN the photo itself! (That guarantees I’ll see your picture! 🙂 ) I’d love to see your healthy pumpkin cheesecake bars!

Healthy Pumpkin Cheesecake Bars
Ingredients
FOR THE CRUST
- 2 ½ cups (75g) brown rice cereal
- 2 tbsp (26g) Truvia
- 1 tbsp (14g) unsalted butter, melted
- 5 tbsp (75mL) nonfat milk, room temperature
FOR THE FILLING
- 1 (8oz) block Greek yogurt cream cheese, softened
- 1 cup (240g) plain nonfat Greek yogurt
- ¾ cup (183g) pumpkin purée (NOT pumpkin pie mix!)
- ¾ tsp liquid stevia
- 1 large egg white, room temperature
- 1 tsp cornstarch
- 1 tsp ground cinnamon
- ¼ tsp ground nutmeg
- ¼ tsp ground ginger
- 1 tsp vanilla extract
Instructions
- Preheat the oven to 300°F, and coat an 8”-square baking pan with nonstick cooking spray.
- To prepare the crust, add the cereal to a food processor or blender, and pulse until the cereal turns into fine crumbs. Transfer to a bowl, and stir in the Truvia. Mix in the butter and milk until all of the cereal mixture is completely incorporated. Gently press the mixture into the prepared pan. Bake at 300°F for 18-21 minutes or until it feels dry to the touch. Cool completely to room temperature.
- To prepare the filling, beat the cream cheese and Greek yogurt in a medium bowl until smooth. Mix in the pumpkin purée and stevia. Mix in the egg white, stopping when just incorporated. Mix in the cornstarch, cinnamon, nutmeg, ginger, and vanilla until just incorporated.
- Spread the filling on top of the cooled crust. Bake at 300°F for 18-22 minutes or until the center barely jiggles when the pan is gently shaken. Cool completely to room temperature in the pan before covering with plastic wrap, ensuring that the plastic wrap completely touches the tops of the cheesecake bars. Chill for at least 3 hours before slicing and serving.
Notes
View Nutrition Information + Weight Watchers Points


I am fascinated by the crust you came up with and love your creativity!! Can’t wait to give it a try!
You’re just the sweetest, Jane!! That truly means a lot, especially coming from you! ♡ It’s such a fun and easy way to make a naturally gluten-free cheesecake crust. Much easier than hunting down gluten-free graham crackers — although I’m sure you’re a pro at that! 😉