
Last weekend, I noticed a few binders on the top shelf in my closet at my parents’ house. After joking with a friend about how microscopically tiny I wrote for my college cheat sheets that my chemistry and physics professors allowed us to bring into exams (most people would need a magnifying glass to read them!), I thought it’d be fun to find one and send her a picture.
But as I stood on my tiptoes to grab the second binder (I’m only 5’2” and that shelf was basically out of arm’s reach!), the rest of the things surrounding it toppled down, including two college physics textbooks, a humongous landscape architecture textbook (that class satisfied my liberal arts requirement!), two spiral notebooks, and that binder.

Their fall slowed as they hit heavy winter jackets hanging on the closet rod, and somehow, I miraculously caught all of them before they fell any further. I actually laughed a little as I carried everything over to the bed… I would’ve struggled to lug that stack across the room a year ago, but after increasing my strength-based workouts, I wasn’t even winded!
Since the two binders originally sat next to my college textbooks, I fully expected to find physics and organic chemistry notes inside… But instead, as I flipped open the first, I discovered my high school photography class notes, black and white strips of film, and photographs I developed in the darkroom. I smiled as I flipped through the sheets, marveling at how far my photography skills have come.

When I picked up the second binder, I almost forgot to peer inside. I saw a sheet of white paper slipped behind the plastic covering on the front, its contents even more special to me than the entire photography binder: the high school varsity baseball schedule from my junior year, each home game highlighted in bright yellow.
During all four years of high school, I announced those home games. Sitting in a small shed directly behind home plate with pink carbon copies of each team’s lineup, I quickly learned to speak from my diaphragm and drop my voice an octave or two whenever I picked up the microphone to broadcast, “Now batting, right fielder, number 55…” for a fuller, richer sound.
Aside from marching band, announcing those baseball games were my favorite memories from high school!

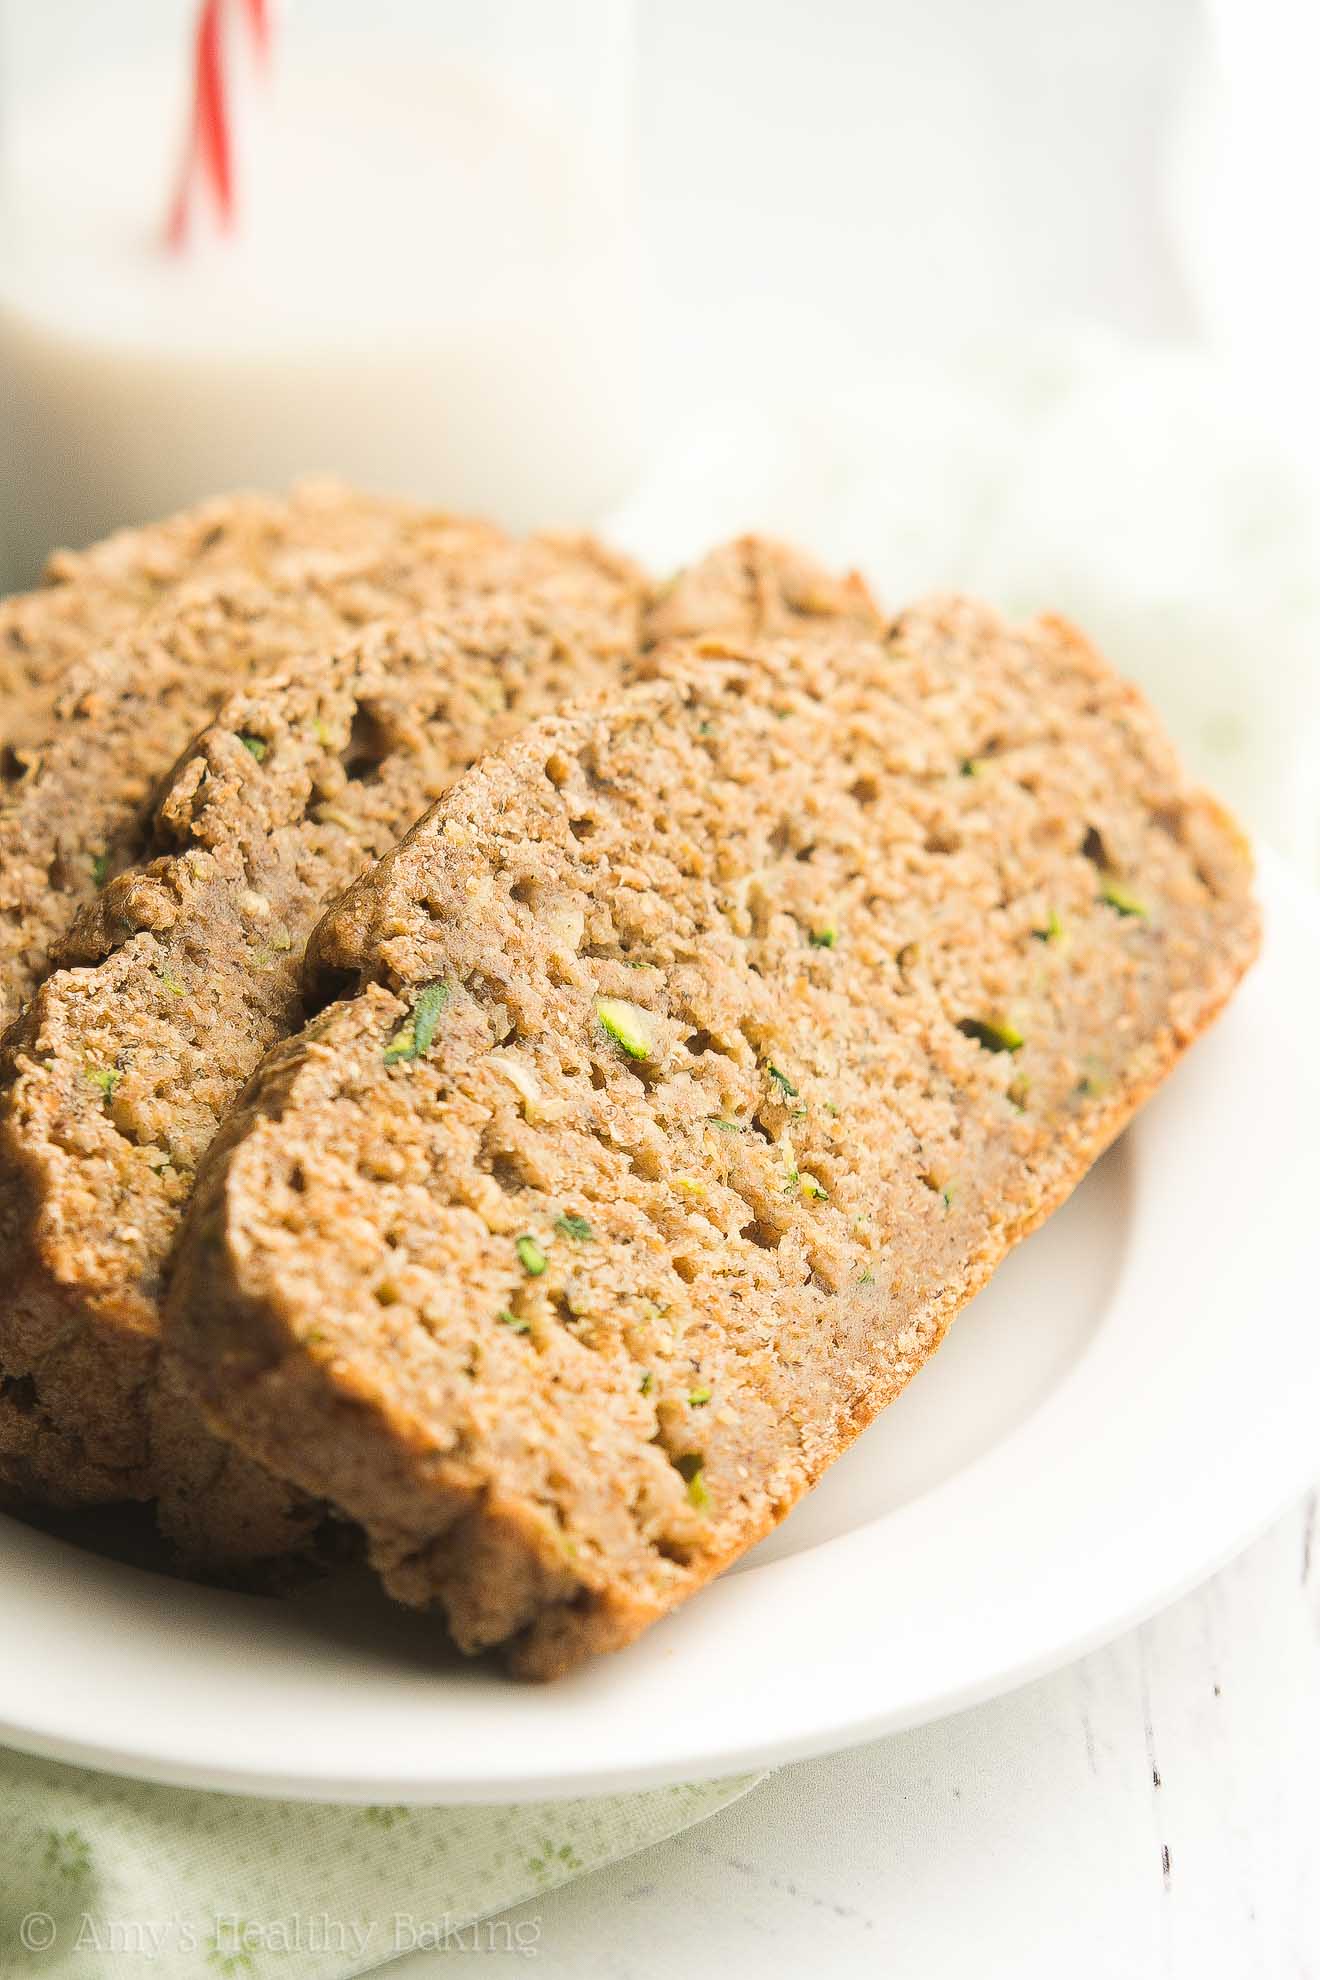
With recollections from those days on my mind for the rest of the weekend, I decided to bake one of my favorite high school treats—but with a vegetable twist! When this Healthy Zucchini Banana Bread finally cooled enough to slice, I couldn’t resist carving myself a second piece… It’s full of sweet fruit flavor and lots of cozy cinnamon, but it contains no butter, refined flour or sugar and only 106 calories!

To start, you’ll need whole wheat flour (or gluten-free, if you prefer!). Just regular ol’ whole wheat flour! This is the kind I use because it allows my baked goods to rise a little higher than other brands. You’ll also mix in lots of cinnamon and a hint of nutmeg, two of my favorite zucchini bread spices. (I suppose you could consider this recipe a hybrid of my two favorite quick breads: banana and zucchini!) The nutmeg gives it a special rich depth, so don’t skip it!
Because this healthy loaf only contains 1 tablespoon of coconut oil, the rest of its tender texture comes from mashed banana and Greek yogurt. If you’ve been around my blog for a while, you’ll know how much I love Greek yogurt! It adds the same moisture as extra butter or oil for a fraction of the calories, and it gives your baked treats a protein boost, too.
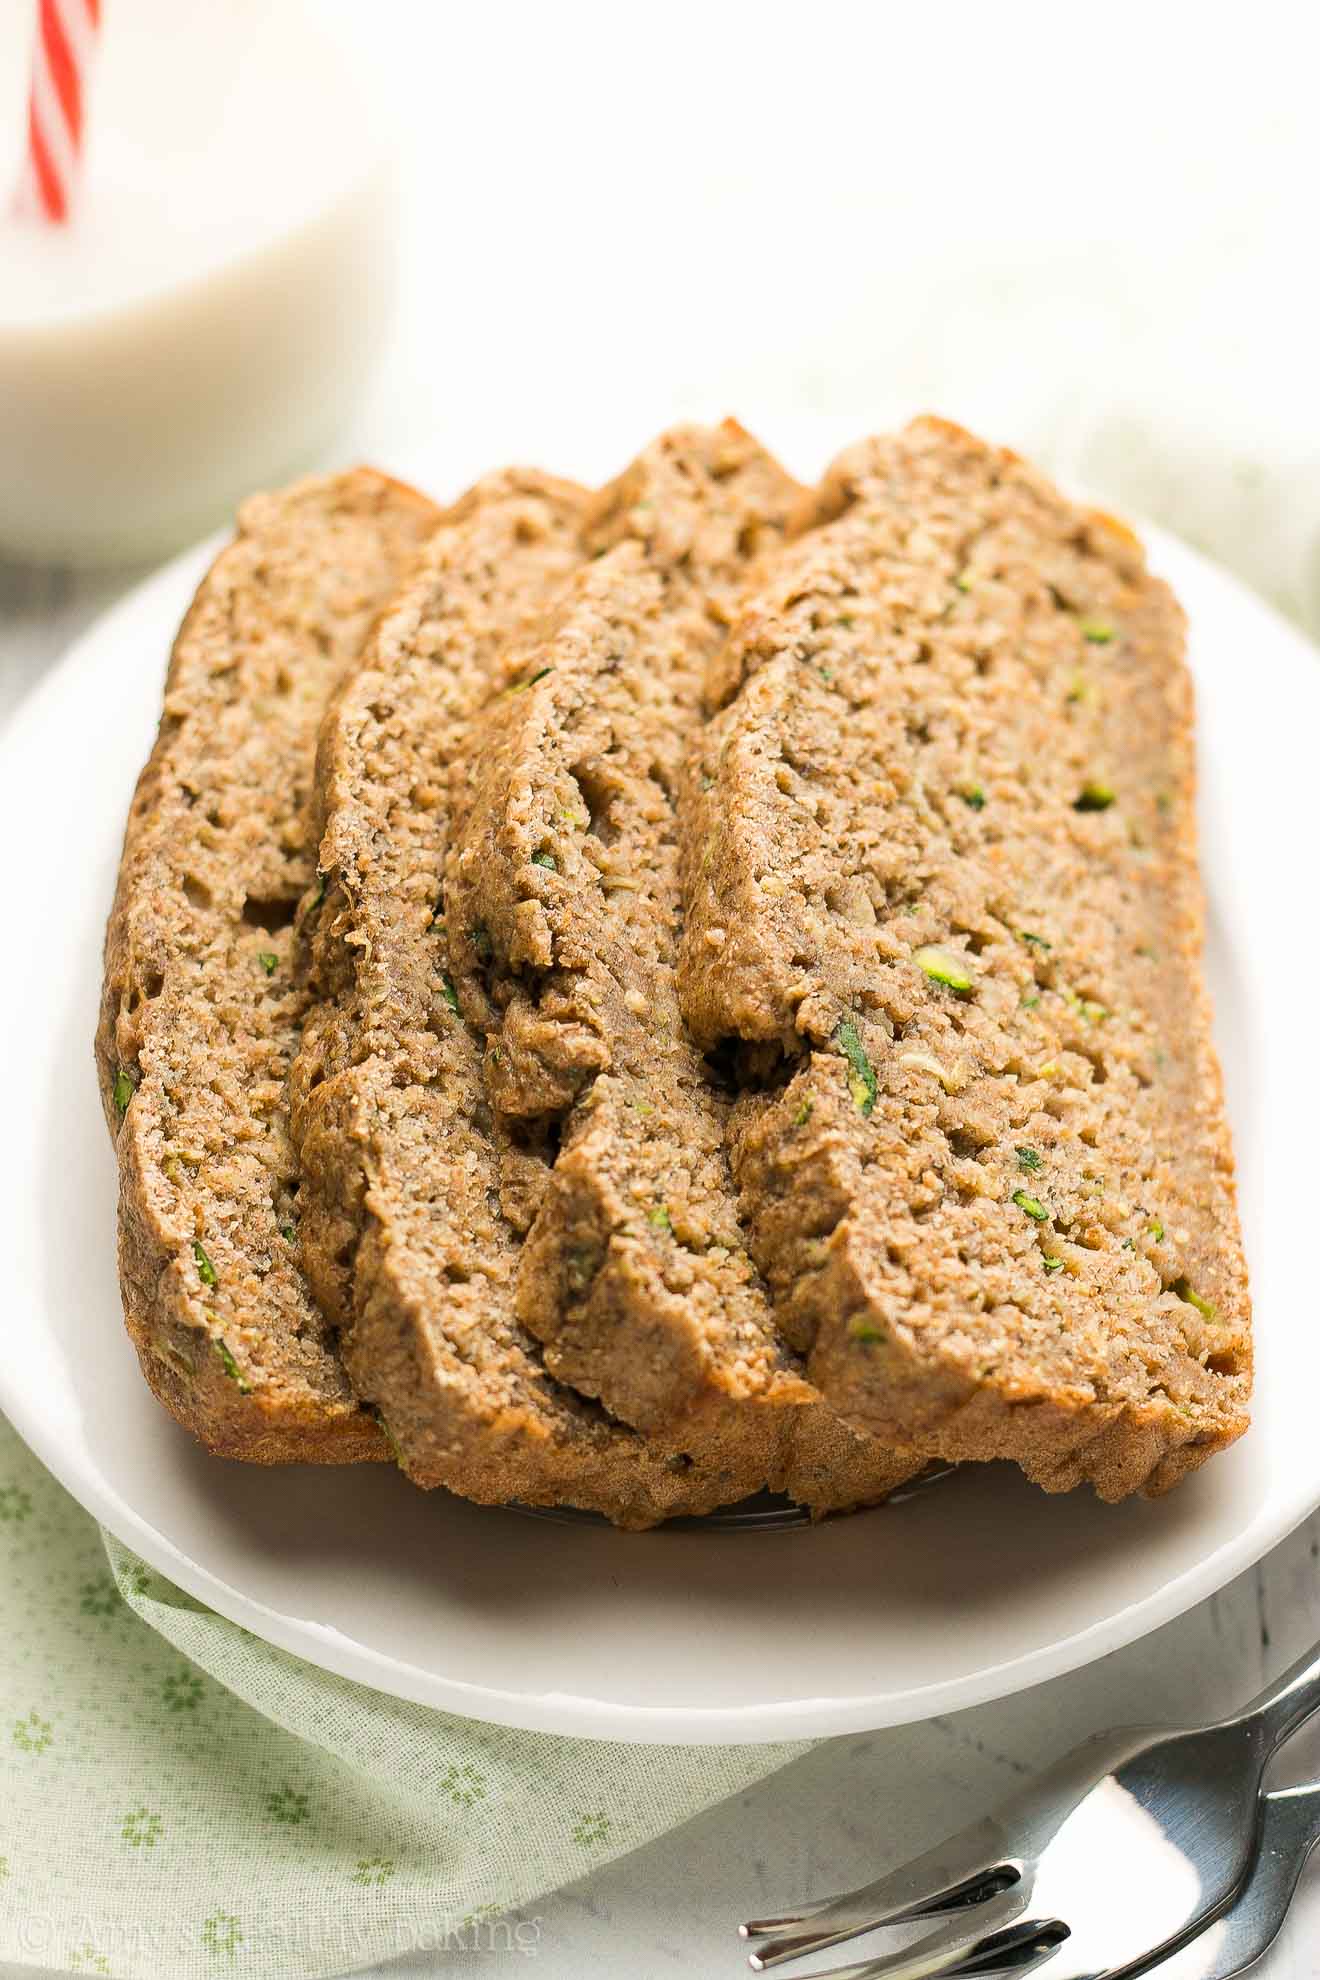
As for the bananas, pick the ripest, spottiest ones you can find. And if you have ones that are more brown than yellow, those are the best kind! Those overly speckled bananas contain more natural sweetness than the pure yellow ones, so you’ll only need to add a couple tablespoons of honey to the batter.
Before mixing the zucchini into the batter, I have a special trick for you… Thoroughly pat the freshly grated zucchini with paper towels to soak up the extra moisture! Too much moisture will cause your loaf to collapse while cooling, so removing that water allows you to add lots of zucchini (and healthy nutrients!) while still getting a nice, tall quick bread.
Hello healthy breakfast! And snack… And maybe even dessert… 😉 And when you make your own, remember to snap a picture and share it on Instagram using #amyshealthybaking and tagging @amyshealthybaking IN the photo itself! (That guarantees I’ll see your picture! 🙂 ) I’d love to see your healthy zucchini banana bread!

Healthy Zucchini Banana Bread
Ingredients
- 2 cups (240g) whole wheat flour or gluten-free* flour (measured like this)
- 1 tsp baking powder
- ½ tsp baking soda
- 1 ½ tsp ground cinnamon
- ¼ tsp ground nutmeg
- ¼ tsp salt
- ½ tbsp (7g) unsalted butter or coconut oil, melted and cooled slightly
- 2 large egg whites, room temperature
- 1 ½ tsp vanilla extract
- ¼ cup (60g) plain nonfat Greek yogurt
- ¾ cup (200g) mashed banana (about 2 medium – and see Notes!)
- 2 tbsp (30mL) honey
- ¼ cup (60mL) nonfat milk
- 1 ½ cups (160g) freshly grated zucchini, patted dry (see Notes!)
Instructions
- Preheat the oven to 350°F. Line a 9x5” baking pan with foil, and lightly coat with nonstick cooking spray.
- In a medium bowl, whisk together the flour, baking powder, baking soda, cinnamon, nutmeg, and salt. In a separate bowl, whisk together the butter, eggs, and vanilla. Mix in the mashed Greek yogurt, stirring until no large lumps remain. Mix in the mashed banana and honey. Alternate between adding the flour mixture and milk, beginning and ending with the flour mixture, and stirring just until incorporated. (For best results, add the flour mixture in 3 equal parts.) Fold in the zucchini.
- Spread the batter into the prepared pan. Bake at 350°F for 45-50 minutes or until a toothpick inserted into the center comes out clean. Cool in the pan for 10 minutes before carefully lifting out the loaf by the foil and transferring to a wire rack to cool completely.
Notes
View Nutrition Information + Weight Watchers Points
You may also like Amy’s other recipes…
♡ Healthy Blueberry Buttermilk Banana Bread
♡ Healthy Chocolate Chip Zucchini Bread
♡ Healthy Strawberry Blueberry Banana Bread
♡ Healthy Chocolate Drizzled Raspberry Banana Bread
♡ Healthy Strawberry Buttermilk Banana Bread
♡ Healthy Chocolate Chip Zucchini Bread Oatmeal Cookies
♡ Healthy Chocolate Chip Zucchini Mini Muffins
♡ Healthy Zucchini Bread Protein Muffins


I’ll probably make this again, because it’s healthy, and our 6-year-old at it happily. Our 2-year-old wasn’t as big a fan. It tasted as expected — like a healthier version of zucchini bread. The more ripe and sweet the bananas you use, the better. I used 2 pretty-ripe bananas and would have like more flavor, maybe will see how it comes out with some berries in the mix. Also to make it easier, I used 2 eggs without separating the whites, and I thought the consistency was fine. Thanks for the lower-sugar recipe.
I’m glad you and your 6-year-old enjoyed this banana bread, Norah! It’s very true about the ripeness of the bananas making a difference. You can easily substitute more maple syrup for an equal amount of milk, if you prefer sweeter banana bread! 🙂
Have you ever made these as muffins instead of a loaf? Just thinking of baking and freezing, which would make for easier portioning. Sound delicious…can’t wait to try!
You can definitely turn this recipe into 12 muffins instead! Bake them at the same temperature, and begin checking after about 16 minutes. They may take more time, but it’s easier to bake them longer than the other way around! 😉 I can’t wait to hear how your muffins turn out Meredith!
Can I use 2 whole egg by reducing milk?
How long in a mini loaf pan?
I’m honored that you’d like to try my recipe, Chiharu! Yes, you can use 2 whole eggs. Just reduce the milk by 1 tablespoon to compensate for the added liquid volume! I haven’t tried making this exact recipe in mini loaf pans, but since I’ve done that with another one of my banana bread recipes, I’m sure it should work. If you divide the batter between 4 mini loaf pans, bake them at 350°F, and start checking for doneness around 20 minutes. They may take longer, up to another 5-8 minutes, but it’s much easier to put underdone loaves back in the oven than it is to salvage burnt ones! 😉 They’ll be done when the tops feel firm to the touch and a toothpick inserted into the center comes out clean or with a few crumbs attached.
I can’t wait to hear what you think of this banana bread!
Thank you so much for giving me a detailed instructions!
I want to figure out how to incorporate chickpea flour into baking goods so far not good. What do you think swap a bit of portion of flour to chickpea flour?
It’s my pleasure, Chiharu! I’m happy to help. 🙂 I’m actually not a huge fan of the flavor of chickpea flour, so I rarely bake with it (and often try to avoid it!). Is there a particular reason that you’d like to incorporate it into more of your baked goods? For example, for added protein or something similar?
Yes, I have a 3y son and I want to use nutrient rich flour.
But I found following the recipe is the best results.
Your son is so lucky to have you, Chiharu! If your main goal is added protein, then oat flour would actually be a better option for most baking recipes. (I love that it doesn’t have a bean-like flavor!) I’ve done a side-by-side comparison of the nutrition information of oat flour and chickpea flour before. In 1 cup of each, oat flour has about 21g of protein, whereas chickpea flour has about 24g of protein (whereas whole wheat flour has about 16g of protein). So it really isn’t that much of a difference, unless you happen to have a special type of chickpea flour with a super high protein content.
However, the thing to keep in mind is that gluten is the protein in wheat-based flours that helps baked goods rise and maintain their shape while cooling. Oat flour and chickpea flour both lack that, so when you substitute them for wheat-based flours in my recipes that rise (like cupcakes, cakes, muffins, quick breads, this banana bread, etc!), your baked goods will often turn out denser and may collapse while cooling.
However, if you don’t mind that texture difference with oat flour or chickpea flour (where your baked goods may collapse and turn out denser), the flavors will still remain the same. 🙂 Does all of that make sense?
Oh I understand! Thank you for the details!!
Texture and taste comes first for toddlers so I will stick to the recipe from now on.
You’re welcome, Chiharu! I’m always happy to help! 🙂 If you’d like to substitute oat flour or chickpea flour in my recipes that don’t rise (like cookies and brownies!), that should be fine. You shouldn’t notice a difference in their texture or flavor, especially if you use oat flour!
I can’t wait to hear what you and your toddler think of this banana bread — or any of my other recipes you decide to try!
Can you use frozen bananas?
I really appreciate your interest in my recipe, Alyce! I haven’t personally tried using frozen bananas, so I’m not sure and don’t want to lead you astray.
If you do end up making this banana bread, I’d love to hear what you think of it!
This recipe looks amazing!
Is there a dairy free alternative to the Greek yoghurt this recipe calls for?
I really appreciate your interest in my recipe, Jay! Non-dairy yogurt (such as soy-based, almond-based, coconut-based, etc!) works really well in place of the Greek yogurt in this recipe. 🙂
I’d love to hear what you think of this banana bread if you try making it!
I used 2 frozen bananas but found the flavor lacking for this bread. Even with the addition of chocolate chips it quite bland. Would not make it again,
It means a lot that you tried our recipe, LouAnn! That sounds disappointing and not like how this bread is supposed to turn out, so we’d love to work with you to figure out what happened. In order to do so, I have some questions for you!
Was the texture fine, and it was just the flavor that was lacking?
Could you describe the flavor a bit more? That would help us isolate the issue! Was it not sweet enough, was the banana flavor too faint, or were you unable to taste the spices? Something else?
Did you make any substitutions or modifications to the recipe, including those listed in the Notes section? (Other than using frozen bananas!)
Did you use a kitchen scale or measuring cups/spoons for all of the ingredients — especially the flour and honey?
Did you measure the bananas by cups or grams?
How ripe were your bananas prior to freezing? Were they purely brown, like we recommended in the Notes section?
How did you thaw them? (This can affect how much moisture goes into the batter, which can also influence the flavor. That’s why we ask!)
How long did you bake your banana bread? Did it collapse while cooling?
We’d love to help, and we’ll have a much better idea of the potential culprit once we know your answers to all of these questions!