
Shortly after graduating from college, I lived in a small house in a cute little neighborhood not too far from campus. Most of my neighbors in the surrounding homes were couples with at least one or two kids, which made me happy… There were always plenty of people willing to gobble up the dozens and dozens of treats I baked for my blog!
Yet most of the time, I usually ended up stopping by the house directly to the left of mine. Their two adorable children, a boy about four and a girl about seven, always waved at me in the street when I walked my dog and frequently invited me over to play. Their big smiles and sweet hugs melted my heart every time!
A week or two after the holidays, the little girl mentioned that her birthday fell towards the end of January, and her mom was letting her invite a few friends over for a party during the last weekend of the month. I knelt down to give her a pre-birthday hug, and I quickly asked about her favorite cake flavor.

“Chocolate!!” she exclaimed, her eyes bright and shining. “Chocolate, with chocolate frosting!”
I laughed at that… She sounded just like me — a true chocoholic!
So the week after her birthday, I baked a special batch of supremely rich chocolate cupcakes topped with decadent fudgy chocolate frosting. As a little kid, I remembered feeling slightly disappointed when all of my leftover cake had disappeared after my birthday party… So I thought the adorable girl might appreciate extending her birthday magic for another day or two as well!

When I knocked on their door to deliver the treats and wish her happy birthday again, her brother immediately asked, “Will you make me cupcakes for my birthday in September too??”
I laughed and nodded, then inquired about his favorite cake flavor.
“Red!” he shouted. “It’s my favorite color!”
My smile widened at his response. Although not technically a cake flavor, red was my brother’s favorite color as a kid too… And, given the chance, I bet he would’ve requested the same thing!

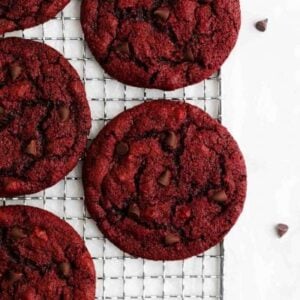
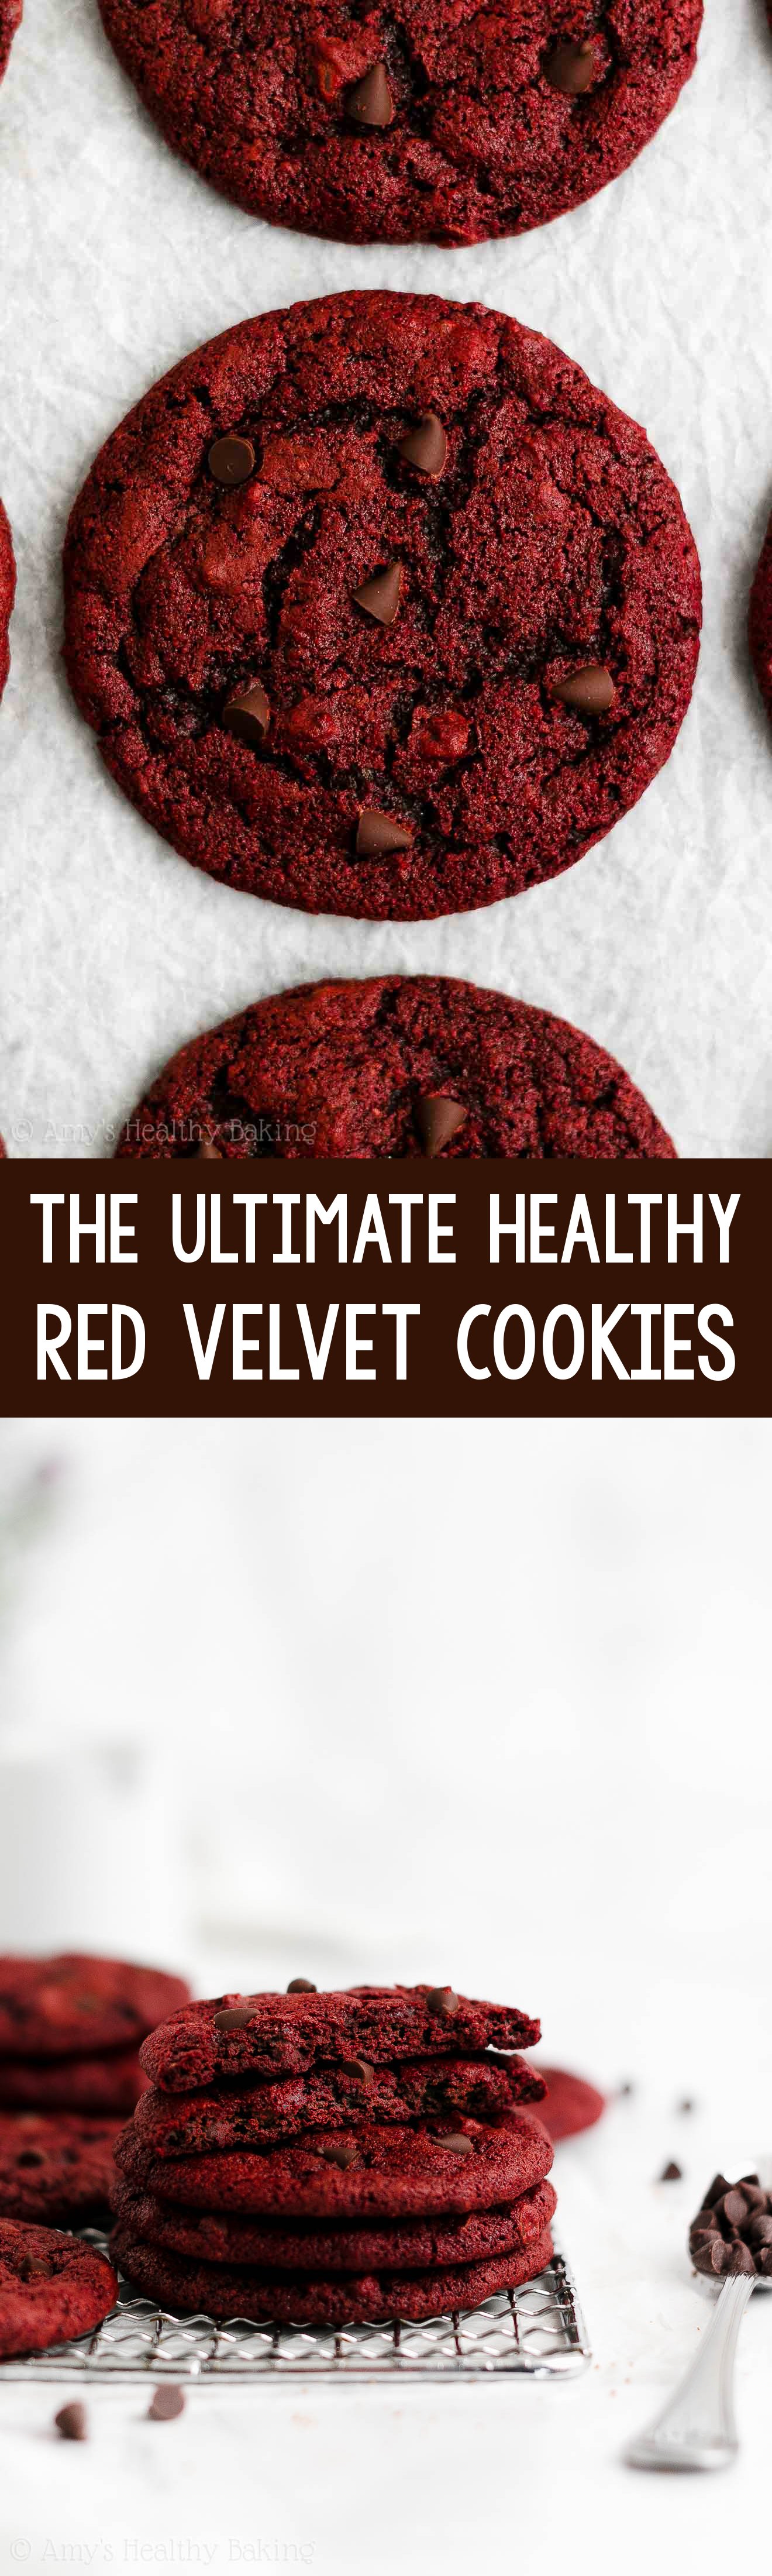
So even now, many years later, I always think of that little boy whenever I bake any red velvet treats… Including these Healthy Red Velvet Chocolate Chip Cookies!
They’re supremely soft and chewy with the perfect iconic red velvet cake flavor and plenty of rich chocolate morsels liberally sprinkled throughout. This recipe is also really simple to make (no mixer required — just bowls and a fork!), and even with no eggs, dairy, refined flour or sugar… These are the BEST red velvet cookies I’ve ever eaten — and they’re 92 calories too!

WHAT IS RED VELVET CAKE?
I’m really excited to show you how to make these healthy eggless and dairy-free red velvet chocolate chip cookies! But first… Let’s cover a super quick history lesson about red velvet cake!
Red velvet cakes gained popularity in the early 20th century during the Great Depression and World War eras. With ingredients so expensive and hard to come by, bakers got creative in the kitchen when making cakes.
To ensure they turned out really moist and velvety in texture, bakers often used two tricks: {a} adding something else to the flour (like cornstarch or cocoa powder!) to prevent the flour from forming long gluten strands (aka to prevent a tough and gummy texture!) and {b} adding acid (like vinegar!) to the cake batter to react with the baking soda, which created air bubbles, made the cakes rise, and gave them a more tender texture.

Back then, cocoa powder had a different acidity level than it does today. When it was added to the cake batter, the cocoa powder actually reacted along with the vinegar and baking soda… Which resulted in the iconic red color (and chocolaty vanilla flavor!) of red velvet cake!
However, with modern cocoa powder’s different acidity level, cocoa powder doesn’t dye cake batter red anymore… So bakers today generally depend on food coloring for that gorgeous bright red hue!
Now with that out of the way…

HOW TO MAKE THE BEST RED VELVET CHOCOLATE CHIP COOKIES
Let’s go over how to make the best healthy eggless and dairy-free red velvet chocolate chip cookies!
Just like with my ultimate healthy red velvet cupcakes, you’ll start with a combination of white whole wheat flour and cocoa powder. White whole wheat flour is not a blend of white (aka all-purpose) flour and regular whole wheat flour! Instead, it’s made by finely grinding a special type of soft white wheat (hence the name!), whereas regular whole wheat flour comes from a heartier variety of red wheat. They both have the same health benefits (like extra fiber!), but white whole wheat flour has a lighter taste and texture… Which lets the soft and chewy texture of your healthy eggless and dairy-free red velvet chocolate chip cookies really shine!
Use the regular kind of cocoa powder, like this! Dutched and “special dark” cocoa powders have a different acidity level compared to regular unsweetened cocoa powder, and that can affect the taste and texture (not just appearance!) of your cookies. For the best healthy red velvet chocolate chip cookies, I definitely recommend using regular unsweetened cocoa powder!

To me, red velvet cake tastes like chocolaty vanilla. It’s not chocolate, it’s not vanilla… It’s the perfect marriage of the two — aka chocolaty vanilla! 😉 Therefore, the ratio of cocoa powder to flour makes a HUGE difference in how amazing (or not) red velvet treats taste.
It seems like many recipes call for just 1 or 2 tablespoons of cocoa powder for every 2 or 3 cups of flour… Which tastes so disappointing. You can’t really detect the chocolaty part of the iconic red velvet chocolaty vanilla flavor with that little cocoa powder!
So for the best ever red velvet cookies (and cupcakes!), I use a much higher ratio of cocoa powder to flour. In these cookies, you’ll use 3 tablespoons of cocoa powder and just over ¾ cup of flour. True red velvet perfection!
Just remember, it’s extremely important to measure the flour and cocoa powder correctly, using this method or a kitchen scale. (← That’s the one I own!) Too much of either will dry out your cookie dough, meaning your cookies will taste cakey and won’t spread while baking. Too much cocoa powder can also make your treats taste bitter. So for the best ever healthy eggless and dairy-free red velvet cookies, take the few extra moments to measure your ingredients properly — I promise they’re worth it!

Following red velvet cake tradition, you’ll whisk a little baking soda into your mixing bowl too. Just a teensy bit… We don’t want the cookies to rise really high like a cake! You’ll add just enough to give these healthy red velvet chocolate chip cookies the perfect soft and chewy texture.
Unlike many red velvet cookie recipes that call for softened butter, you’ll actually use melted butter (or coconut oil, to keep them dairy-free!) in this recipe. I love using melted butter for two reasons: {a} it makes your healthy red velvet chocolate chip cookies softer and chewier and {b} it’s much faster (and easier!) than waiting for butter or coconut oil to soften.
However, you only need a small amount… A mere 1 ½ tablespoons. That really helps keep your healthy eggless and dairy-free red velvet chocolate chip cookies low calorie and low fat! Then I have a special trick that makes your cookies taste just as rich and buttery as classic butter-laden recipes…

Extra vanilla extract! Vanilla extract enhances butter’s rich flavor, so by adding a bit more than in traditional recipes, your healthy red velvet chocolate chip cookies taste just as rich and indulgent… For far fewer calories! Such a fun trick, right??
In place of eggs, you’ll use a bit of milk! Any kind will work: nonfat, whole, almond, cashew, soy, rice… You name it! Just make sure that your milk is at room temperature. Cold milk will immediately resolidify your melted butter or coconut oil!
You’ll sweeten your healthy red velvet chocolate chip cookies with coconut sugar. Coconut sugar is exactly what it sounds like: an unrefined sweetener that comes from coconuts. However, it does not actually taste like coconuts! It has a rich caramel-like flavor, similar to brown sugar, which makes these cookies taste absolutely incredible!

To give these cookies their gorgeous red color, I ended up using food coloring. I couldn’t get any “natural” food coloring or other options (like beets or pomegranates) to look nearly as red… They all ended up looking brown or slightly mahogany in color. Not very pretty at all! But if you’re staunchly against red food coloring, you’re welcome to try one of those “natural” options — or just replace the food coloring with water!
Oh! And before I forget… You’ll skip the vinegar that’s classically found in red velvet cake. The vinegar would react a bit too much with the baking soda, which would make your cookies cakey, rather than chewy. (And that’s one less ingredient to worry about, too!)
Finally… You need mini chocolate chips! I love these (and these for a dairy-free and vegan version!) because they taste so rich, they turn deliciously gooey and melty in the oven, and their small size ensures that every bite of these healthy red velvet cookies contains at least one morsel of chocolate (if not more!).

When you first mix together the cookie dough, it should be fairly wet. Therefore, chilling is mandatory! Chilling helps stiffen the cookie dough so it doesn’t spread into one massive cookie blob on your baking sheet.
Even after chilling, the cookie dough will still be a bit sticky. That’s a good thing! If your cookie dough is sticky, then you’ll get the best soft and chewy healthy red velvet chocolate chip cookies imaginable. So do NOT use your hands to roll it into balls!

And because people always ask… I don’t use a cookie scoop! I just use a spoon and this mini spatula to drop the cookie dough onto the baking sheet, and then I use that same spatula to shape it into roundish domes. Nothing fancy here — just a little bit of patience!
Then press a few more mini chocolate chips into the tops of your cookie dough, slide your baking sheet into the oven, pour yourself a glass of milk, and…

Enjoy your delicious homemade treats! And when you make your own, remember to snap a picture and share it on Instagram using #amyshealthybaking and tagging @amyshealthybaking IN the photo itself! (That guarantees I’ll see your picture! 🙂 ) I’d love to see your healthy vegan red velvet chocolate chip cookies!
Healthy Red Velvet Chocolate Chip Cookies
Ingredients
- ¾ cup + 1 tbsp (97g) white whole wheat flour or gluten-free* flour (measured like this)
- 3 tbsp (15g) unsweetened cocoa powder (measured like this)
- ½ tsp baking soda
- ⅛ tsp salt
- 1 ½ tbsp (21g) coconut oil or unsalted butter, melted and cooled slightly
- 2 tbsp + 2 tsp (40mL) unsweetened vanilla almond milk, room temperature
- 2 ½ tsp liquid red food coloring (see Notes!)
- 2 tsp vanilla extract
- ½ cup (96g) coconut sugar
- 3 tbsp (42g) miniature chocolate chips, divided
Instructions
- Whisk together the flour, cocoa powder, baking soda, and salt in a medium bowl. In a separate bowl, whisk together the coconut oil or butter, milk, red food coloring, and vanilla extract. Stir in the coconut sugar. Add in the flour mixture, stirring just until incorporated. Fold in 2 ½ tablespoons of miniature chocolate chips. Chill the cookie dough for 30 minutes.
- Preheat the oven to 350°F, and line a baking sheet with a silicone baking mat or parchment paper.
- Drop the cookie dough into 12 rounded scoops onto the prepared sheet using a spoon and spatula. Gently press the remaining miniature chocolate chips into the tops. Bake at 350°F for 9-12 minutes. Cool on the pan for 10 minutes before transferring to a wire rack.
Notes
View Nutrition Information + Weight Watchers Points
You may also like Amy’s other recipes…
♡ Healthy Red Velvet Cookie Bars with Cream Cheese Frosting
♡ The Ultimate Healthy Red Velvet Cupcakes
♡ Healthy Red Velvet Pancakes
♡ Healthier White Chocolate Red Velvet Cookies
♡ Healthier Baked Red Velvet Donuts
♡ The Ultimate Healthy Soft & Chewy Egg-Free Chocolate Chip Cookies
♡ …and the rest of Amy’s healthy cookie recipes!

Recipe looks delicious. How may I substitute regular food coloring drops for the food coloring you have recommended? Are there any other sugars to try instead of the coconut sugar? Thank you!
I really appreciate your interest in my recipe Sharon! I used regular food coloring, just like the drops, but because you need so much, those little squeeze bottles aren’t nearly enough. Then I’ve actually covered your second question in the Notes section of the recipe (located directly underneath the Instructions). I know it can be easy to miss! 😉 I’d love to hear what you think of these cookies if you try making them!
Recipe says preheat at 350 then bake at 325???
I made this recipe twice and the cookies do not spread like you show in this blog. I weighed the flour and cocoa powder on the second batch to see if it would help and no luck.I am stumped, I’m beginning to think the 30 minutes in the fridge is causing the batter to be stiff and there is not enough butter in the recipe to melt in the oven giving the spread as it does in a normal cookie recipe.
I’m so honored that you’ve already tried baking these cookies twice Tony — that really means a lot! Thanks for catching the temperature typo. All fixed! 🙂 That’s incredibly strange that your cookies didn’t spread at all, so I’d love to help you solve the mystery! Did you make any modifications to the recipe, including those listed in the Notes section? Did you use the full amount of coconut oil (or butter) and milk, and did you use measuring spoons or a kitchen scale to measure the milk? Did you use the full amount of red food coloring as well?
I know I just asked a LOT of questions, but I’ll have a much better idea of the culprit once I know your answers to all of them! 🙂
I used a scale for the flour and cocoa. I used all purpose flour. I used a little over a tbl of butter and half tbl of applesauce. I used all the milk using measuring spoon and all the dye using measuring sppon. I only used 2 tbl of mini chips as well
other than this everything else the same.
I forget to add I used a brown sugar blend instead of coconut sugar maybe not enough sugar.
I tried another batch and used 1/4 cup truvia baking blend plus 1 tbl sugar and only 1 tbl mini chips and everything else the same and weighed everything and although they spread a little they still did not flatten. They came out cakelike.
Thank you for sharing all of this information Tony! It’s super helpful — and we’ve found the culprit! Truvia’s baking blend does not absorb liquid the same as brown sugar or coconut sugar. Because of this, when it’s substituted in my cookie recipes, the mixture is much drier compared to the originals. If you used less sweetener, that would’ve also contributed to the dryness. Substituting applesauce also creates a cakey texture. Add those three things together — using some applesauce in place of the butter, Truvia’s different absorbency, and using less of the Truvia as well — and that’s exactly why your cookies were so cakey and didn’t spread. 🙂
If you follow the recipe exactly as written, without any substitutions or modifications (like decreasing the sweetener!), these cookies will turn out very soft and chewy, and they’ll definitely spread while baking!
Made these yesterday since I found out I’m egg and gluten intolerant and they turned out great! Hard to limit myself to one 🙂
I’m so glad you enjoyed these cookies Jacquie! That’s the best kind of compliment if it was hard to stop after just one! 😉 Thank you so much for taking the time to let me know!
Just made these cookies. They did not end up looking like the pictures because they didn’t spread. Followed ingredients too. Anyways still a healthy treat nevertheless!
I’m honored that you tried making my recipe! That sounds disappointing and not like how these cookies should turn out at all, so I’d love to help figure out what happened. 🙂 Did you make any modifications to the recipe, including those listed in the Notes section? How did you measure the cocoa powder and flour — with a kitchen scale or measuring cups? If the latter, can you describe how you used them to measure? How long did you chill the dough?
I know I just asked a lot of questions, but once I know your answers to all of them, I’ll have a much better idea of the culprit!
I tried this today and the cookies turned out AMAZING.
Thank you so much! 🙂
I’m so glad you enjoyed these cookies Estelle! Thank you for taking the time to let me know — that truly means a lot! 🙂
Hi Amy!
I am glad to find your website during this time. I plan to make your cookies since it really looks delicious; however, I found out that we do not have coconut oil and the butter we have is not non-dairy. Unfortunately, I cannot use the butter because my sister is on vegan diet so I was thinking if I can substitute a normal oil like canola or vegetable oil? Due to the crisis, we are limited to go out but we are really craving some cookies, I am beginner in baking so I’m really not sure. Hope you can help. Thank you!
I’m so honored that you’d like to try making these cookies, Angel! Your sister is SO lucky to have you too. You’re incredibly kind to bake treats she can enjoy too! 🙂 Typically, I’d recommend against using canola or vegetable oil in cookies. This is because butter, coconut oil, and vegan butter (the “fat source”) are all solids at room temperature and after chilling. So chilling this cookie dough re-solidifies the fat source, and that fat source then melts again when you put the cookie dough in the hot oven, which creates tender little pockets in the cookies.
Since canola and vegetable oil are liquids both at room temperature and even after being chilled, you won’t necessarily get the same texture. However… I know it’s not always easy (or a good thing!) to go out and buy more ingredients during the crisis right now, so as long as you keep that little texture difference in mind, I think it’s worth trying! Does all of that make sense? 🙂
I’d love to hear what you and your sister think of these cookies if you try baking them!
Cookies taste very good and chocolatey, but this recipe barely made 11 tiny cookies that didn’t spread at all. I followed the recipe to a T. This also means that each bite sized cookie was over 100 calories and cannot boast low-calorie or diet friendly.
I’m honored that you tried my recipe Sam! If they didn’t spread at all, that doesn’t sound like how these cookies are supposed to turn out, so I’d love to help you solve those issues. 🙂 Did you use any of the modifications or substitutions in the Notes section of the recipe? Did you use a kitchen scale or measuring cups for the flour and cocoa powder? If the latter, can you describe how you used them to measure? Did you use the full amount of coconut sugar, milk, and food coloring? How long did you chill the cookie dough?
I know I just asked a LOT of questions, but once I know your answers to all of them, I should have a much better idea of the culprit and how to fix it! 🙂