
THE BIG BLOG NEWS
In December of 2013, my family and I hustled through the hospital doors to visit my grandparents at Christmas. My grandma had entered the ER in the beginning of October, and various post-surgery complications prevented her from healing and going home sooner. Between the nurses’ rounds and doctor’s appointments, I cheered Grandma through her PT sessions, listened to “Law and Order” with Grandpa during another one of her operations, and played Tour Guide in the backseat when we checked her out of the hospital to look at Christmas lights.
On the plane flight home a few days later, squashed in between my mom and brother, I reflected on the weighty subjects of life and love. After 55+ years of marriage, my grandparents still rose each day with the same passion for each other and their various hobbies, and I contemplated how I wanted to replicate that in my own life.
As I meditated, a tiny seed transplanted itself from my heart into my head. I sensed that blogging was the right path, but as the idea continued to blossom, I realized my name no longer fit.

I first started blogging as Foods for the Soul in October of 2010. Before writing my very first post, my younger brother had to patiently explain the difference between a blog and a website, as well as walk me — a completely computer-challenged person — through the process of setting one up. I initially treated it as a hobby and a way to stretch myself outside of my comfort zone. I started creating new dishes instead of sticking to my weekly pasta and sandwich routine, snapping pictures in my tiny apartment kitchen and posting my humble recipes afterward.
As motivation to continue blogging, I challenged myself to cook my way through the alphabet. Each week, I cooked a new dish that began with the next letter, and after 26 weeks when I finally reached “Z,” I was hooked. I kept going.

About two years later, in the beginning of the spring, I put cooking on the back burner and started focusing almost exclusively on baking. I dreamed of cocoa powder and chocolate chips at night, I pondered the flavor profiles of various cookies and cupcakes while running errands, and I brainstormed potential brownie and bar recipes during dinner.
So I decided to change my blog’s name to reflect that. Instead of Foods for the Soul…
It’ll be called Amy’s Healthy Baking.
Amy = me.
Healthy = my lifestyle.
Baking = my passion.
The name already feels like it fits better. But I promise that nothing else about my blog is changing! It’s still me developing, photographing, and writing the recipes and blog posts you so sweetly read.

SOCIAL MEDIA
No matter where you’re following me — email, Facebook, Pinterest, or Instagram — you still are, even after my blog’s name change. You don’t have to do anything to continue receiving updates! Just to be thorough, here are those links…
Email: Amy’s Healthy Baking Newsletter
Facebook: Amy’s Healthy Baking
Pinterest: @AmyBakesHealthy
Instagram: @amyshealthybaking
If you’d like to start following me — or just want to make sure you still are! — simply click those links above.

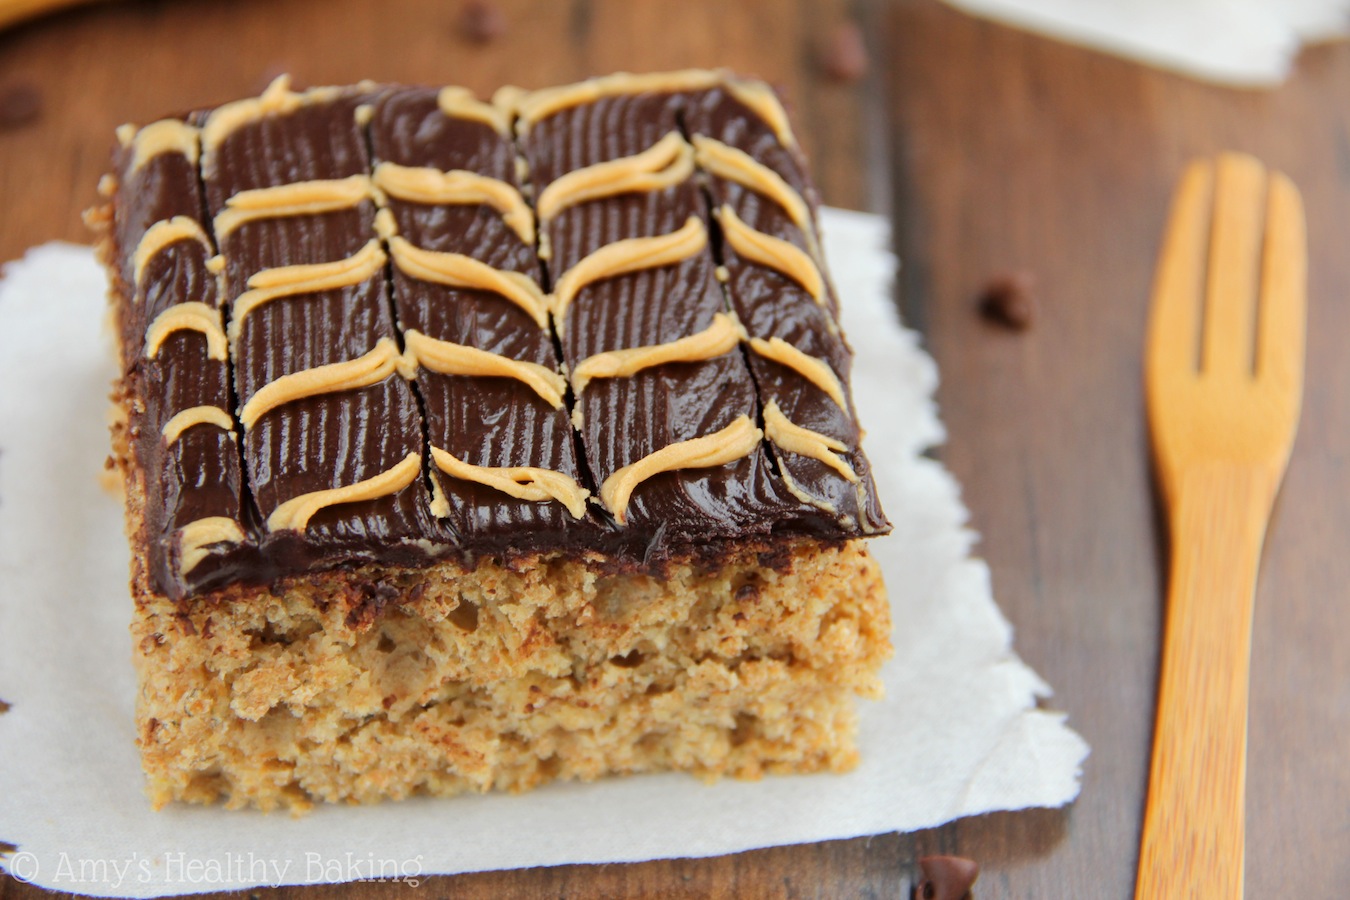
I wanted to celebrate my blog’s new name, and since no celebration is complete without cake, I baked something special… This healthy banana cake with chocolate frosting!
Bright fruit flavor fills every bite of this moist banana cake, accompanied by a decadent dark chocolate frosting and hints of sweet peanut butter. In true “healthy baking” fashion, this delicious cake is made with entirely wholesome ingredients — and it’s also easy to whip up any day of the week!

KEY INGREDIENTS TO MAKE A HEALTHY BANANA CAKE
Let’s go over the ingredients you’ll need to make this healthy banana cake! I’m assuming you have typical baking staples like baking powder, salt, and vanilla… So we’ll mainly cover the more interesting and important ones.
Flour. I used whole wheat flour to bake this cake. Although 100% whole wheat baked goods can sometimes garner a bad reputation for turning out dense and dry, this cake is the exact opposite. It’s really moist and soft — and we’ll cover why that is soon!
Tip: If you’d like to make this banana cake gluten-free, then check the Notes section of the recipe. I’ve included my top recommendations there!
Oil. There’s just 1 tablespoon of coconut oil in this entire cake! It’s only there for texture. With all of the other prominent flavors, you can’t actually taste the coconut!
Tip: If you don’t have any, feel free to substitute any other neutral-tasting oil or melted unsalted butter instead.
Bananas. The bananas are the star of this cake! They play three key roles: flavor (obvious, I’m sure!), natural sweetness, and texture.
For the best results, use the spottiest, brownest, ripest bananas on your counter. They should be mostly brown (if not purely black!) with very little yellow. These ripe — or borderline overripe! — bananas have a much stronger and sweeter flavor compared to mostly yellow ones. They also yield a moister, softer, and more tender texture.
Yes, I know it’s hard to wait patiently for your bananas to turn that ripe… But I promise it makes a big difference in the taste and texture of your healthy banana cake!
Greek yogurt. Along with the mashed bananas, this is the other ingredient that makes your cake super moist! Greek yogurt is the secret ingredient in many of my healthy baking recipes because it adds lots of moisture without the extra calories from more butter and oil. It boosts the protein content of baked goods too!
Honey. To amplify the bananas’ natural sweetness, I mixed in a touch of honey. I only added a small amount though! Because you’re using a substantial amount of ripe mashed bananas, the cake batter required very little extra sweetener.

HOW TO MAKE THE BEST BANANA CAKE
Let’s quickly talk about how to make the best moist banana cake! As I mentioned earlier, this recipe is very simple and straightforward.
Measure correctly. This is really important! For the flour (and cocoa powder, when you start on the frosting!), use this method or a kitchen scale. (← That’s the one I own!) Too much flour will make your cake dry, dense, and bland. Too much cocoa powder will make the frosting dry, stiff, and bitter. But if you take a few moments to measure correctly… You’ll have a beautifully moist, tender, and flavorful cake — and a rich and decadent chocolate frosting to spread on top of it!
For the bananas, measure by cups or grams — NOT by the number of bananas! This is the biggest mistake I see people make when baking banana-flavored treats (cakes, breads, muffins, etc). Why?
Not all “medium” bananas are the exact same size!
If you go solely based on the number of bananas, you may end up adding too much mashed banana, making the batter too wet, and causing your cake to collapse if your bananas are on the larger side… Or not adding enough, yielding batter that’s too dry, and resulting in a bland and dry cake if they’re a bit smaller.
So please — pretty, pretty please with a cherry (or banana!) on top — promise me that you’ll measure them correctly!
Use the correct pan. You’ll bake this cake in a 9”-square pan. I wanted the slices to be nice and wide!
If you prefer taller and thicker slices, you can try using an 8”-square pan instead. The bake time may differ by a tad, so use the toothpick test to check. (Look for very few or no crumbs attached!)
Tip: When you measure your square baking dish, measure across the top edge — not the bottom! Some square pans have sloped sides, so their top rim is larger than the bottom. The correct measurement is across the top, so if your pan is 9” across the top but closer to 8” around the bottom, it’s actually a 9”-square pan. (And that’s what you need to make this banana cake!)
Bake. After spreading the batter into your square baking dish (an offset spatula is really handy for this!), pop that in the oven. It doesn’t take very long to bake, so set a timer — and don’t stray too far from the kitchen! With the way this banana cake smells while baking, that wasn’t exactly a problem for me… I nearly planted myself criss-cross-applesauce right in front of the oven door while impatiently waiting for it to finish!
Cool completely. Yes, completely. 100%. All the way to room temperature… Before frosting AND serving. A cake’s structure doesn’t finish setting until it’s entirely cool. If you try to slice into it while it’s still warm, you’ll affect its texture, causing it to collapse some and turn out denser… And if you try to frost it while it’s still warm, its heat often melts the frosting and makes it run down the sides!

HOW TO MAKE CHOCOLATE FROSTING
While your cake cools, it’s time to talk about frosting! Surprisingly enough, I usually avoid frosting. Generally too sweet for my tastes, I scrape it off store-bought cakes and cupcakes (or choose cookies or brownies instead)… Unless it’s dark chocolate and super fudgy, almost like ganache.
So I intentionally designed this chocolate frosting recipe to be just like that! I also love this recipe because it’s super simple to make. You only need a bowl and a fork — no mixer required!
Assemble your ingredients. You just need four of them: unsweetened cocoa powder, pure maple syrup, vanilla, and milk.
That’s right… No butter or powdered sugar in this chocolate frosting — yet it’s still luxuriously creamy and smooth!
Stir. Once you’ve measured those ingredients and added them to a bowl, stir them together. I recommend using a fork to do this! The empty space between a fork’s tines allows the ingredients to pass through and mix more efficiently, so it takes less time and yields a beautifully creamy frosting!
Spread + swirl. After your banana cake has fully cooled, it’s time to frost it! I love using offset spatulas, but a regular butter knife works too.
One quick note… With its really rich and decadent taste, a little of this chocolate frosting goes a long way, so the recipe only yields enough for a thin layer. I didn’t want its rich dark chocolate taste to overpower the cake’s fruity banana flavor!
Although the peanut butter swirl looks sophisticated, it’s so simple! I introduced the technique with these fudgy peanut butter brownies, and I thought it turned out even cuter on this cake.
Just warm the peanut butter in the microwave until it’s easy to spread, and spoon it into a zip-topped baggie. Snip off the corner and pipe horizontal lines across the fudgy frosting, between ¼” to ½” apart. They don’t have to be perfectly straight; almost all of mine are slanted because I was so excited about my big blog news! Drag a toothpick in vertical lines, alternating the direction (up to down, then down to up), to create the elegant “V” shapes. That’s all there is to it!
FAQS ABOUT THIS HEALTHY BANANA CAKE WITH CHOCOLATE FROSTING
Is this healthy banana cake moist, gluten free, clean eating, low fat, or low calorie?
Yes — to all of the above! This banana cake is really moist and tender, and it’s also naturally clean eating, low fat, and low calorie (compared to more “traditional” cake recipes!). I’ve included my top gluten-free recommendations in the Notes section of the recipe for you as well!
Can I substitute a different flour?
You sure can! White whole wheat flour, whole wheat pastry flour, and all-purpose flour will all work equally well.
What about a different sweetener?
Yes again! You can easily replace the honey with pure maple syrup or agave. I don’t recommend sugar-free maple syrup though. It’s water-based, and that will make your cake collapse while cooling and turn out overly dense. For even more sweetener options, see the Notes section of the recipe!
Can I use a different milk too?
Yup! Just about any milk will work.
What if I want to make this banana cake sweeter? Is there a way to do that?
Absolutely! Just replace some (or all!) of the milk with an equal amount of honey (or your sweetener of choice).
What’s the best cocoa powder for chocolate frosting?
Regular unsweetened cocoa powder, which is also called “natural unsweetened cocoa powder” and “unsweetened cocoa powder.” I don’t recommend using Dutched or special dark cocoa powder. They have a different acidity level, and they also taste more muted and bland in this particular frosting recipe.
My chocolate frosting is too thick and hard to spread. Why is that?
The #1 culprit is too much cocoa powder! Did you remember to measure it correctly?? (Don’t scoop it from the container — see the “Measure correctly” header under the “How to Make the Best Banana Cake” section above for more info!) It’s easy to fix that though! Just stir in more milk or liquid sweetener, about ½ teaspoon at a time, until it’s smooth enough to spread.
What’s the best way to store this banana cake? And how long does it last?
Store this banana cake in the refrigerator, either inside of an airtight container, covered with foil, or covered with plastic wrap. It should keep for at least two or three days — if not longer!
Can I make this banana cake as a smash cake for my baby’s first birthday?
I haven’t personally tried, but other readers have done that and said it turned out beautifully. Some of them substituted pure maple syrup for the honey, just to be safe, but their little ones thoroughly enjoyed the cake — and the adults did too!

So from the bottom of my heart… Thank you. I wouldn’t be here, blogging and baking and doing what I love, without you. Whether you read through the entire post, just try the recipe, or simply skim through the photos, I truly appreciate you and your support. ♡
And if you make this recipe, remember to snap a picture and share it on Instagram using #amyshealthybaking and tagging @amyshealthybaking IN the photo itself! (That guarantees I’ll see your picture! 🙂 ) I’d love to see your healthy banana cake with chocolate frosting!

Healthy Banana Cake with Chocolate Frosting
Ingredients
FOR THE CAKE
- 1 ½ cup (180g) whole wheat flour or gluten-free* flour (measured like this)
- 1 ½ tsp baking powder
- ½ tsp baking soda
- ¼ tsp salt
- 1 tbsp (14g) coconut oil (melted and cooled slightly)
- 1 large egg (room temperature)
- 2 tsp vanilla extract
- ¾ cup (200g) mashed banana (about 2 medium – and see Notes!)
- 3 tbsp (45mL) honey
- 2 tbsp (30g) plain nonfat Greek yogurt
- ¼ cup (60mL) nonfat milk
FOR THE FROSTING
- ½ cup (40g) unsweetened cocoa powder (measured like this)
- ¼ cup (60mL) pure maple syrup
- 1 tsp vanilla extract
- 1 tbsp (15mL) nonfat milk
- 1 tbsp (16g) homemade creamy peanut butter
Instructions
- To prepare the cake, preheat the oven to 350° and lightly coat a 9”-square baking pan with nonstick cooking spray.
- In a medium bowl, whisk together the flour, baking powder, baking soda, and salt. In a separate bowl, whisk together the coconut oil, egg, and vanilla. Stir in the mashed banana, honey, and yogurt until smooth and no clumps remain. Alternate between adding the flour mixture and milk, beginning and ending with the flour. (For the best results, add the flour mixture in 3 equal parts.)
- Spread the batter into the prepared pan, and bake at 350°F for 22-25 minutes. Cool in the pan for 10 minutes before turning out onto a wire rack to cool completely.
- To prepare the frosting, combine the cocoa powder, maple syrup, vanilla, and milk in a small bowl, stirring until smooth. Spread on top of the cooled cake. Pipe the peanut butter onto the frosting in lines (as described in the blog post above), and draw lines in the opposite direction using a toothpick to create the “V” effect.
Notes
View Nutrition Information + Weight Watchers Points
You may also like Amy’s other recipes…
♡ Healthy Banana Pound Cake
♡ Healthy Banana Oatmeal Snack Cake
♡ Healthy Carrot Cake
♡ Healthy Pumpkin Cake
♡ Healthy Banana Cupcakes
♡ Healthy Banana Oatmeal Cookies
♡ Healthy Chocolate Chip Banana Bread
♡ …and the rest of Amy’s healthy banana recipes and healthy cake recipes!


Found your site through my blogging friend Taylor over at Food, Faith, Fitness! Totally new to your blog, but congrats on the big news! Very exciting stuff 🙂
There’s no way this cake can be healthy… I mean look at it. It looks so moist and decadent! What kind of wizardry are you using over there in your kitchen?!?! I want some of that in mine haha
Thank you Chris! Your kind words mean a lot, both about my new blog and the cake. The moisture is all from the bananas and Greek yogurt, so buy a container to bring the magic to your kitchen! 😉 Taylor is such a sweetheart, and she creates the most incredible dishes too. So happy you stopped by!
YAY!!!!!!!!!!!!!!!!! Congratulations, sweet friend!!!! I’m so happy that you officially made the switch- and it looks GREAT! So clean and fresh! Perfect time to switch… I know I’ve got spring cleaning on the brain! And that cake… mmm… I’m a big frosting fan- if you ever need someone to eat your frosting for you, I’m your girl! (although I don’t recall you having a problem finishing off the frosting on Linda’s fudge cake… haha!)
Andrea, you are just the best. Thank you SO much love!! You’ve been there for me since I first came up with the idea, and I probably wouldn’t have done it if you hadn’t said it was a good idea. So thank you!! 🙂 And you’re totally welcome to all of my non-fudgy-chocolate-frostings. (That’s the only reason I finished every last smidgen of Linda’s fudge cake!)
I love the new look! And it totally fits you. And I love this cake!
Thank you so much Dorothy!! I really appreciate it. And thank you for pinning my cake too! 🙂
LOVE the new digs :0 and this cake looks SO good!
Thanks Heather! I had fun designing it, and the cake was a great reward. 😉
Love this, Amy! SO exciting for you!! And this cake?! So delicious. Loving this post and all that’s in store! xoxo
Thank you Erin! You’re so sweet; I really appreciate it. 🙂
Amy the new design looks wonderful and so fitting for you. It couldn’t be more perfect.
And this cake . . . oh my word! That frosting? . . . can not wait to try! Thanks for sharing 🙂
Thank you so much Emma! I’m really, really touched by your sweet words. 🙂 I hope you enjoy the frosting! It’s a lot darker than most well-known companies make and sell in cans, which I love. I’m a true dark-chocoholic!
Congrats on the name change and on moving forward with your passion! It’s awesome 🙂
This cake is gorgeous. I love the icing design.
Thank you so much Sasha! I had fun decorating the cake; I felt like I was 3 years old and coloring in preschool all over again. 😉
Amy, congrats on the changes and on finding your true voice — wishing you all the best!!!! 🙂
Thank you so much Danny, for all of your kind comments and tweets. I really appreciate it! 🙂
Wonderful! This cake looks so good. I will be trying it with gluten-free flour! Can’t wait to see what your giveaways include!! 🙂 xo
Thanks Joanna! I’d love to hear what GF flour(s) you use and if you have to make any modifications. My mom is trying to stick to a GF diet, but I know she has as big of a sweet tooth as I do! 😉
This cake looks seriously amazing Amy! Pinned!
Thanks so much Trish, for both your sweet comment and the pin! 🙂