
I lived in the dorms during my freshman year of college, and with only a small fridge the size of a microwave and no kitchen, I purchased a meal plan and ate most of my lunches and dinners in the dining hall. Although usually somewhat skeptical of the entrées, I could always count on the salad bar for healthier options before stopping by the dessert station for sweet treats. Even then, I needed my daily fix!
Sometimes I felt adventurous and sampled their latest raw vegan carrot cake or tofu chocolate cupcakes, but their cookies were always the best. Chocolate chip, peanut butter, snickerdoodle, tuxedo… Those were the softest and chewiest you’d ever imagine. It was like biting into little circles of heaven!
But with the extra chewy factor and ample amounts of cinnamon, the oatmeal raisin cookies were always the first I’d reach for. I often headed down to dinner with my next door neighbor, who enrolled in many of the same classes and quickly turned into my study buddy. Since oatmeal raisin were his favorite too, we’d grab a plate to nibble on while quizzing each other about mechanisms and equations for our next chemistry and physics midterms.
Thank goodness the rest of the freshmen seemed to avoid that flavor!

So now, quite a few years later, I decided that it was finally time to develop a recipe of my own that rivaled—if not surpassed—those oatmeal raisin cookies. Something incredibly soft, unbelievably chewy, and absolutely irresistible… Exactly the opposite of the boring, bland, or dry reputations oatmeal cookies sometimes attract. And of course, being me and my blog, I wanted to make them healthier.
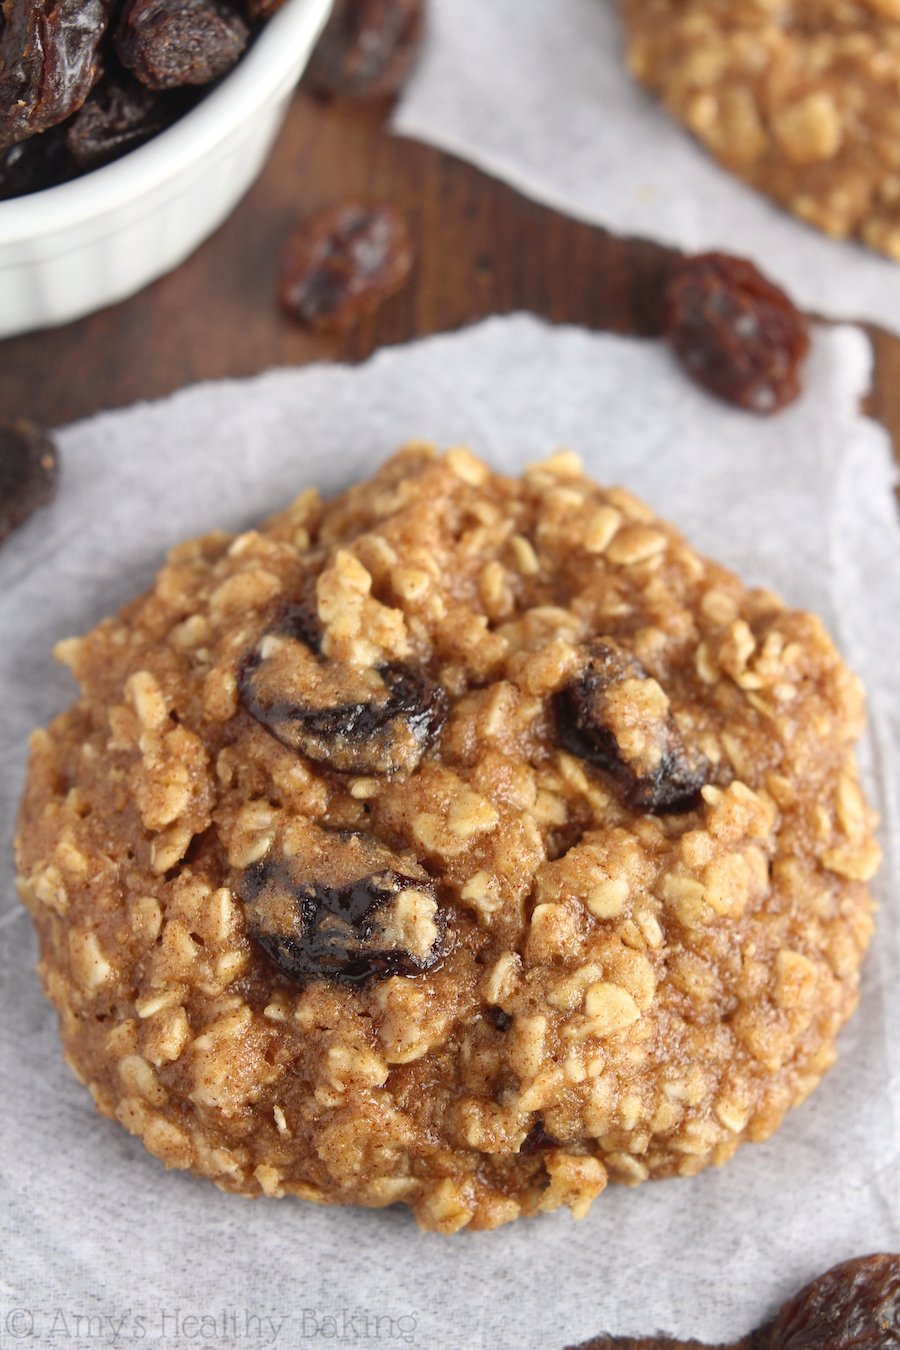
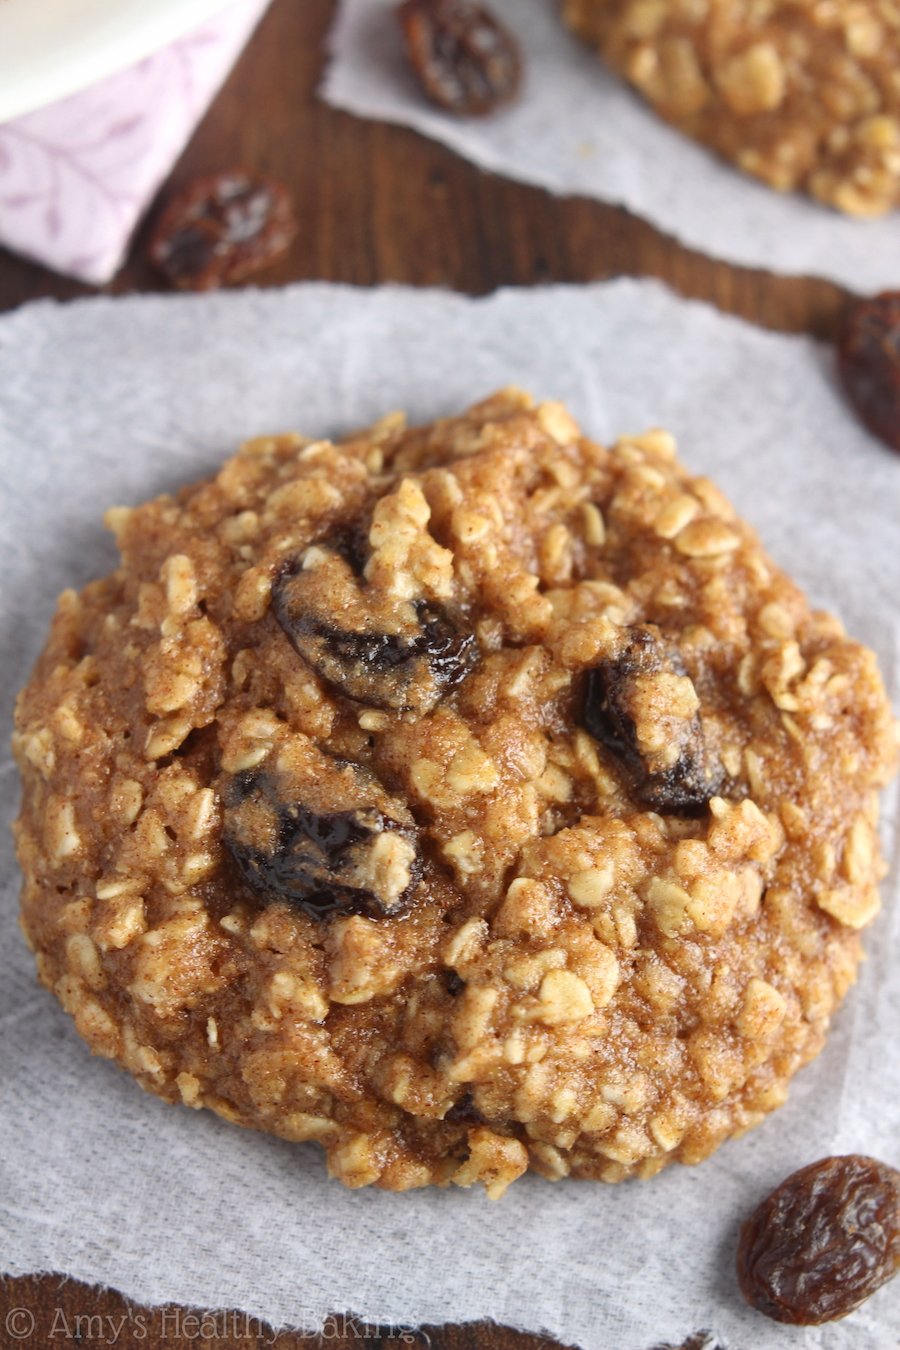
So… These are it! They’re the Ultimate Healthy Soft & Chewy Oatmeal Raisin Cookies. They’re chock full of hearty oats, sweet raisins, and lots of warm cinnamon. They’re also just 100 calories with no refined flour or sugar. Trust me, you’ll never need another recipe ever again!

HOW TO MAKE THE BEST HEALTHY OATMEAL RAISIN COOKIES
Now let’s go over how to make these ultimate healthy oatmeal raisin cookies! I’m going to walk you through some important ingredients you’ll need and a few keys steps to help you avoid some of the more common issues. I cover many of these things in the video beneath the recipe too. If you’d rather skip straight to the recipe and start baking, go right ahead!
To start, you’ll need whole wheat flour or gluten-free flour. No refined all-purpose flour in these cookies! You’ll also need instant oats (also called “quick cooking” or “one minute” oats). Instant oats are smaller and thinner than traditional old-fashioned rolled oats. This means they soften faster, which keeps your ultimate healthy oatmeal raisin cookies supremely soft and chewy! You can usually find instant oats in canisters right next to the old-fashioned oats at the grocery store. (And no, they’re NOT the same thing as in those flavored individual brown paper packets!)
It’s extremely important to measure both the oats and flour correctly. Use this method or a kitchen scale if you own one. (I highly recommend the latter! This is the one I own.)
If your cookies turned out dry or failed to spread on the baking sheet, it’s mostly likely because there was too much of either of those dry ingredients, especially the oats. They act like little sponges and soak up moisture, so adding too many will quickly turn the cookies crumbly.
I promise these ultimate healthy oatmeal raisin cookies are worth taking the extra 10 seconds to measure your flour and oats correctly!

Whereas traditional recipes usually call for a full stick (or more!) of butter, you just need 2 tablespoons of coconut oil or butter. That really helps keep your ultimate healthy oatmeal raisin cookies low calorie and low fat, and if you use coconut oil, they’re also dairy-free!
Also unlike traditional recipes that use refined granulated sugar, you’ll actually sweeten your ultimate healthy oatmeal raisin cookies with honey, agave, or pure maple syrup. These are unrefined sweeteners, and they all work equally well!
Then here’s one of my favorite tips for making the best ever healthy oatmeal raisin cookies…

Don’t add your raisins into the cookie dough straight from the package! Instead, hydrate your raisins first. This is super simple to do! Add them to a microwave-safe bowl, cover them with water, and place a lid or plastic wrap on top. Microwave them on high for 1 minute. Let them sit for at least 5 minutes (or while you measure and mix together the rest of the ingredients!). By the time you’re ready to drain them and stir them into the cookie dough, they’ll be exceptionally plump and juicy… Which definitely creates the best healthy oatmeal raisin cookies imaginable!
Now that your cookie dough is all mixed together, chilling is mandatory. Most of the time. If you added the correct amount of oats and flour, the dough should be wet and look more like thick muffin batter. Chilling will help stiffen the dough so it doesn’t spread as much while baking. If your cookie dough is already stiff, skip the chilling and bake it right away.
(The video just above the recipe shows what the textures before and after chilling should look like!)

However, your ultimate healthy oatmeal raisin cookies will only spread some after chilling (not excessively!), so if you want wider, somewhat thinner cookies, make sure you flatten them slightly before baking. Just give them a little pat with a spatula. If you prefer thicker cookies, skip that and bake them right after scooping them onto the baking tray.
Finally, do not overbake these cookies! I always pull mine out slightly early, then let them sit on the warm baking sheet longer. This allows the centers to continue to set without turning the outsides crisp and crunchy. Your ultimate healthy oatmeal raisin cookies will stay soft and chewy for an entire week that way!
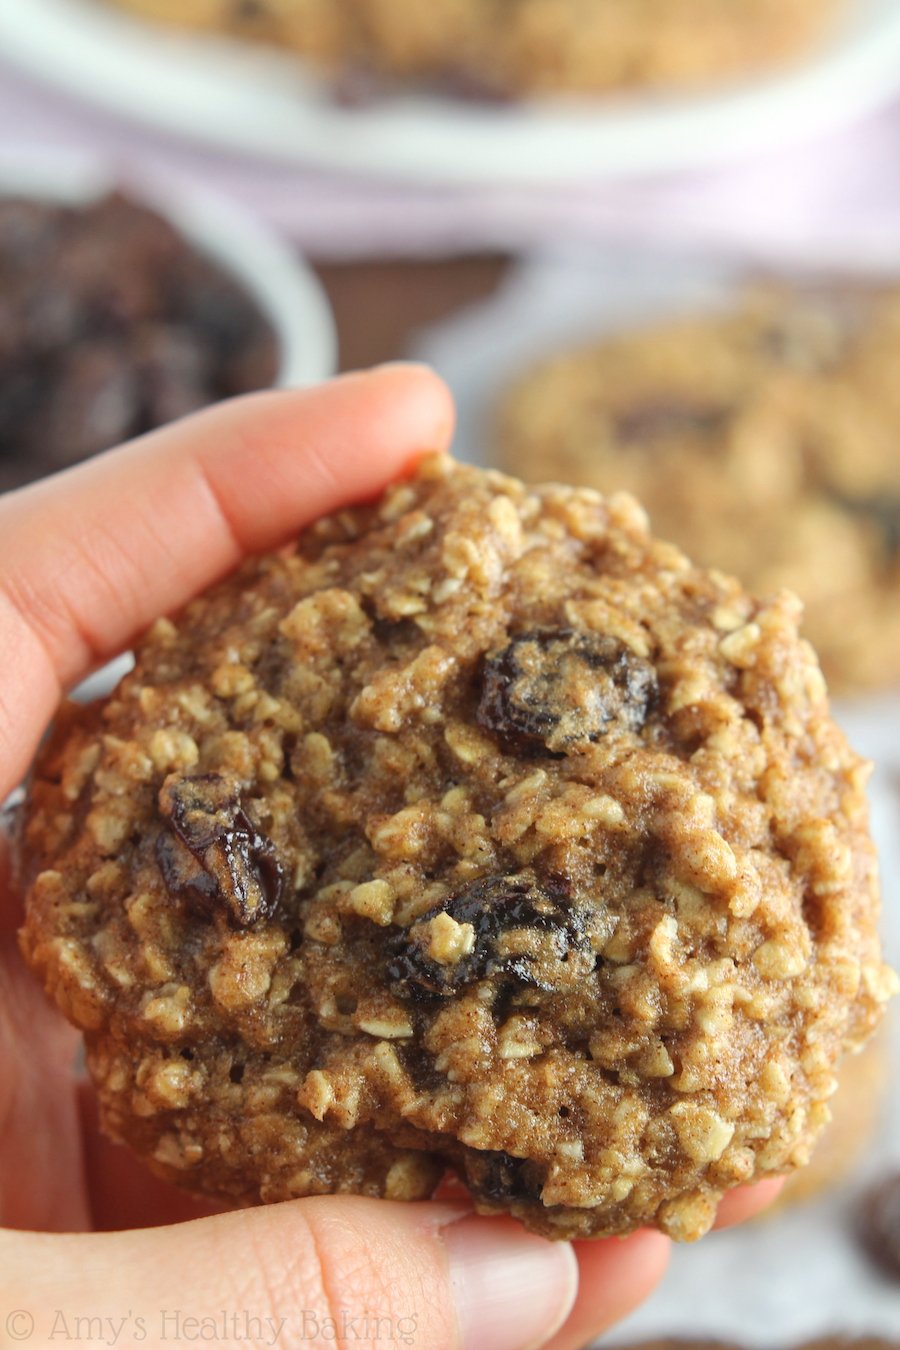
These Ultimate Healthy Soft & Chewy Oatmeal Raisin Cookies didn’t stand a chance at my house. Even with just me eating (and sneaking) them, they only lasted four days. I hope you enjoy them just as much!
And when you make your own oatmeal raisin cookies, remember to snap a picture and share it on Instagram using #amyshealthybaking and tagging @amyshealthybaking IN the photo itself! (That guarantees I’ll see your picture! 🙂 ) I’d love to see your ultimate healthy oatmeal raisin cookies!
(My Healthier Chocolate Treats cookbook is full of sweet and healthy recipes like these oatmeal cookies! You can see a sneak preview of all of the recipes inside here!)

The Ultimate Healthy Soft & Chewy Oatmeal Raisin Cookies
Ingredients
- 1 cup (100g) instant oats (measured like this & gluten-free if necessary)
- ¾ cup (90g) whole wheat flour or gluten-free* flour (measured like this)
- 1 ½ tsp baking powder
- 1 ½ tsp ground cinnamon
- ⅛ tsp salt
- 2 tbsp (28g) coconut oil or unsalted butter, melted and cooled slightly
- 1 large egg, room temperature
- 1 tsp vanilla extract
- ½ cup (120mL) honey or agave
- ¼ cup (40g) raisins (see Notes!)
Instructions
- Whisk together the oats, flour, baking powder, cinnamon, and salt in a medium bowl. In a separate bowl, whisk together the coconut oil, egg, and vanilla. Stir in the honey or agave. Add in the flour mixture, stirring just until incorporated. Fold in the raisins. Chill the cookie dough for 30 minutes.
- Preheat the oven to 325°F, and line a baking sheet with parchment paper or a silicone baking mat.
- Drop the cookie dough into 15 rounded scoops onto the prepared sheet, and flatten slightly. Bake at 325°F for 11-14 minutes (see Notes!). Cool on the pan for 10 minutes before transferring to a wire rack.
Notes
View Nutrition Information + Weight Watchers Points

Here is what the cookie dough should look like just before chilling. It resembles thick muffin batter more than cookie dough!

Here is what the cookies look like before and after baking. They some, but not too much, so be sure to flatten them slightly with a spatula just before popping the baking sheet in the oven.

You may also like Amy’s Other Recipes…
♡ Chocolate Chip Peanut Butter Oatmeal Cookies
♡ Healthy Almond Joy Oatmeal Cookies
♡ Healthy Carrot Cake Oatmeal Cookies
♡ Healthy Raspberry Oatmeal Cookies
♡ Healthy Apple Pie Oatmeal Cookies
♡ …and the rest of Amy’s healthy oatmeal cookie recipes!

5 stars 😍
Great recipe!! Very impressed!!
I’m so glad you enjoyed these cookies, Gloria! Thank you for taking the time to let me know! 🙂
Delicious, I really enjoyed these cookies! Thank you so much for the recipe!
That means so much to me, Kayleigh! I’m so glad you loved these cookies — thank you for taking the time to let me know! 🙂
I made this recipe 2 different ways.
One using butter & maple syrup the second one using coconut oil & honey. Voted by 7 family members= everyone liked both by preferred the butter/ maple syrup combination.
Will make again😊 thanks Amy
I’m so glad everyone enjoyed both versions, Marie! Thank you for taking the time to let me know. That truly means a lot — especially that you’d like to make them again! 🙂
Hi Amy,
Just wanted to say I tried the recipe today. My mum is on a dairy free diet so I replaced the egg with (2tbsp water,2 tsp baking powder and 1 teaspoon of vegetable oil), also using lactose free butter. They still came out amazing! Some of the best cookies I remember tasting and one of the few online recipes where the stated calories actually match the calculations. Thanks for the great recipe! Will be making these often.
I’m so glad you and your mum enjoyed these cookies, Nick! You’re so thoughtful to bake her homemade treats that fit her dairy-free diet. She’s really lucky to have you! 🙂
That’s the best kind of compliment, if you already think that you’ll make these often. Thank you for taking the time to let me know! I really appreciate you sharing your recipe modifications too, especially about your egg substitute. I always love hearing what tweaks work!
I forgot to rate them, before- easy 5 stars
Oh my goodness — you’re SO kind to leave another comment to rate this recipe as 5 stars! You just made my day, Nick! Thank you!! 🙂
How would we tweak this recipe to have bananas as a sweetener, or do you have a banana oatmeal cookie recipe?
With 65+ oatmeal cookie recipes on my blog, I do have multiple banana oatmeal ones! You can find them here, here, here, here, and here (plus a few more!). In the future, the best way to find a specific recipe is to click on the “Recipes” tab at the top of my blog or use the Search Bar (located on the right side, if you’re viewing on a computer, or the bottom of my blog, if you’re viewing on a mobile device). That will help you find an answer much sooner than waiting on a response from me! 😉
I’d love to hear what you think of any of those banana oatmeal cookie recipes if you try making them!
Could you use Avocado oil in place of coconut oil or butter?
I’m actually severely allergic to avocados, so I’ve never worked with avocado oil before and don’t want to lead you astray. I’d love to hear what you think of these cookies if you try making them! 🙂
Delicious! I made a few tweaks. I used chopped dates instead of raisins and I only had old fashioned oats on hand (not instant oats), plant butter (olive oil based) and maple syrup. This is what I had on hand and the cookies came out fabulouse. I specifically wanted a cookie recipe that did not need a full stick of fat. Thank you!!
I’m so glad you enjoyed these cookies, Deeanna! Thank you for taking the time to let me know! I love your idea of using chopped dates. That sounds so fun – I’ll have to try that sometime! 🙂
I made these today and was very disappointed. Chilled the batter till it was stiff (about 25 min) The cookies hardly spread at all, even though I flattened them before baking. I weighted the flour and oats. I used quick oats. I did not use raisons because they were for our granddaughter who does not like raisons. I added a few chocolate chips instead. Used butter.
The cookie was very cake like, not at all chewy. Can you tell me how to get the results you got?
I’m honored that you tried my recipe, Darlene! Your granddaughter is so lucky to have you. You’re so sweet to use chocolate chips instead for her!
That sounds disappointing and not like how these cookies are supposed to turn out, so I’m happy to help you figure out why that was. 🙂 In order to do so, I have some questions for you!
Did you make any other substitutions or modifications to the recipe, including those listed in the Notes section? (Besides the chocolate chips instead of raisins!)
Did you weigh the other ingredients as well, besides the flour and oats? (Especially the butter and honey!)
How did the consistency of your cookie dough before and after baking compared to mine in the video directly above the recipe?
How thick were your cookies after your flattened the cookie dough before baking?
How long did you bake your cookies?
I know I just asked a LOT of questions, but I’ll have a much better idea of the culprit once I know your answers to all of them!
I tried twice to find this response, clicking on link and it only went to your recipe. I left another message. Then I tried a third time and got your response so hopefully you get this before you get the other message
I used quick oats, not instant. Used butter not oil. Chocolate chips not raisons. The rest of ingredients were just as you stated in recipe, including whole wheat flour.
Yes, butter and honey were also weighted
I even weighted each cookie to be sure I was getting them close to same size, approx. 29 gm
Before baking dough looked like yours. Held it’s shape, used a fork to press them a bit.
They were probably about ½ inch thick, still that size.
After baking they had not spread out at all.
They were checked after 11 minutes, still very doughy. Baked another 2 min.
Warm they were cake like, once cooled they are just crumbly and cake like.
Any help you can give will be very appreciated.
Darlene
It worked — I received your comment here, Darlene! 🙂
Quick oats and instant oats are actually the same thing. They’re also called “one-minute oats.” (I actually covered that in the Notes section of the recipe — I know it can be easy to miss!)
We found the main culprit! It’s how the honey was measured. It shouldn’t be weighed! Kitchen scales can’t actually measure liquids (ie ingredients given in mL or fluid ounces). I know many of them say they can, but it’s not true… and it drives me nuts. 😉 Scales can only measure weights, not volumes! This is because the weight of liquids like milk, honey, maple syrup, etc actually depends on their density, and every liquid’s density is different. There’s no way to program every different density into a kitchen scale, so that’s why it doesn’t work for measuring liquids.
If you used your kitchen scale to measure honey, you were unintentionally measuring it by weight instead of volume, for the reasons I shared above, and that resulted in adding a different amount than the recipe called for! That’s why your cookies turned out cakey and didn’t spread. If you measure the honey with a measuring cup or measuring spoons, your cookies should look (and taste!) much better because you’ll be adding the correct amount!
So for my recipes, I always recommend using a scale for solid ingredients (or mostly solid ingredients, like yogurt!) with measurements given in grams, and then using measuring cups or spoons for all liquid ingredients (given in mL) AND small amount solid ingredients (like baking powder, baking soda, salt, etc where you just need teaspoons!).
Does that make sense?
The other more minor culprit is how long the cookies were baked. When they’re ready to be removed from the oven, they should look and feel slightly underdone! The heat from the warm baking sheet will continue to cook the cookies while they rest for those 10 minutes after removing them from the oven. So if you wait to remove the baking sheet from the oven until these cookies feel firm, you’ll actually end up overbaking them (which will also lead to a cakey and/or dry texture!).
So to summarize… If you use a measuring cup for the honey and remove your cookies from the oven when the centers still feel slightly soft and underdone, they should both look and taste much better!
In Canada quick oats and instant oats are definitely NOT the same. Our instant oats are like yours, they cook in one minute. Canadian quick oats need 3-5 minutes to cook. So I am wondering if I should be using quick oats. I must admit, since I am trying to make a healthier version, I do have a issue using heavily processed instant or quick oats. I would much rather be using old fashion large flake oats that are not processed so much.
My scale has a button to change units. ml’s is one of the units. I have always wondered about that, it did not make sense that it would measure volume, esp since 100 ml of feathers certainly would not weigh the same as 100 ml of stones. I did think as I was doing it that I should measure the honey but choose to believe there was some sort of adjustment in the scale. ;-(
Not sure if I will try this again or not. I have tried another honey recipe, measuring properly. it was supposed to produce the same texture as your recipe but it failed too. I really do want a cookie that spreads out a bit and ends up chewy, not cake like.
Thanks for sharing all of this with me, Darlene!
I didn’t realize that Canada labels what we call traditional old-fashioned rolled oats as “quick oats.” My apologies! For this recipe, you want the oats that cook in one minute. They’re just smaller and thinner than old-fashioned oats (or what it sounds like you call quick oats!), but they only have one ingredients (oats!). They’re not processed, and they’re not the same thing as what comes in individual brown paper packets with flavors like cinnamon apple or maple brown sugar. Does that make sense?
However, if you’d prefer to use old-fashioned oats, then I’ve shared what to do in order to use them in these cookies in the Notes section of the recipe. 🙂
You have a GREAT intuition, if that’s what you were thinking when you used your scale to measure honey. Trust yourself, Darlene!! You’re much smarter and wiser, especially compared to your kitchen scale!
I understand not wanting to waste your time or ingredients, and I’m not offended if you don’t give my recipe another try. However, if you decide to make a second batch using a measuring cup for the honey and you remove your cookies from the oven when the centers still feel soft and underdone (if you ever so gently press your finger into them, you should see an indentation — they should NOT feel firm!), your cookies should end up with a soft and chewy (not cakey!) texture. If you compare your cookie dough at each stage to what mine looks like in the video directly above the recipe, that should guarantee your cookies turn out much better as well!
If you have any other questions about this recipe, please feel free to ask. I’m happy to answer anything!