
During my senior year of college, I reconnected with one of my friends from high school who attended a different university. After realizing how much I love sports (I still watch more games on TV than shows on the Food Network!), he snagged us a pair of tickets for a professional hockey game between two of the biggest rivals in the league.
Throughout the afternoon, we laughed and caught up, trading stories about the past four years at college, and by the time the game’s final buzzer sounded, we had made plans to get together again a few weeks later after midterm season had ended.
As a big foodie, my friend enjoyed cooking big meals to share with his other friends that lived in the same apartment building, but he never baked desserts to go with the dinners. That’s where I came in—he wanted to learn how to bake an apple pie!

That Friday afternoon, I loaded my car with a few pounds of apples and all of the ingredients to make a pie crust from scratch, and when I parallel parked outside of his high-rise building, we walked everything upstairs and immediately got to work.
His roommate and a few other friends were already in the apartment, sitting on the couches while watching hockey highlights on TV from the previous night’s games, but his roommate quickly followed us into the kitchen as we unpacked ingredients. He wanted to learn how to bake an apple pie too!
My high school friend volunteered for the task of slicing apples for the filling, so I started supervising his roommate, who was in charge of mixing up the dough for the crust. Both looked like naturals and easily completed their jobs, but then we hit a little snag…

I had forgotten my rolling pin at home!
The two of them improvised by grabbing the tallest bottle of wine in their kitchen, and after double-checking that the cork was tightly nestled inside, they rolled out the pie crusts with the bottle. They assembled and baked the pie without any other hiccups, and after a quick trip to the grocery store for fresh vanilla bean ice cream, we slowly savored huge, warm slices à la mode.

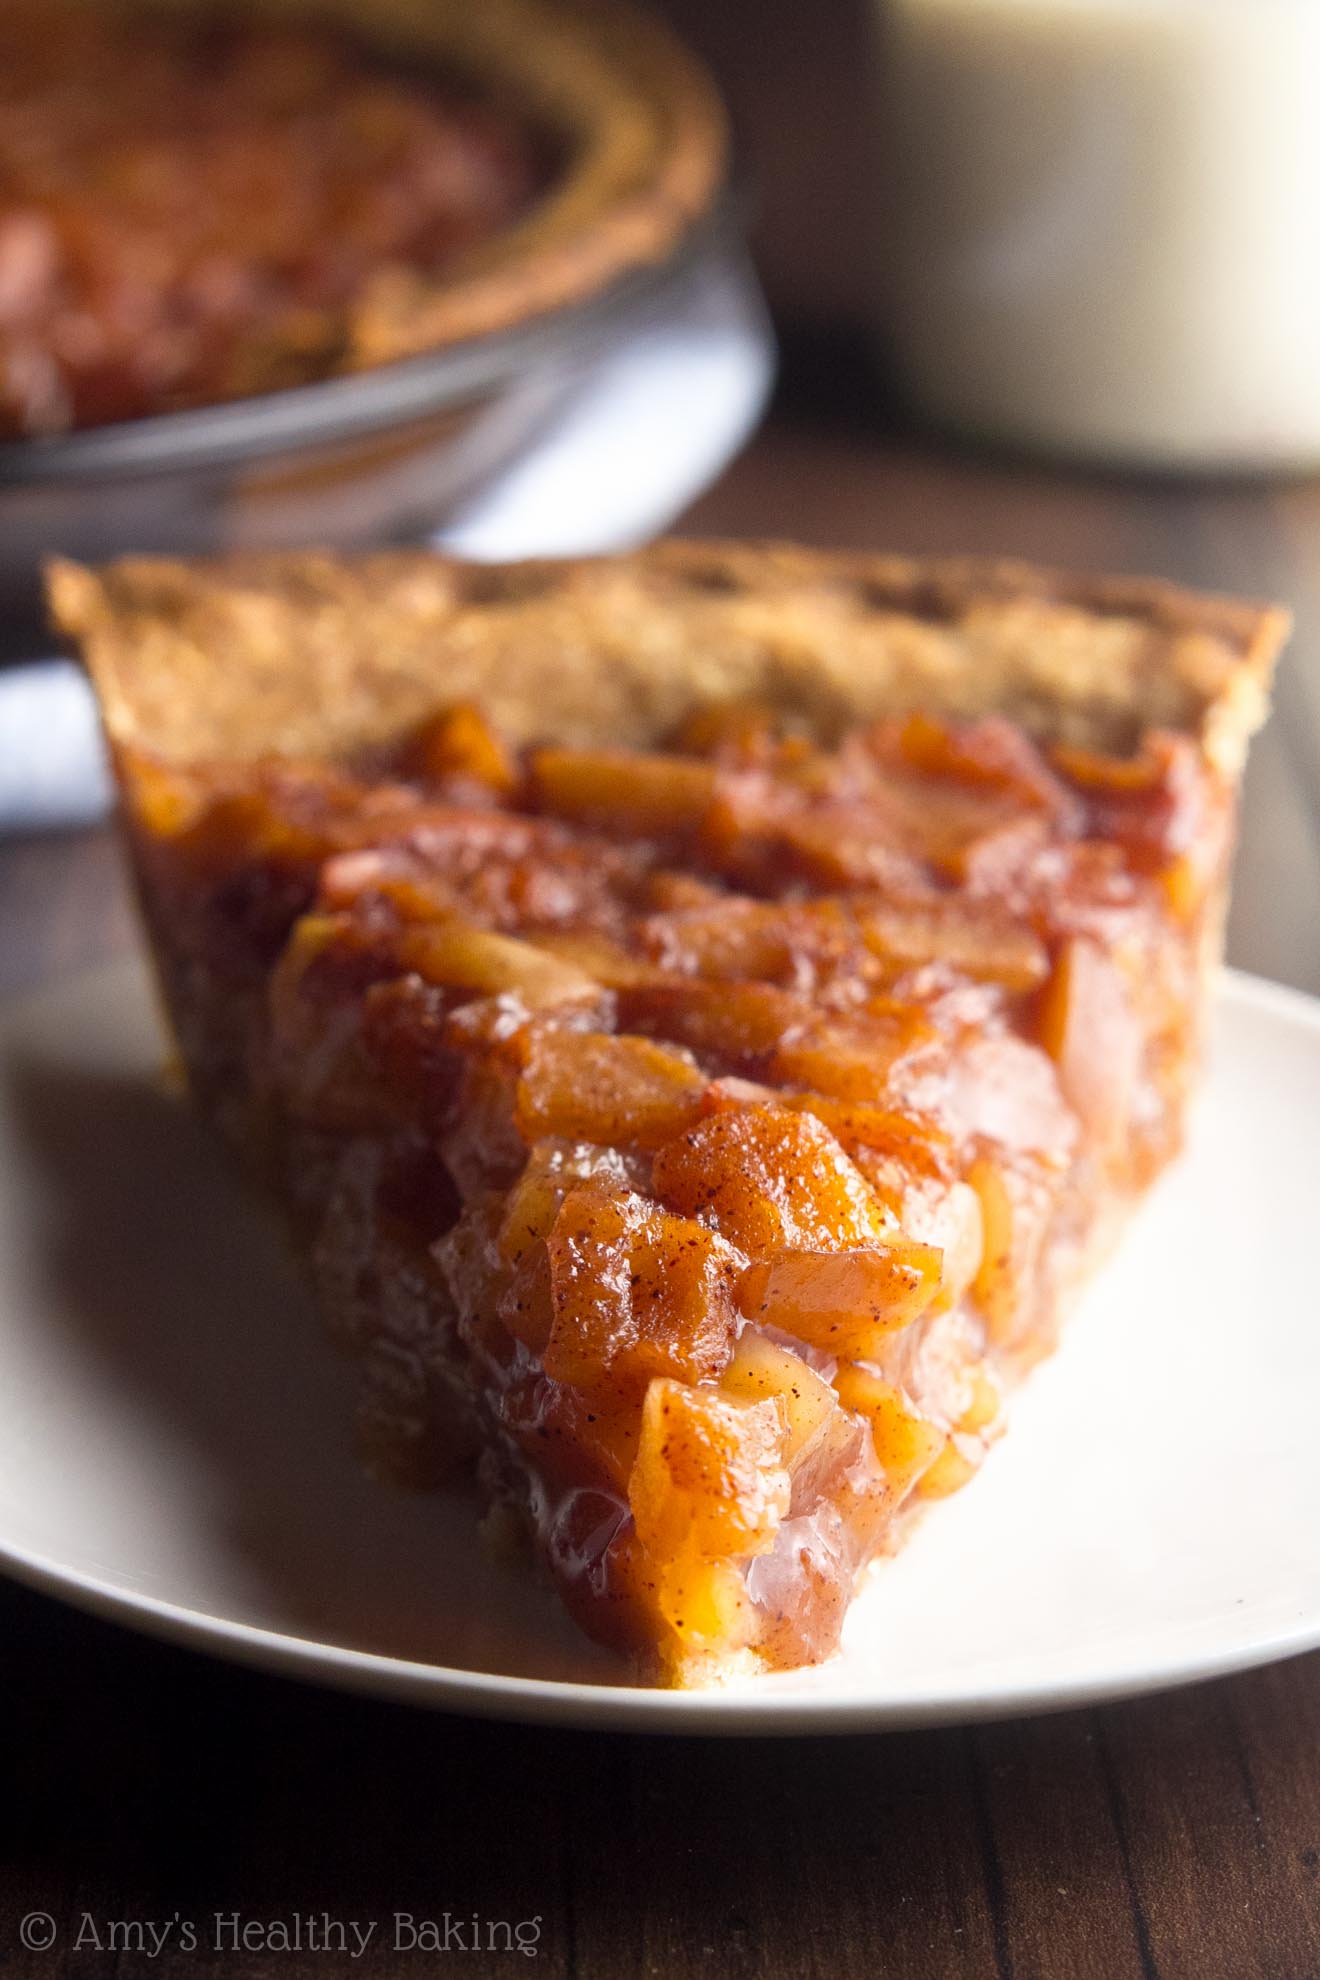
And now, every time I bake an apple pie—or even just see one at the grocery store—I think of that one we made with a wine bottle and laugh. I remembered that story while making this Clean Eating Classic Apple Pie, too, and with its cozy cinnamon-spiced fruit filling my kitchen with tantalizing smells, it disappeared even faster than the pie my friend baked in college!

Let’s start with the pie crust. A flaky crust requires butter. There’s just nothing we can do about that. It’s possible to substitute Greek yogurt or applesauce for butter in muffins or cupcakes, but do NOT try to do that with a pie crust. The fat in butter is what gives a pie crust is crisp, flaky texture, and any other low-fat or fat-free ingredient will make the crust gummy and soggy instead.
However, there is a silver lining! Many traditional pie crusts require a full ½ cup of butter—or more!—but I managed to make this healthier one with merely 4 tablespoons of butter. You’ll add a tiny splash of milk and apple cider vinegar to the crust as well, plus a tiny bit of pure maple syrup for a hint of sweetness.
So to make the crust, you’ll start with white whole wheat flour. It’s made from white wheat, as opposed to the “red” wheat that regular whole wheat flour comes from. This different type of wheat produces a lighter texture that’s closer to all-purpose flour, yet it still contains the same health benefits as regular whole wheat flour. Whole wheat pastry flour would work as well, and both can be found on the baking aisle of most grocery stores.

Next comes the butter. I highly recommend mixing it into the flour with a pastry cutter! They’re relatively inexpensive—I found mine at Walmart for less than $4—and they’re great for making my scone recipes as well. Continue working the butter into the flour until it resembles fine crumbs, like in the picture above.
Then you’ll add the remaining crust ingredients a little at a time, mixing them into the flour mixture until it forms a dough. Shape that into a 4”-wide circle, cover with two large sheets of plastic wrap, and chill for at least an hour.
This next part is different than with traditional crust recipes…


You’ll leave the crust between the plastic wrap to roll it out! (And yes, I skipped the wine bottle and used my regular rolling pin for this!) This trick makes it easier to both transfer it into the pie plate as well as to roll into a thin circle because you don’t need extra flour for the crust or rolling pin.
For the filling, you’ll use my homemade slow cooker apple pie filling recipe. Many of you have asked whether it’s possible to bake into a pie, and here’s the answer—YES! It already contains plenty of cozy spices and cornstarch to thicken, and the apples’ texture stays soft with just a hint of firmness after baking.


The hardest part is waiting for the pie to cool and set for a few hours, but I promise it’s worth the wait. My family agreed that this apple pie is one of the best they’ve ever had!
| Clean Classic Apple Pie | | Print |
- 1 cup (120g) white whole wheat flour (measured like this)
- ½ tsp salt
- 4 tbsp (56g) unsalted butter (very cold and cubed)
- 2 tsp nonfat milk (cold)
- 1 tsp pure maple syrup (cold)
- ¾ tsp vanilla extract
- 1-2 tbsp (15-30mL) ice cold water
- 4 cups Slow Cooker Apple Pie Filling
- Whisk together the flour and salt in a medium bowl. Cut in the butter using a pastry cutter or the back of a fork until the mixture resembles crumbs. (See photo in the blog post above.)
- In a small bowl, whisk together the milk, maple syrup, vanilla, and 1 teaspoon of water, and drizzle over the flour mixture. Mix until all of those liquid ingredients have been incorporated. Continue to add water ¼ teaspoon at a time and mixing until completely incorporated until the mixture forms a dough. (I often use a total of 1 tablespoon of water.)
- Transfer the dough to the center of a large sheet of plastic wrap, and shape into a 4”-wide circle. Cover the top with another large sheet of plastic wrap. Chill the dough for at least 30 minutes.
- Preheat the oven to 425°F, and coat a 9”-round pie plate with nonstick cooking spray.
- Leaving the dough between the sheets of plastic wrap, roll it out into a 11”-wide circle. Peel off the top layer of plastic wrap, and turn it out into the prepared pie plate. Peel off the other layer of plastic wrap. Gently press the dough into the pie plate, and trim the overhang. Spoon the apple pie filling into the center. Cover the edges of the pie crust with foil to prevent burning.
- Bake the pie at 425°F for 15 minutes. Without opening the oven door, reduce the temperature to 375°F and bake for an additional 15 minutes. Carefully remove the foil covering the crust, and bake for another 15 minutes (45 minutes total) or until the crust is golden. Cool completely to room temperature; then let the pie set for an additional 3 hours before serving.
Honey or agave may be substituted for the maple syrup.
{clean eating, low fat, low calorie}


You know, I don’t believe in all my years I’ve seen a single crust apple pie. It’s a different concept. Have you ever tried placing dough decorations over the filling before baking? Now some fillings you cannot place an unbaked dough decoration because it will sink. I think pumpkin pie is one of those but cherry pie you can. It’s a nice way to use leftover dough scraps and also add some additional decoration to the pie.
That’s so funny — I grew up eating apple pies with just the bottom crust, so I was shocked when I saw one with a top crust too! 😉 I haven’t tried doing that with this pie, but the filling is thick enough that I’m guessing they won’t sink. Another option is to bake the leftover pie scraps on their own, then lay them on top of the baked pie once it has cooled. 🙂 I’d love to hear what you think if you try this pie Pamela!
Hi! I’m planning to make this pie today. Just to clarify- you suggest we make the apple pie filling separately, and then cook it in the pie crust for another 45 mins? Wouldn’t that make the apples super mushy, after they are already cooked tender in the slow cooker?? Worried to try it for risk of wasting 9 cups of fresh apples in case I am misunderstanding the recipe.
Thanks!!
Yes, that’s exactly what you do Ana! If you prefer crisp apples, rather than soft and completely fork-tender, then you can cut back on the amount of slow cooker time. 🙂 I can’t wait to hear what you think of this apple pie!
It turned out amazing! I made them in individual ramekins and they were a huge hit with the entire family- especially the kids. Thank you!!
That makes me SO happy to hear Ana! I’m thrilled that everyone loved them! 🙂 Thank you for sharing that with me!
Hi Amy,
I want to try this perfect recipe for the thanksgiving and my friend can’t have dairy.
Is it possible to substitute butter and milk to non dairy options ?
Thanks
Elena
I’m so honored that you’d want to include my recipe as part of your Thanksgiving dinner Elena! Yes, you can definitely make it dairy-free. I recommend using Earth Balance buttery sticks in place of the butter (it has the best resulting taste and texture!), and any non-dairy milk will work. If you can’t find Earth Balance sticks, then most margarines will work. I don’t recommend coconut oil or any other oil because the crust won’t turn out properly flaky. 🙂 I can’t wait to hear what everyone thinks of this apple pie! Happy Thanksgiving!
I’ve never been a big sweets eater but with my little girl turning 7 I wanted to get her comfortable in the kitchen by having fun making some healthy treats to share on the weekends. We made our/my very first pie this past weekend using this recipe and it was amazing! I shared it with my coworkers and they fell apart over it! The best part was the house smelled amazing for a day. We did peel the Honeycrisp apples and used Agave instead of the maple syrup for the pie filling. Thank you so much! Can’t wait to try out the The Ultimate Healthy Dark Chocolate Cupcakes my daughter picked out for this next weekend.
Oh my goodness, that means SO much to me that you used my recipe to make you and your daughter’s first pie! I’m truly honored — what a huge compliment! Thank you!! 🙂 I’m really glad everyone enjoyed it, and I can’t wait to hear what you think of the cupcakes too!
Hi! I plan on makin your apple pie for Christmas dinner but I want to make the filling a day early so I can free up my slow cooker for other dishes on Christmas morning. Would you recommend 1-keeping the filling separate and assembling the pie right before baking; 2-assembling the pie and refrigerating until ready to bake; or 3-bake the whole thing a day early and reheat at dinner time?
Thanks for your help and I can’t wait to see how delicious this comes out!
I’m truly honored that you’d consider making this pie for your Christmas dinner Suzy! That means a lot to me! 🙂 To achieve the correct texture, the pie does need to be fully cooled to room temperature and then rest for 3 additional hours once at room temperature (see Step 6!). Therefore, if you have time to do that before your Christmas dinner, I think either option 1 or 3 will both work! If you’d like to serve it warm, then I recommend reheating individual slices. (The juices need time to fully set, and they only do that once the pie has cooled and rested!) I’m really excited to hear what you think of this apple pie! Merry Christmas!
Hi Amy!
I made this amazing pie yesterday and its really the most delicious pie i’ve ever made. My friends love it so much. Thanks for this recipe. I would ask you something. While Im doing the quantity of pies dough its seemed to me insuficient. Actually I afraid of did something wrong. But at the end it seemed enough, delicious. However i think quantity of dough can increase a little. If i double the ingredients quantity, any problem does occur?
I’m so glad you and your friends enjoyed this pie Oyku! That means the world to me that you’d call it the most delicious pie you’ve ever made. I’m truly honored — thank you for sharing that with me! 🙂 Yes, you can double the pie crust dough ingredients if you prefer a thicker crust. It may turn out a little soft on the bottom, but the flavor will remain the same! I just prefer mine on the thin side. 😉 I’d love to hear how that turns out if you try it!