
This past summer when my family and I flew to San Diego to visit my grandparents, Grandpa arranged a little surprise for us on the last afternoon of our trip. While he and Grandma moved around the living room furniture and set up a serve-yourself salad-and-sandwich lunch buffet in the kitchen, the rest of us stayed in the guest rooms. Grandpa was adamant — no sneak peeks!
When Grandpa announced that they were ready, we walked out to the kitchen, loaded our plates with homemade sub sandwiches and potato chips, and settled into the comfy sofa and chairs. After handing everyone a bottle of water, Grandpa turned on the TV and pressed “Play.”

The screen lit up with a DVD of videos shot more than 25 years ago, starting with the Christmas before I was born where Mom and Grandma bought Grandpa his first camcorder and filmed their own version of “The 12 Days of Christmas,” complete with ten Fords a-honking and nine diapers leaking. The video then moved through the weeks and months after my birth, and many of the scenes captured Grandma singing to me, desperately trying to calm me down after a crying fit.
Towards the end of the DVD, Grandpa recorded my third Thanksgiving, held at their house in San Diego. It began with documentary-style footage of following my dad around the grocery store, picking out various potatoes and green beans and declaring them “perfect,” before cutting to my mom back in the kitchen demonstrating how to bake pie.
As an incredible lady, she simultaneously mixed the ingredients for the crust on one side of the countertop while supervising me standing on a chair in front of the sink, stretched out as far as my little arms would go to wash my hands so I could help (and then “wash” a few of the dishes too when I grew bored with my fingers…). Mom soon switched to holding me on one hip while measuring the remaining water and stirring it into the dough to keep me out of trouble. She’s superwoman!

Then the time came to roll out the dough for the pie crust… And of course, I wanted to help. Mom tried to give me a little piece of the dough to play with while she moved the rolling pin back and forth over the rest, but I had other ideas. A few weeks earlier, Mom and I had made plaster of Paris plaques with my handprints indented into the centers for all of my grandparents as Christmas gifts, so I now thought that I needed to press my handprints into everything… Including that pie crust dough!
Whoops.
Somehow, Mom managed to get the pumpkin and pecan pies filled and into the oven handprint-free, but we all laughed around the TV while the Thanksgiving footage played when Mom retold that story!

And now as an adult, I’m able to resist any temptations to press my hands into the dough on my own, so my parents put me in charge of the pies for this year’s Thanksgiving feast. Although our family’s tradition always includes my Great-Grandma’s pecan pie, I perfected this Ultimate Healthy Pumpkin Pie to serve for the other half of dessert. And with how much my family enjoyed taste testing it… I think I’d better bake two!

HOW TO MAKE THE BEST HEALTHY PUMPKIN PIE
Let’s go over how to make the best ever healthy pumpkin pie! I’m about to explain each and every step of baking this recipe so that you understand what you’re doing and why to ensure that your pie turns out perfectly. There are lots of step-by-step photos too!
This healthy pumpkin pie recipe begins with the homemade pie crust. The crust is more than just a means of holding the filling… It’s its own masterpiece: delicate, crisp, buttery, flaky bliss! Although I’m not usually a crust person (shh, don’t tell!), I actually snuck “broken” pieces of the crust around the entire rim of one of the pies I baked while testing this recipe… Whoops!
Our healthy homemade pie crust differs from traditional ones in a few ways. First, you’ll use white whole wheat flour instead of all-purpose flour. White whole wheat flour is made from a special type of white wheat, as opposed to the red wheat that regular whole wheat flour comes from, which gives it a lighter taste and texture that’s very similar to that of all-purpose flour. You can find white whole wheat flour on the baking aisle of many grocery stores. Whole wheat pastry flour would be a great substitute, if you prefer.

Next comes the butter. Whereas Greek yogurt or applesauce often can be used as substitutes for butter in other baked goods like muffins, scones, or cakes, they do not work here and make the pie crust gummy instead. You simply cannot make a crisp, flaky pie crust without butter!
However, there’s good news! Unlike traditional recipes that use a full stick or two (that’s 8 to 16 tablespoons!), this healthy pie crust only requires 4 tablespoons of butter. Cut it in until the mixture resembles coarse crumbs. I highly recommend a pastry cutter like this one for that! They’re relatively inexpensive, and they do the job in half the time of a fork or two knives.
Tip: Pastry cutters are great for my scone recipes too!


Next you’ll mix in the remaining ingredients until the mixture comes together to form a dough. Shape that dough into a 4”-wide circle, and place it between two very large pieces of plastic wrap. After chilling, you’ll roll out the dough while it’s still sandwiched between the plastic wrap! This method makes much less of a mess compared to the traditional way of rolling out pie crusts with flour, and it makes transferring the pie crust to your pie plate much easier, too.
Now for the important part… For the best flaky crust that’s cooked all the way through — yes, including the bottom! — you must parbake the pie crust. Parbaking, also called pre-baking or partial baking, is a technique that ensures that the bottom of the crust fully cooks, instead of staying soft or chewy. Pies with creamy custard-like fillings (like pumpkin pie!) are usually parbaked because the filling cooks at a different rate than the crust.


To parbake your healthy homemade pie crust, fit it into the pie plate, and add a sheet of foil or parchment paper to the center. Pour pie weights — or uncooked rice, if you can’t find yours like me! — into the center, ensure the foil or parchment paper is fully touching the pie dough all the way around the steep edges of the plate, and bake the crust at a slightly higher temperature for 15 minutes.
Tip: Foil works slightly better than parchment paper here because it conducts heat better, so it warms the bottom of the crust that it touches.
Do not skip the pie weights or rice, and do not prick the crust with a fork instead of using the pie weights or rice. Either of these will result in a shrunken parbaked crust with big bubbles in the center and around the edges from where the steam tried to escape. The gravity from the weights or rice is what keeps the bottom of the pie crust flat while baking.

Now that you have your perfect crust, it’s time to make the filling! The filling starts with one full can of pumpkin purée. You want regular ol’ pumpkin purée, not pumpkin pie filling! (The cans are sometimes labeled as “100% pumpkin” instead.) The latter contains refined sugar, which will impact the texture of your pie. And of course, you can’t have pumpkin pie without the spices! You’ll use a trio of cinnamon, nutmeg, and ginger. I tested this healthy pumpkin pie with many different amounts of these three, and all of my taste testers agreed that the recipe version below was absolutely perfect.
Instead of heavy cream or evaporated milk, you’ll use nonfat milk and Greek yogurt. Greek yogurt is one of my favorite ingredients in healthier baking! I’ve used it in muffins, cupcakes, scones, cakes, brownies, pancakes, and even frosting. It adds a rich, creamy quality for a fraction of the calories of heavy cream, and it provides your healthy pumpkin pie with a little protein boost too.
To help the filling set, you’ll use egg whites and cornstarch. To avoid clumps, whisk the cornstarch together with the milk before mixing it into the filling, and lightly beat the egg whites separately as well. This ensures the filling of your healthy pumpkin pie turns out smooth and creamy after baking.

Finally, you’ll sweeten your healthy pumpkin pie with a combination of pure maple syrup and liquid stevia. Remember to use pure maple syrup (the kind that comes directly from maple trees!), not pancake or sugar-free syrup. The latter two include refined sugar and corn syrup, among other things, and they’ll create a different taste and texture.
As for the other sweetener, stevia is a plant-based, no-calorie sweetener that’s clean eating friendly. I love this liquid stevia. You can find it at many health-oriented grocery stores, but I’ve found the best price online here. (You’ll also use it in all of these other recipes of mine!)
Hint: Stevia is very concentrated, so a little bit goes a long way! You’ll only need ½ teaspoon to sweeten this entire pie. (That’s the equivalent of about ¼ cup of granulated sugar!)
Tip: Many stevia brands and products have different sweetness levels, so they’re not necessarily 1-for-1 substitutes for each other. For the best flavor and texture, I highly recommend using the same one that I do!

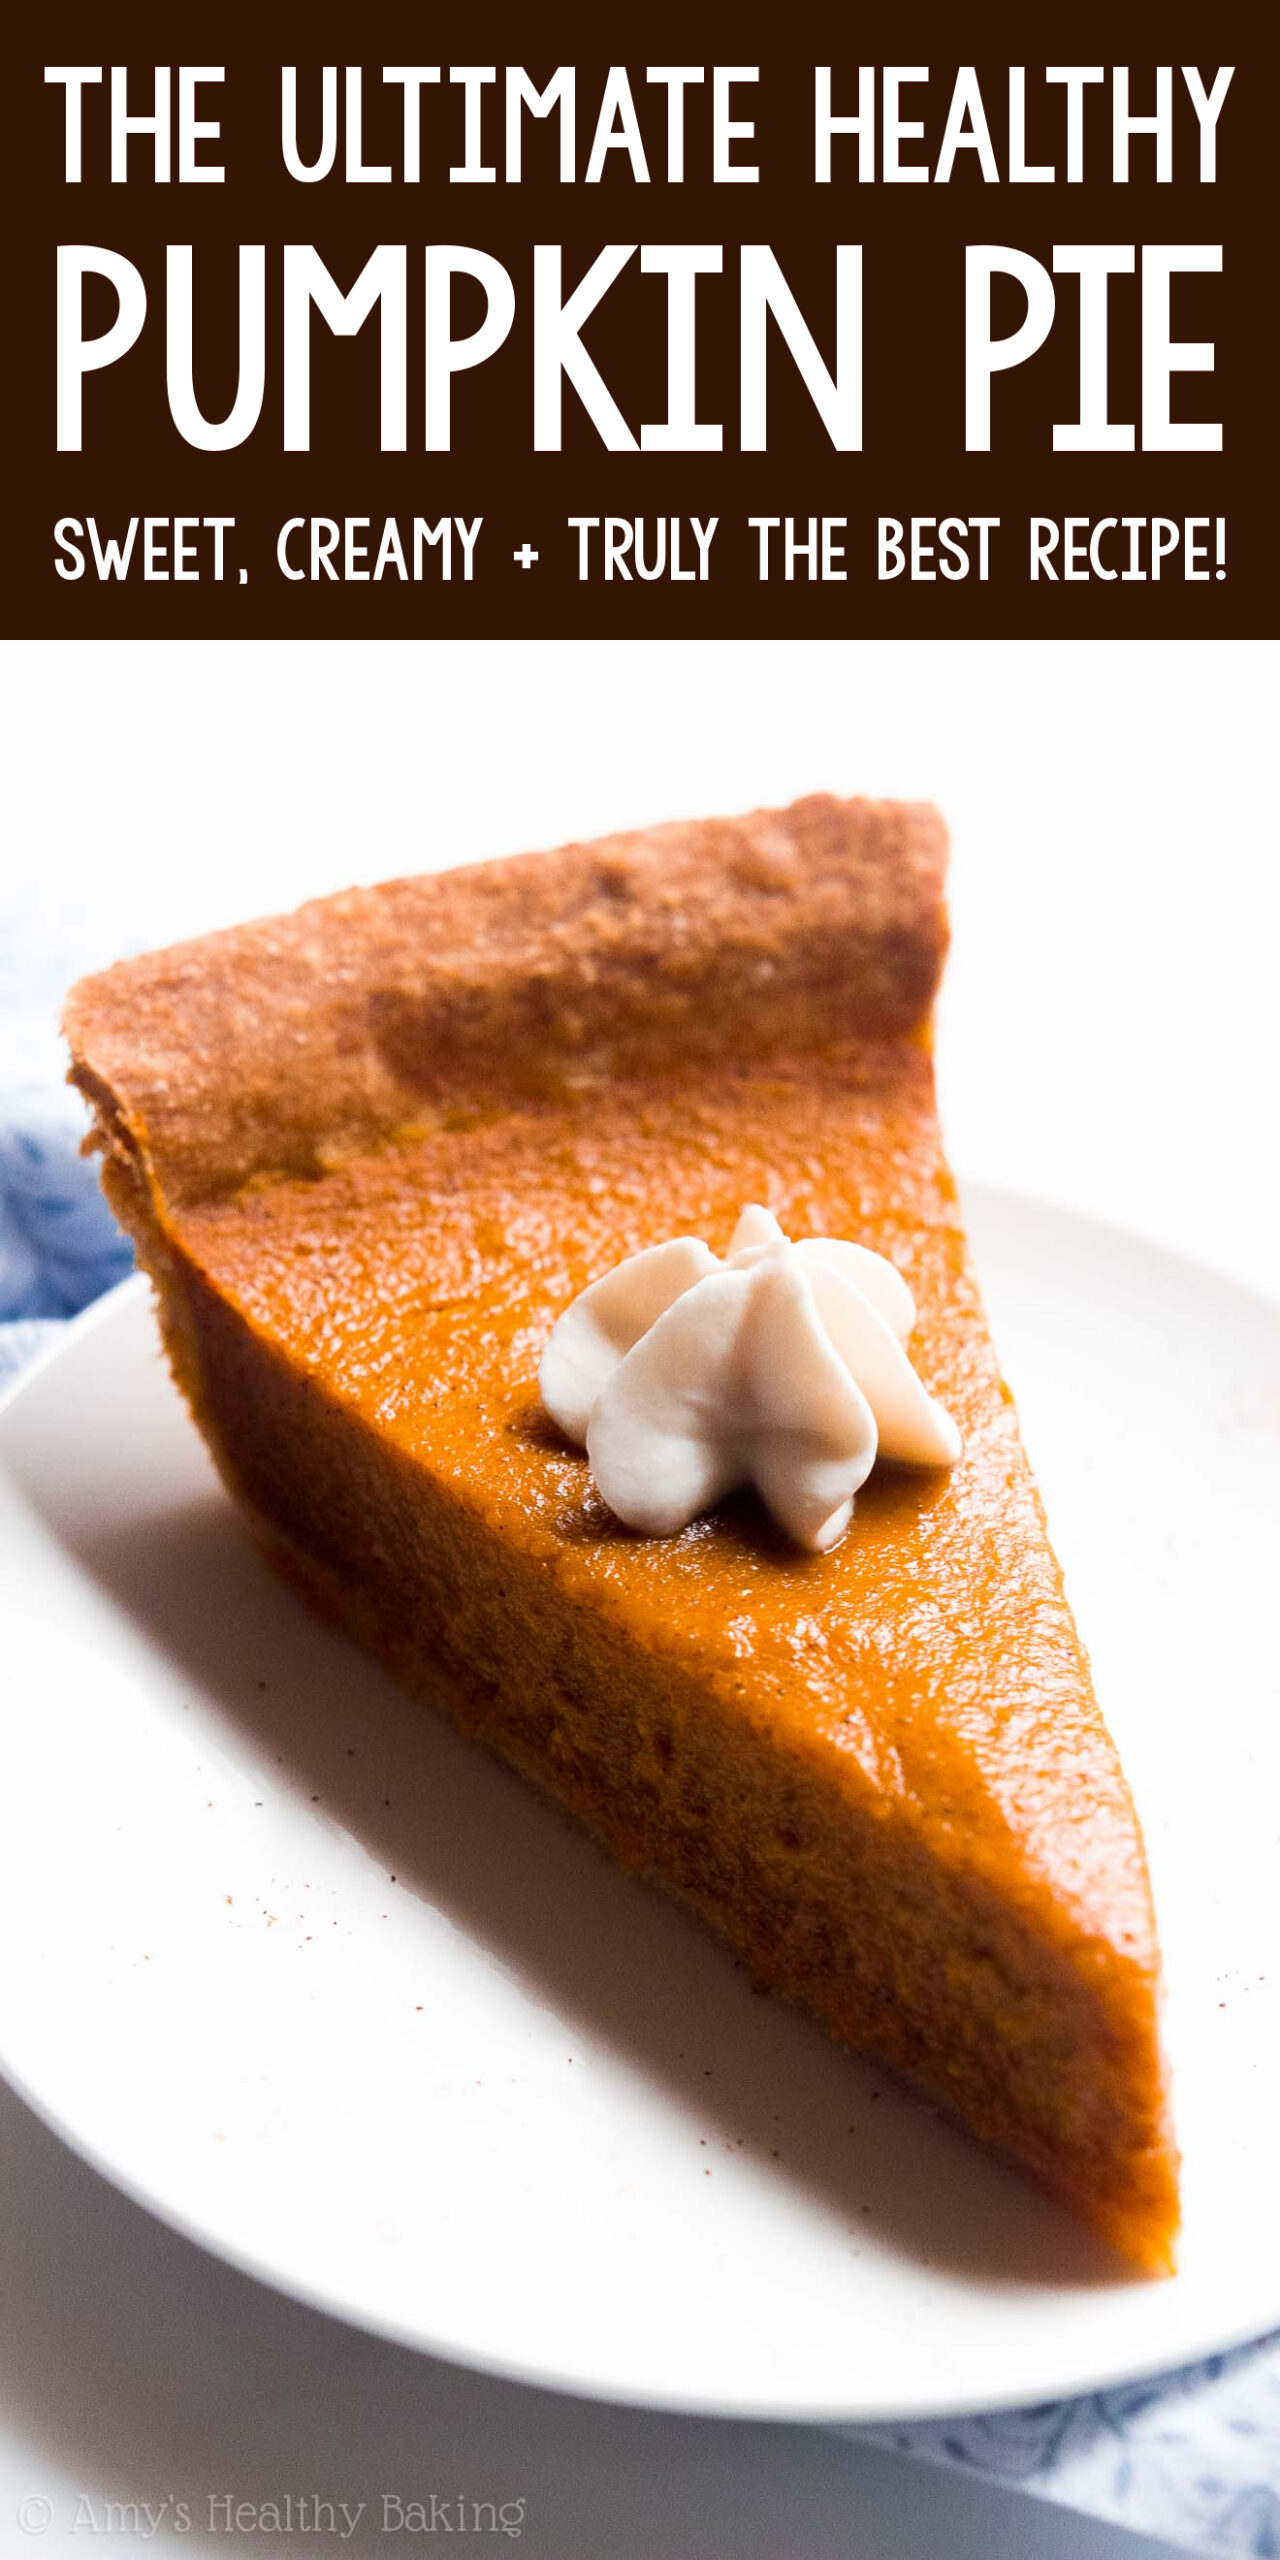
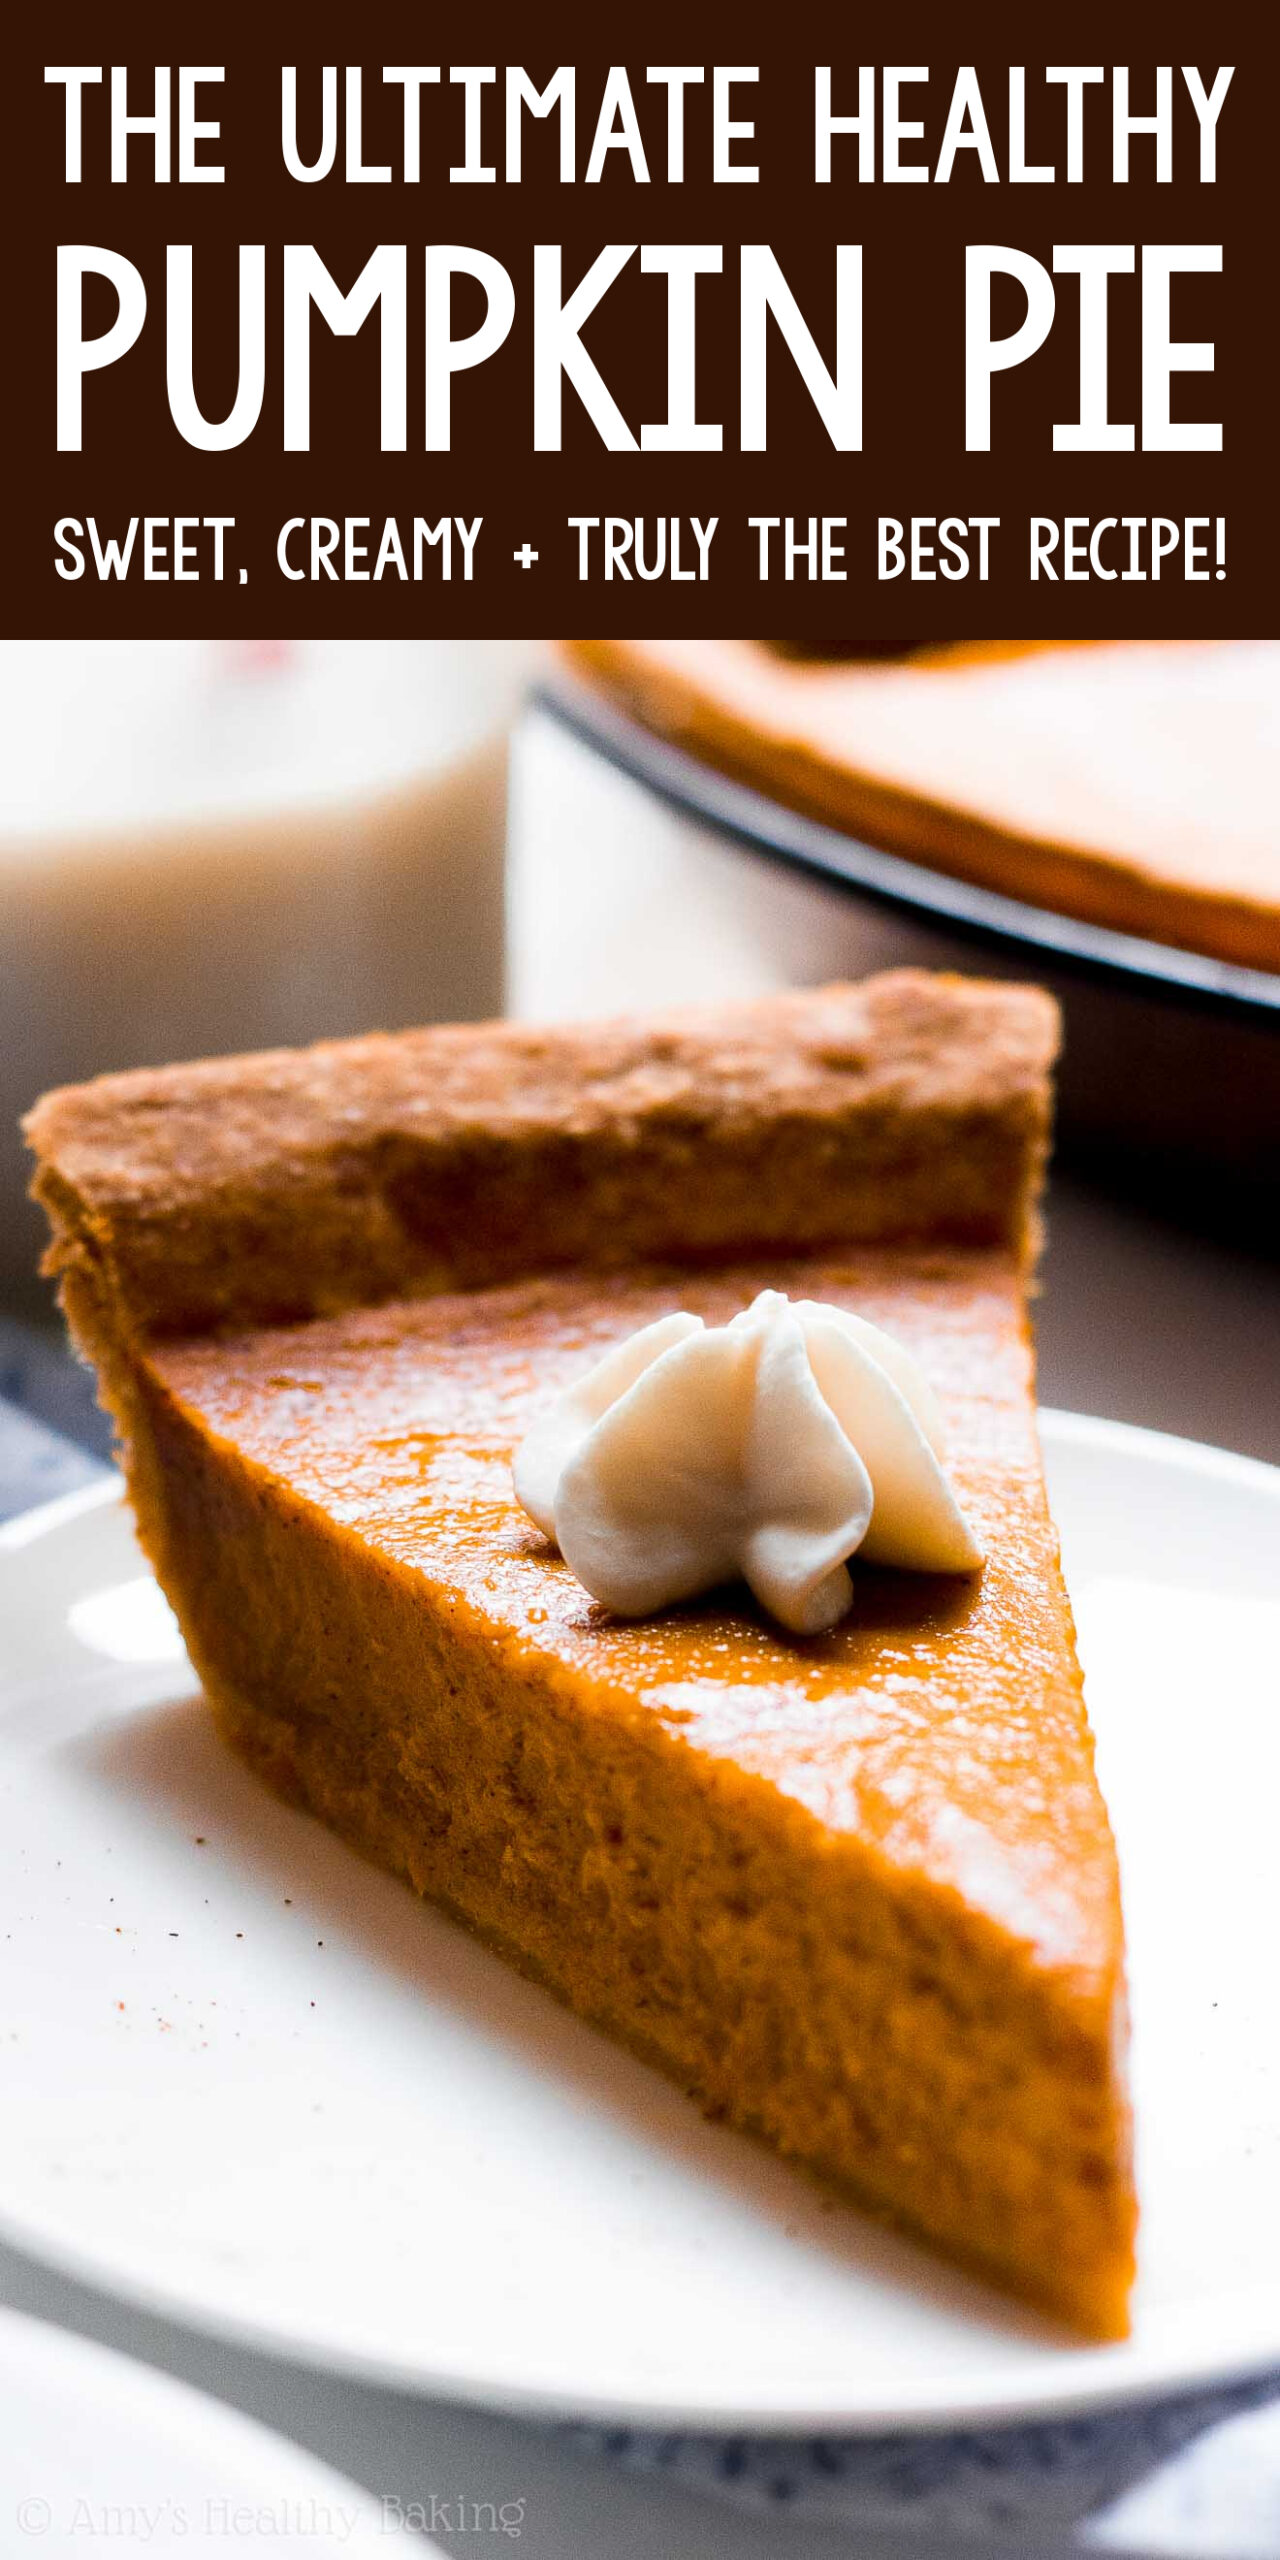
For the best results, cool your healthy pumpkin pie completely to room temperature before chilling for 8 hours. This long chilling time allows the flavors to meld, and it also makes for the cleanest cuts when slicing the pie to serve! If you can’t wait the full 8 hours, make sure you chill the pie for at least 3 hours. I promise it’s worth the wait!


And of course, you can’t have pumpkin pie without whipped cream! For this healthier, lightened-up version, you’ll beat a small amount of heavy cream to the soft-peak stage before adding Greek yogurt and more liquid stevia. It has the same consistency as regular whipped cream made entirely from heavy cream but for a fraction of the calories!
My dad assumed that meant he could douse his entire slice with it… And I didn’t blame him! 😉

Now who else wants a slice?? And when you make your own, remember to snap a picture and share it on Instagram using #amyshealthybaking and tagging @amyshealthybaking IN the photo itself! (That guarantees I’ll see your picture! 🙂 ) I’d love to see your ultimate healthy pumpkin pie!

The Ultimate Healthy Pumpkin Pie
Ingredients
FOR THE CRUST
- 1 cup (120g) white whole wheat flour (measured like this)
- ½ tsp salt
- 4 tbsp (56g) unsalted butter (very cold and cubed)
- 2 tsp nonfat milk (cold)
- 1 tsp pure maple syrup (cold)
- ¾ tsp vanilla extract
- 1-2 tbsp (15-30mL) ice cold water
FOR THE FILLING
- 1 15oz can pumpkin purée (not pumpkin pie mix!)
- ¼ cup (60g) plain nonfat Greek yogurt
- ½ cup (120mL) nonfat milk
- 1 tbsp (8g) cornstarch
- 1 ½ tsp ground cinnamon
- ¼ tsp ground nutmeg
- ¼ tsp ground ginger
- ¼ tsp salt
- ⅛ tsp black pepper (see Notes!)
- ¼ cup (60mL) pure maple syrup
- 2 tsp vanilla extract
- ½ tsp liquid stevia (see Notes!)
- 3 large egg whites, room temperature & lightly beaten
FOR THE WHIPPED CREAM
- 3 tbsp (45mL) heavy whipping cream
- 6 tbsp (90g) plain nonfat Greek yogurt (see Notes!)
- ½ tsp liquid stevia (or adjusted to taste – and see Notes!)
Instructions
- To prepare the crust, whisk together the flour and salt in a medium bowl. Cut in the butter using a pastry cutter or the back of a fork until the mixture resembles crumbs. (See photo in the blog post above.)
- In a small bowl, whisk together the milk, maple syrup, vanilla, and 1 teaspoon of water, and drizzle over the flour mixture. Mix until all of those liquid ingredients have been incorporated. Continue to add water ¼ teaspoon at a time and mixing until completely incorporated until the mixture forms a dough. (I often use a total of 1 tablespoon of water.)
- Transfer the dough to the center of a large sheet of plastic wrap, and shape into a 4”-wide circle. Cover the top with another large sheet of plastic wrap. Chill the dough for at least 30 minutes.
- While the dough chills, prepare the filling. Stir together the pumpkin purée and Greek yogurt in a large bowl. In a separate smaller bowl, whisk together the milk and cornstarch. Stir the milk mixture into the pumpkin mixture. Add the cinnamon, nutmeg, ginger, salt, and pepper, stirring until fully incorporated. Stir in the maple syrup, vanilla, and liquid stevia. Gradually stir in the egg whites until fully incorporated.
- Preheat the oven to 375°F, and coat a standard 9”-round pie plate (not deep dish!) with nonstick cooking spray.
- Leaving the dough between the sheets of plastic wrap, roll it out into a 11”-wide circle. Peel off the top layer of plastic wrap, and turn it out into the prepared pie plate. Peel off the other layer of plastic wrap. Gently press the dough into the pie plate, and trim the overhang.
- Line the center of the pie with foil, ensure that the foil is fully touching the dough all the way around the steep sides of the pie plate, and pour pie weights or uncooked rice into the center. Bake the crust at 375°F for 15 minutes. Carefully remove the foil and pie weights or rice.
- Pour the filling into the center of the parbaked crust. Bake the pie at 350°F for an additional 35-40 minutes or until the center barely jiggles when lightly shaken. Cool completely to room temperature; then chill the pie for an additional 8 hours before serving.
- To prepare the whipped cream, place a glass or metal bowl and the electric beater attachment(s) in the freezer for 10 minutes. Remove from the freezer. Add the heavy cream, and beat for 2-3 minutes or until it reaches the soft peak stage. Add the Greek yogurt and liquid stevia, and beat for an additional 1-2 minutes or until it reaches the stiff peak stage. Cover and refrigerate until ready to serve the pie. Top each slice with a dollop of whipped cream.
Notes
View Nutrition Information + Weight Watchers Points
You may also like Amy’s other recipes…
♡ The Ultimate Healthy Apple Pie
♡ The Ultimate Healthy Sweet Potato Pie
♡ Pumpkin Pie Bars
♡ Easy Pecan Hand Pies
♡ Pumpkin Pie Thumbprint Cookies
♡ Pecan Pie Thumbprint Cookies
♡ Maple Sweet Potato Casserole
♡ …and the rest of Amy’s healthy pumpkin recipes and healthy Thanksgiving recipes!


I am wondering if I can use honey in place of the maple syrup?
I really appreciate your interest in my recipe Izzy! I’ve actually covered this exact question in the Notes section of the recipe, located directly underneath the Instructions. I know it can be easy to miss! 🙂 I’d love to hear what you think if you make this pumpkin pie!
hello Amy! Could I use whole eggs instead of egg whites? Thank you
I really appreciate your interest in my recipe Devin! If you’d like to use whole eggs, then I recommend reducing the milk by 1 tablespoons (so use 7 tablespoons instead of the full ½ cup) to compensate for the added volume from the 3 egg yolks. 🙂 I’d love to hear what you think of this pumpkin pie if you try making it!
Loved this pie! I subbed lite coconut milk for milk and didn’t separate the eggs and it was still perfect. The black pepper is subtle but it does add a tiny little kick. The texture is light and creamy and not too eggy like some other recipes. I’m going to make it again today and increase the spices a bit and let the flavors meld so it will be ready for tomorrow. Thanks for the recipe!
I’m so glad you enjoyed this pumpkin pie! That means a lot to me that you’d make it a second time — that’s the best kind of compliment! 😉 I hope your second pie turned out even better!
Hello Amy!
I’m hoping to try this recipe on the weekend and was wondering if you could advise on what size pie dish I should use? Should it be particularly deep or will a standard one suffice?
Thanks so much,
Ozel
I really appreciate your interest in my recipe Ozel! This recipe was designed for a regular pie plate, not deep dish. My regular pie plates are about 1″ deep, or maybe a fraction of an inch more. 🙂 I can’t wait to hear what you think of this pumpkin pie!
Hi Amy, I want to use my pumpkin pie spice instead of the individual spices, so what would be the measurement for the pps?
I truly appreciate your interest in my recipe Mary! Just add together the cinnamon + nutmeg + ginger measurements, which should equal 2 teaspoons. 🙂 I can’t wait to hear what you think of this pumpkin pie!
Hi Amy,
I’m really new to baking and was excited to find your healthy recipes. I’m planning to try this recipe for the first time, but unfortunately I don’t having a standing mixer at home. Can you mix the dough for this pie crust by hand? If yes, how do you advise doing so? In general, if a standing mixer is required, do you specify that in your recipes?
Thanks!
Julia
I’m so honored that you’d like to try making my recipes, including this pie! That really means a lot to me, Julia. 🙂
You’re in luck — I almost never use a stand mixer to make my recipes! I’ll always specify in the Instructions exactly when you need to use a mixer (see Step 4 of this recipe, as an example!), and even then, I generally use a hand-held mixer. My stand mixer has been sitting it its box in the garage for 3+ years… That’s how often I use it! 😉 In general, all you need to make my recipes is a whisk (where explicitly instructed), a pastry cutter (although more of a “nice to have,” but they’re really inexpensive!), and a fork for everything else.
That includes this recipe! I used a pastry cutter and fork to make this pie crust, and I used a whisk and fork to make the filling. Super easy — and I love how forks are dishwasher-friendly, which means I have fewer dishes to wash by hand! 😉 I can’t wait to hear what you think of this pumpkin pie!
Thanks for your response, Amy! This is super helpful information – I already made your chai spiced apple crisp and it was a hit, so I’m looking forward to trying this pie and some of your other recipes, sans standing mixer 🙂
-Julia
It’s my pleasure, Julia! I’m happy to help. 🙂 I’m so glad you enjoyed my chai spice apple crisp! That really means a lot; thank you for taking the time to let me know. I’m really looking forward to hearing what you think of this pie too — and any other recipes you decide to try as well!
I am so happy you published this recipe! Just in time for my Thanksgiving planning – I think everyone in my house will like this due to it being all healthy ingredients. I calculated the SmartPoints value for WW Blue and Purple plans – came to 5 SP per serving! Maybe even same for Green – just the Greek yogurt would be different – divided by 10 servings probably adds nothing! Thank you!
I’m so honored that you’d consider including this pie as part of your Thanksgiving meal, Sharon! That’s great to know about the different WW plans. I appreciate you sharing! 🙂 I’d love to hear what everyone in your house thinks of this pumpkin pie, if you do end up making it!