
Every year in elementary school, my teachers organized a Valentine’s Day party with the help of a few parent volunteers from our class. Unless the holiday fell on a Friday, my mom rarely signed up to do anything. She worked part-time as a scientist and took every Friday off of work to spend time in the classroom grading our spelling tests and math worksheets, which she much preferred over party planning!
When February 14th arrived, we came to school dressed in our favorite pink, red, or heart-themed outfits with matching hair ties and bracelets. (Well, at least the girls… Some of the boys boycotted and wore black and blue instead!) As we grew older, some girls started painting their nails to coordinate with their clothes too.
Life was much more fun back then… No romantic dates or restaurant reservations or red roses to worry about — just lots of sweetheart candies and chocolate kisses!

While the students ran around outside during the lunch recess, the parents set up festive tables inside and hung red crêpe paper streamers around the walls. When we came back to the classroom, we pulled out our homemade shoebox “mailboxes” covered in heart-shaped stickers and walked around the desks, dropping a little paper Valentine in each person’s box.
Finally, after all of that waiting, we were allowed to eat the food! Although the volunteers tried to set out some not-so-sugary options like Goldfish or pretzel sticks, we always gravitated towards the desserts. Miniature vanilla cupcakes topped with tall swirls of red and white frosting, thick Lofthouse-style sugar cookies covered with pink icing, fudgy brownie bites, stiff heart-shaped sugar cookies coated in pink- and red-colored coarse sugar crystals… Plus red fruit punch and pink lemonade to wash it all down!
I’m pretty sure I tried to take at least one of each treat…

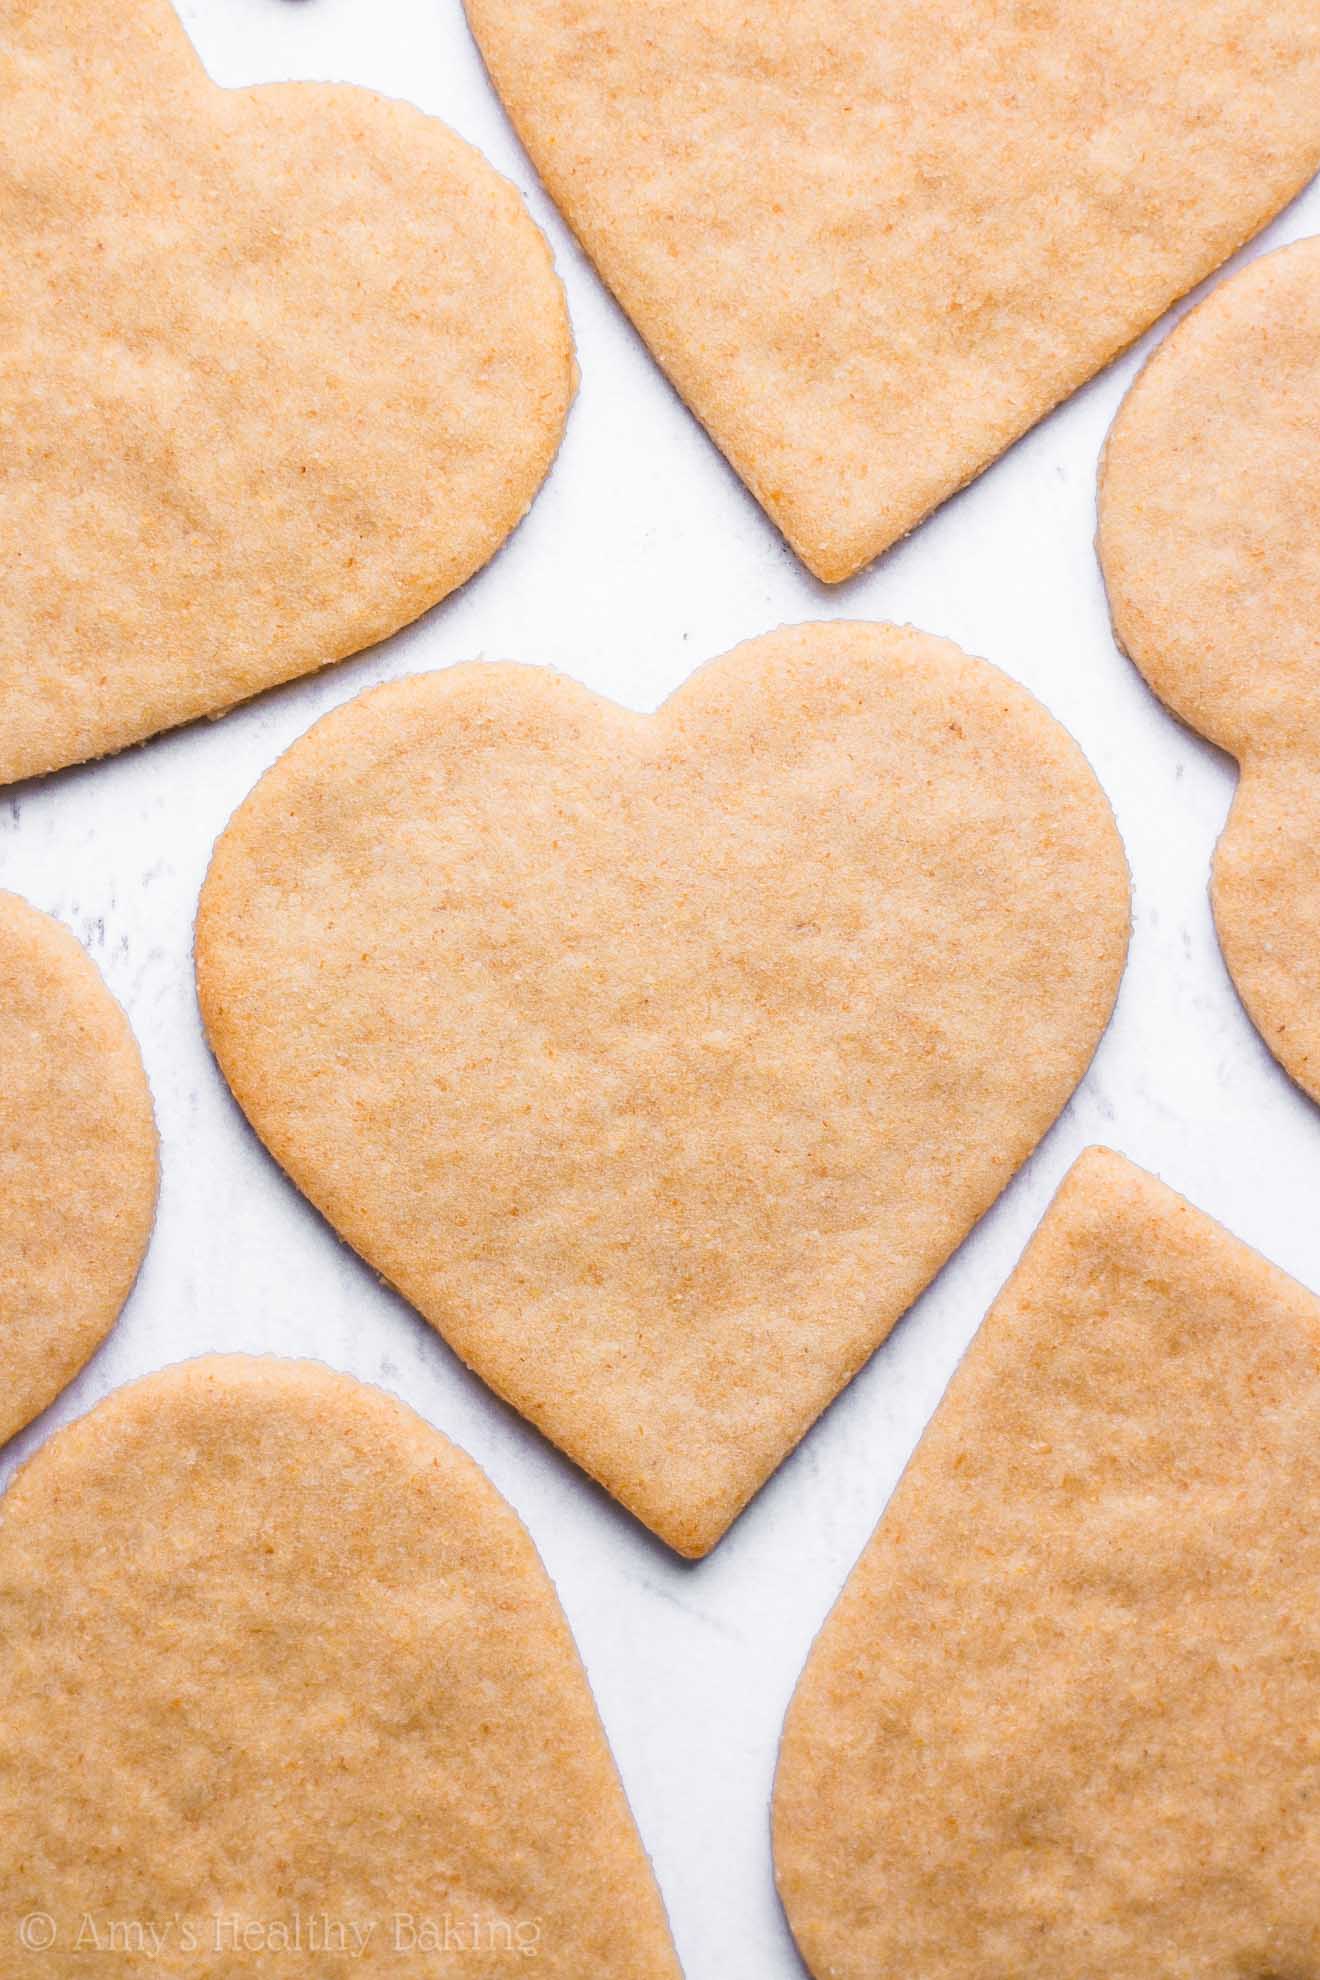
Because I started feeling nostalgic when I spotted those heart-shaped cookies during my last visit to the grocery store, I decided to create my own healthier recipe when I returned home. These ultimate healthy sugar cookies are the result!
They’re soft, buttery, and taste like those traditional ones from the bakery or your grandma’s kitchen… But they’re healthier and easier to make!
I think that sounds like the perfect Valentine’s Day treat, don’t you?

QUICK OVERVIEW – THE ULTIMATE HEALTHY SUGAR COOKIES
Difficulty: Fairly simple, including for many beginner bakers.
Taste: Sweet, buttery, and rich — just like traditional ones!
Texture: Beautifully soft, a hint of chewiness, and melt-in-your-mouth tender.

INGREDIENTS TO MAKE THE ULTIMATE HEALTHY SUGAR COOKIES
Let’s cover what you’ll need to make these healthy sugar cookies! Many of these are common baking ingredients, so there’s a good chance you have almost everything that you need.
Flour. To make these sugar cookies healthier, you’ll start with white whole wheat flour. I know — it sounds a little confusing, doesn’t it? But contrary to what many people think, this flour is not a combination of white (aka all-purpose) flour and regular whole wheat flour!
Here in the US, white whole wheat flour comes from a special type of finely ground white wheat, whereas regular whole wheat flour is made from red wheat. White wheat is softer with a milder flavor, which gives white whole wheat flour a lighter taste and texture (similar to that of all-purpose flour), and since it’s 100% whole wheat flour, it still has the same benefits as regular whole wheat flour!
Hint: Whole wheat pastry flour would be a great substitute!
Tip: If you’d like to make your healthy sugar cookies gluten-free, then see the Notes section of the recipe. I’ve shared my recommendations there!
Cornstarch. Although it may sound like a strange ingredient for cookies, cornstarch helps keep these sugar cookies soft by soaking up the extra moisture in the dough. It’s a great cookie baking trick — I’ve used it to make really soft chocolate chip cookies and thumbprint cookies too!
Baking powder. You’ll only use a tiny bit of baking powder — just enough to give these sugar cookies a more tender texture!
Salt. A small pinch of salt balances the flavor and brings out the buttery taste of these healthy sugar cookies.

Unsalted butter. Unlike many traditional recipes that call for an entire stick or two of butter, this one only requires 2 tablespoons. Yes, that’s it! That really helps keep these healthy sugar cookies low calorie and low fat.
Secret ingredient. I also added a special secret ingredient to give these sugar cookies that iconic buttery taste… Butter extract! It’s a clear liquid and typically sold on the baking aisle near the vanilla extract. (Some Walmart stores also sell a larger 4-ounce bottle on their wedding aisle for an even better price!) You can find butter extract online too.
Note: The butter extract is required to make the cookies taste like traditional recipes. If you can’t find it, you can substitute vanilla extract, but they won’t have quite the same iconic flavor.
I promise it’s not a “one-time” use ingredient though! You’ll also use butter extract to make all of these other recipes of mine. It’s a really handy item to have in your pantry!
Vanilla extract. Just like in traditional recipes, you’ll add a splash of vanilla extract to the dough of these healthy sugar cookies. It accentuates their rich buttery notes and helps give them the same irresistible flavor you know and love!
Egg. A very predictable cookie ingredient! A large egg binds together the other ingredients, and the yolk also adds to these sugar cookies’ beautifully soft texture.

Sweeteners. To sweeten these healthy sugar cookies, you’ll use a combination of two ingredients instead of granulated sugar: honey and vanilla stevia. Stevia is one of my favorite ingredients! It’s a plant-based, sugar-free, no-calorie sweetener that’s clean eating friendly. It’s very concentrated, so a little goes a long way!
This is the type that I buy, and it’s sold in a small bottle with an eyedropper. You can find it at many health-oriented grocery stores, but I often buy it online. (And you’ll use it in all of these recipes of mine too!)
Tip: Many stevia brands and products have different sweetness levels, so they’re not necessarily 1-for-1 substitutes for each other. For the best results, I highly recommend using the same one that I do!
Because cookie dough requires a precise balance of liquid and dry ingredients, you cannot use pure honey. That would throw off the ratio and make your cookie dough as wet as muffin batter! If you’d rather not use stevia, then see the Notes section of the recipe. I included alternative options there!

Confectioners’ style sweetener. I love my sugar cookies plain, but there’s nothing wrong with adding icing! If you’d like to make the optional glaze to drizzle on top, you’ll need confectioners’ style erythritol. Erythritol is also a plant-based, sugar-free, no-calorie sweetener. Many stores have started to stock it, but I often buy mine online here.
Hint: Regular powdered sugar also works, if that’s something you like to keep on hand!
Milk. Almost any type will work! You just need a bit to mix with the confectioners’ style sweetener to make the icing, so feel free to use whatever you already have in your fridge.
HOW TO MAKE THE BEST HEALTHY SUGAR COOKIES
Now let’s talk about how to make the best healthy cut-out sugar cookies! This recipe is simple and straightforward, and I also have some tips for you to make sure your cookies turn out perfectly.
Measure correctly. This is my #1 tip for making perfect sugar cookies… Properly measure all of the ingredients!
For the flour, use this method or a kitchen scale. (← That’s the one I own!) Do NOT dip your measuring cups directly into the flour. This can result in adding 1 ½ times as much flour as is called for by the recipe! That extra flour will dry out the cookie dough and make your cookies bready, if not crumbly and falling apart. It’ll also make them taste bland. Yet if you use one of those two options above, your healthy sugar cookies will be perfectly soft and sweet!
For the honey, use measuring cups — NOT a scale! I know many scales offer mL or fluid ounces as an option, but that only works for liquids with a density of exactly 1.0g/mL (like water). Unless you’d like to look up the exact density of your honey and convert from mL to grams, measuring cups are more accurate. (Faster too!)
No mixer required. That’s right — no mixer required to make the dough for these healthy sugar cookies! You only need bowls, a whisk, and a fork. They’re faster and easier to make than many traditional recipes! And that’s partially because…
Melt the butter. You’ll melt the butter. No waiting around for it to soften or creaming it with the sweeteners!
This doesn’t just save time either… I found that melted butter made these sugar cookies more tender, compared to the more traditional method of creaming the butter. Softer cookies and faster to make is a winning combination in my book!

Chill. Once you’ve mixed up the cookie dough, it’s time to chill. Chilling is mandatory. The cookie dough will be sticky after stirring together all of the ingredients, and chilling helps it stiffen so you can roll it out and slice it into fun shapes with cookie cutters!
To chill, shape the dough into a 1”-thick rectangle on top of a very large piece of plastic wrap, and lay another very large piece over the top. See that photo above? You want lots of excess plastic wrap on all four sides because…
Roll. You’ll roll out the cookie dough between the sheets of plastic wrap. That’s right — no need to flour your work surface or rolling pin! I love an easy clean-up like that.

Cookie cutters. Time to pick your shapes! I used this heart-shaped cookie cutter for the sugar cookies in these photos. I’ve also used this ghost to make Halloween sugar cookies and this festive holiday set to make Christmas sugar cookies!

Transfer. Once you’ve cut out as many shapes as will fit, peel the scraps away from the shapes, instead of lifting the shapes out of the scraps. This trick ensures that those pretty hearts (or stars… or candy canes… or whatever seasonal cookie cutters that you’re using!) maintain their shape and don’t become stretched out or deformed while transferring them to the baking sheet.
Reroll (once!). You can gather and re-roll the scraps to cut out more cookies, but I generally recommend that you only do this once. When you roll the cookie dough too many times, it becomes tougher and not quite so soft and chewy after baking.

Bake. These healthy sugar cookies bake quite quickly, so set a timer and don’t stray too far from the kitchen! They’re done when the centers still feel a teensy bit soft. The residual heat from the warm cookie sheet will finish baking those centers all the way through while you let the cookies rest before transferring to a wire rack.
Decorate. This is entirely optional! As you can tell from my photos, I often eat these healthy sugar cookies plain. I just love their sweet buttery flavor!
But if you’d like to decorate yours, mix together the confectioners’ style sweetener and milk in a small bowl once your cookies have completely cooled to room temperature. (If you tried decorating them while warm, that would dissolve the glaze!) Then pipe or drizzle it over their tops for a pretty finishing touch.

FAQS ABOUT THE ULTIMATE HEALTHY SUGAR COOKIES
Are these healthy sugar cookies low calorie, low fat, gluten-free, or clean eating?
Yes — to everything! These healthy sugar cookies are naturally clean eating, low fat, and low calorie (compared to many traditional recipes). They contain no refined sugar, and I’ve included options to make them gluten-free and dairy-free in the Notes section of the recipe.
Can I use a different flour?
Yes! Whole wheat pastry flour is a fantastic alternative. All-purpose flour and regular whole wheat flour also work, but keep in mind that your cookies may have a slight “wheat-y” flavor if you use regular whole wheat flour.
Do I have to use the cornstarch? Is there something else I can substitute?
I haven’t tried substituting anything for it, but you’re welcome to omit it. Just keep in mind that your cookies won’t be quite as soft.

What can I use instead of butter extract?
I highly recommend using the butter extract, if at all possible! It’s what creates that iconic buttery sugar cookie taste in this healthy version. If you can’t find it in stores, you can purchase it online!
If you strongly prefer not to use it, then you may substitute additional vanilla extract. Just remember that your cookies will taste a bit different!
What can I substitute for the honey or stevia?
Pure maple syrup and agave work well in place of the honey! I completely understand that stevia doesn’t work for everyone. I’ve included some alternatives for it in the Notes section of the recipe!
Can I use another type of stevia?
It depends. Many stevia brands and products have different sweetness levels, so they’re not necessarily 1-for-1 substitutes for each other. If you’d like to try something besides the vanilla stevia that I use, you may need to use a different amount and make some tweaks to the recipe to ensure your cookies turn out correctly.

My cookie dough was super sticky, and I couldn’t roll it out or cut it into shapes. Do you know why that happened?
The most common culprit is too much honey. Not enough flour will also do it. Make sure you’re measuring these correctly! (See the “Measure correctly” header in the “How to Make the Best Healthy Sugar Cookies” section above for more info.)
Also, remember to chill the cookie dough for at least 1 hour! It’ll be quite sticky and tacky when you first mix it together, but chilling stiffens it so you can roll it out and cut out cute shapes.
I had the opposite problem. My cookie dough was too dry and wouldn’t hold together. Why is that?
The most common culprits here are the opposite of the ones above: too much flour or not enough honey. Again, make sure you’re measuring these the right way! (See the “Measure correctly” header in the “How to Make the Best Healthy Sugar Cookies” section above for more info.)
Substituting coconut flour will also yield a very dry and crumbly cookie dough. Stick with one of the flour options that I provided in the Notes section instead!

What’s the best way to store these healthy sugar cookies? How long will they last?
Store any leftover cookies in an airtight container. They’ll stay fresh for at least four days if left at room temperature or close to a week (if not longer!) if refrigerated. If you’ve decorated them, store your cookies in the fridge instead.
Can I freeze them?
Absolutely! When plain and undecorated, these healthy sugar cookies freeze and thaw really well.
Can I ship them? To family and friends for the holidays, for example?
That’s so thoughtful of you! You definitely can. I have a handy guide all about how to package and mail cookies, including tips for these healthy sugar cookies!

Pure sugar cookie bliss! ♡ And when you make your own, remember to snap a picture and share it on Instagram using #amyshealthybaking and tagging @amyshealthybaking IN the photo itself! (That guarantees I’ll see your picture! 🙂 ) I’d love to see your healthy sugar cookies!

The Ultimate Healthy Sugar Cookies
Ingredients
FOR THE COOKIES
- 1 cup + 6 tbsp (165g) white whole wheat flour (measured like this)
- ¾ tsp cornstarch
- ¼ tsp baking powder
- ¼ tsp salt
- 2 tbsp (28g) unsalted butter, melted and cooled slightly
- 1 large egg, room temperature
- 1 tsp vanilla extract
- ½ tsp butter extract
- ¼ cup (60mL) honey
- ¾ tsp vanilla stevia
FOR THE ICING (optional)
- 10 tsp confectioners' style erythritol
- 2 tsp nonfat milk
Instructions
- To prepare the cookies, whisk together the flour, cornstarch, baking powder, and salt in a medium bowl. In a separate bowl, whisk together the butter, egg, vanilla extract, and butter extract. Stir in the honey and vanilla stevia. Add in the flour mixture, stirring just until incorporated. Transfer the dough to the center of a large sheet of plastic wrap, and shape into a 1”-tall rectangle. Cover the top with another large sheet of plastic wrap. Chill the dough for at least 1 hour.
- Preheat the oven to 350°F, and line two baking sheets with silicone baking mats or parchment paper.
- Leaving the cookie dough between the sheets of plastic wrap, roll it out until 1/8” thick. Lightly flour your cookie cutter, and press it into the dough, making sure each shape lies as close to its neighbors as possible to minimize unused dough. Peel the unused dough away from the shapes, and place them onto the prepared baking sheets. Reroll the unused dough, and repeat.
- Bake the cut out cookie dough at 350°F for 8-10 minutes. (The rerolled dough may require a little less time.) Cool on the baking sheet for 5 minutes before turning out onto a wire rack to cool completely.
- To prepare the icing, stir together the confectioner’s style stevia and milk in a small bowl. Spoon into a zip-topped bag, and snip off the corner. Pipe onto the cooled cookies.
Notes
View Nutrition Information + Weight Watchers Points
You may also like Amy’s other recipes…
♡ The Ultimate Healthy Chocolate Sugar Cookies
♡ The Ultimate Healthy Gingerbread Cookies
♡ The Ultimate Healthy Chocolate Chip Cookies
♡ The Ultimate Healthy Oatmeal Raisin Cookies
♡ The Ultimate Healthy Snickerdoodles
♡ …and the rest of Amy’s healthy cookie recipes and healthy sugar cookie recipes!


Amy, I loved your preface nostalguc story — was reminiscent of my elementary school years as well. Also, impressive that you were a chemist in your previous life! Thank you for this recipe — can’t wait to try it (as soon as I get all necessary ingredients, hopefully tomorrow.)
Happy Thanksgiving!
Marti Hill, Phoenix.
Thank you so much for your kind words, Marti! I’m honored that you took the time to read my story. There’s something special about elementary school memories, isn’t there? I hope yours are just as lighthearted and sweet! 🙂 I’m excited to hear what you think of these cookies too, whenever you get a chance to try making them. I hope you and your loved ones have a wonderful Thanksgiving!
Hi Amy, does this recipe work well with cookie stamps? Thanks!
We really appreciate your interest in this recipe, Lisa! We haven’t tried using cookie stamps or engraved rolling pins, but since these cookies don’t spread at all and hold their shape really well, we think there’s a good chance either one might work! We’d really love to hear about it if you decide to give it a try! 🙂
I have made some of your recipes and they are delicious! I can’t rate this one because I haven’t made it yet. I want to use stevia, but I mistakenly ordered original flavor Better Stevia instead of the vanilla Sweet Drops. Would that work about the same? Is there anything I could add to the original flavor stevia to make it more vanilla-y?
No need to make any modifications, Grace! NOW Better Stevia and SweetLeaf vanilla stevia are 100% interchangeable in our recipes without any modifications needed. (The vanilla flavor is so faint compared to vanilla extract that you can’t tell a difference!). I’d love to hear what you think of these cookies! 🙂
We’ll also add a note to our blog “To Do” spreadsheet about including this substitution info in our recipes that call for stevia! I have a feeling other readers may wonder the same thing. Hopefully they’ll find it useful too!
You answered my question completely. You are so good about getting back to your readers! THis is the second time I’ve asked you a question, and you’ve gotten right back to me again. Thank you so much! Adding tour answer to the blog spreadsheet might be helpful to others.
I’m so happy we’ve been able to help you out more than once now, Grace! We appreciate your sweet feedback, it really means a lot!
Hi Amy, can’t wait to try these!
I don’t have vanilla stevia, but I do have regular stevia. Is it possible to use it instead?
Thank you!!
I’m happy to hear you’re excited to try these cookies, Maya! What’s the exact regular stevia (brand + product name!) that you have? Since many brands and products have different sweetness levels, they’re not necessarily 1-for-1 substitutes for each other. Once we know the exact one that you have, we’ll have a better idea of whether it’ll work! 🙂
I doubt it’s a known brand since it’s from Israel. It’s called “sucrazit” and the product just says stevia
For comparison it says that 10 drops equal 1 tsp sugar
Thank you for sharing this — it’s so helpful, Maya! The conversion is exactly what we were going to research. For the liquid vanilla stevia that we use, 10 drops is the equivalent of 2 teaspoons of granulated sugar, so you’ll need to use twice as much of your liquid stevia (1 ½ teaspoons total!) to achieve the same sweetness level. Because an extra ¾ teaspoon of liquid is fairly small, you shouldn’t need to make any modifications to the other ingredients or instructions!
We’re excited to hear what you think of these sugar cookies, if you do end up making them! 🙂
Thank you so much for the help!♥️
We’re happy to help, Maya! ♡ I hope you and your loved ones have a wonderful holiday season!
May I use almond flour as a substitute for the white whole wheat flour? Thanks in advance!
We really appreciate your interest in our recipe, Carol! We think that should be fine for this particular recipe. You may need to add an extra 1-3 tablespoons of almond flour since it isn’t quite as absorbent as wheat-based flours (if you watch our video above the recipe, you should be able to see what the texture of the cookie dough should be like at each stage while Amy is making it!). However, the flavors should remain the same! 🙂 We’d love to hear what you think of these sugar cookies if you try making them!
Thanks, Stacey, for your quick reply. I’ll let you know how it turns out with almond flour. Happy Holidays!
Our pleasure, Carol! We’re happy to help. 🙂 Happy holidays to you and your loved ones as well!
I like a little thicker cookie. Can these be rolled to be thicker and still bake thru OK, etc?
I really appreciate your interest in my recipe, Dawn! Yes, you should be able to roll the dough out so it’s thicker. Your cookies may need a bit more time to finish baking, but the baking temperature and their flavor will remain the same! 🙂 I’d love to hear what you think of them if you do end up making these sugar cookies!
This recipe looks great! If I wanted to use powdered stevia instead of liquid stevia, would that be possible? How might I substitute it? Thanks!
We really appreciate your interest in our recipe, Jennifer! What’s the exact stevia (brand + product name) that you’d like to use? Many stevia brands and products have different sweetness levels, so the amount that you’d need and any other modifications the recipe might require depends on the exact stevia sweetener that you’d like to substitute!
Wow – that is so amazing of you to ask! Thank you! The powder is Stevia in the Raw.
We’re happy to help, Jennifer! If you’d like to substitute Stevia In The Raw Bakers Bag (the one that comes in the green bag, rather than their little packets or tablets!), then you’ll need 6 tablespoons to replace the liquid vanilla stevia that we use. Because Stevia In The Raw dissolves down into practically nothing, you shouldn’t need to make any other modifications to the recipe!
We’d love to hear what you think of these sugar cookies if you end up making them!
And in case it’s helpful… We’ve actually developed a few recipes that specifically call for Stevia In The Raw Bakers Bag! I’ll include links to those below — just in case you might be looking for inspiration or other things to bake with it! 😉
• Zucchini Banana Bread
• Gingerbread Muffins
• Cranberry Orange Oatmeal Cookies
Do you have an alternative for egg, my son is allergic.
We do, Jagjina! Amy actually has a family member who is allergic to eggs, and Ener-G is her favorite egg replacement substitute. If you haven’t heard of it before, Ener-G is a flavorless and shelf-stable powder that keeps for ages. It works perfectly as an egg replacer in nearly all of our recipes, including this one! For our recipes, use 1 ½ teaspoons Ener-G + 2 tablespoons warm water for each egg white (and you’ll need an additional ½ tablespoon of butter or coconut oil {or Earth Balance, if you’re vegan!} for each egg yolk, although that doesn’t apply to this particular recipe!).
We’d love to hear what you think of these cookies if you end up making some! 🙂
Wow – you are so amazing! Thank you so much!!!
You’re so sweet to say that. We are happy to help, Jennifer! 🙂
I used coconut sugar and I omitted the butter flavor because I couldn’t find any. I ended up having to add a dribble of water to make it all pull together but it turned out great!!
I’m so happy to hear that you enjoyed these cookies, Jaimie! Thanks for taking the time to share and rate this recipe, it really means a lot! I appreciate you sharing your modifications, too. We love to hear what recipe tweaks work well, and I’m glad you were able to make it all work! 🙂