

The Saturday evening before Thanksgiving during my freshman year of college, a few guys from the low-key worship group I attended hosted a potluck-style “Friendsgiving Feast” at their house. Although they told all the freshmen to “just bring yourself!” since we lived in the dorms, rather than in apartments with regular kitchens, two of my closest friends and I still wanted to show up with dishes to share.
The day before once our classes let out, we biked to the nearest grocery store about a mile away to pick up a few essentials. Since my dorm building actually had a communal kitchen on the first floor right next to the coin-operated laundry room, we met in there early Saturday afternoon. Because of a midterm on Monday, one of the girls opted for a quick and easy salad and brought her flashcards to study, but with my baking obsession, I mixed up my favorite soft and chewy pumpkin cookies, popping tray after tray into the finicky old oven.
A few hours later, we walked around the corner and down the street to the guys’ house, located just a quarter mile away, with our trays of food precariously balanced in our arms. Upon walking inside, we set them down on the three long tables pushed together along with all of the upperclassmen’s dishes before greeting our other friends with big hugs and hellos.
For the rest of the evening, everyone took turns walking down the sides of the tables, filling their plates with the cozy home-cooked food: oven-roasted turkey, herbed stuffing, mashed potatoes and gravy, cranberry salad, soft crescent rolls, sweet potato casserole, slices of cornbread, bacon-laden Brussels sprouts, green bean casserole, fresh spinach salad… And that was just what sat on the first of the three tables!
At the end of the line, plenty of sweet treats waited patiently for us. Classic pumpkin and pecan pies, lots of whipped cream, apple crumbles, sweet potato pies, pecan tassies, and of course, my pumpkin cookies. By the time everyone started to trickle out at the end of the night, quite a few slices of dessert still sat on the table… But all of my pumpkin cookies had magically disappeared!
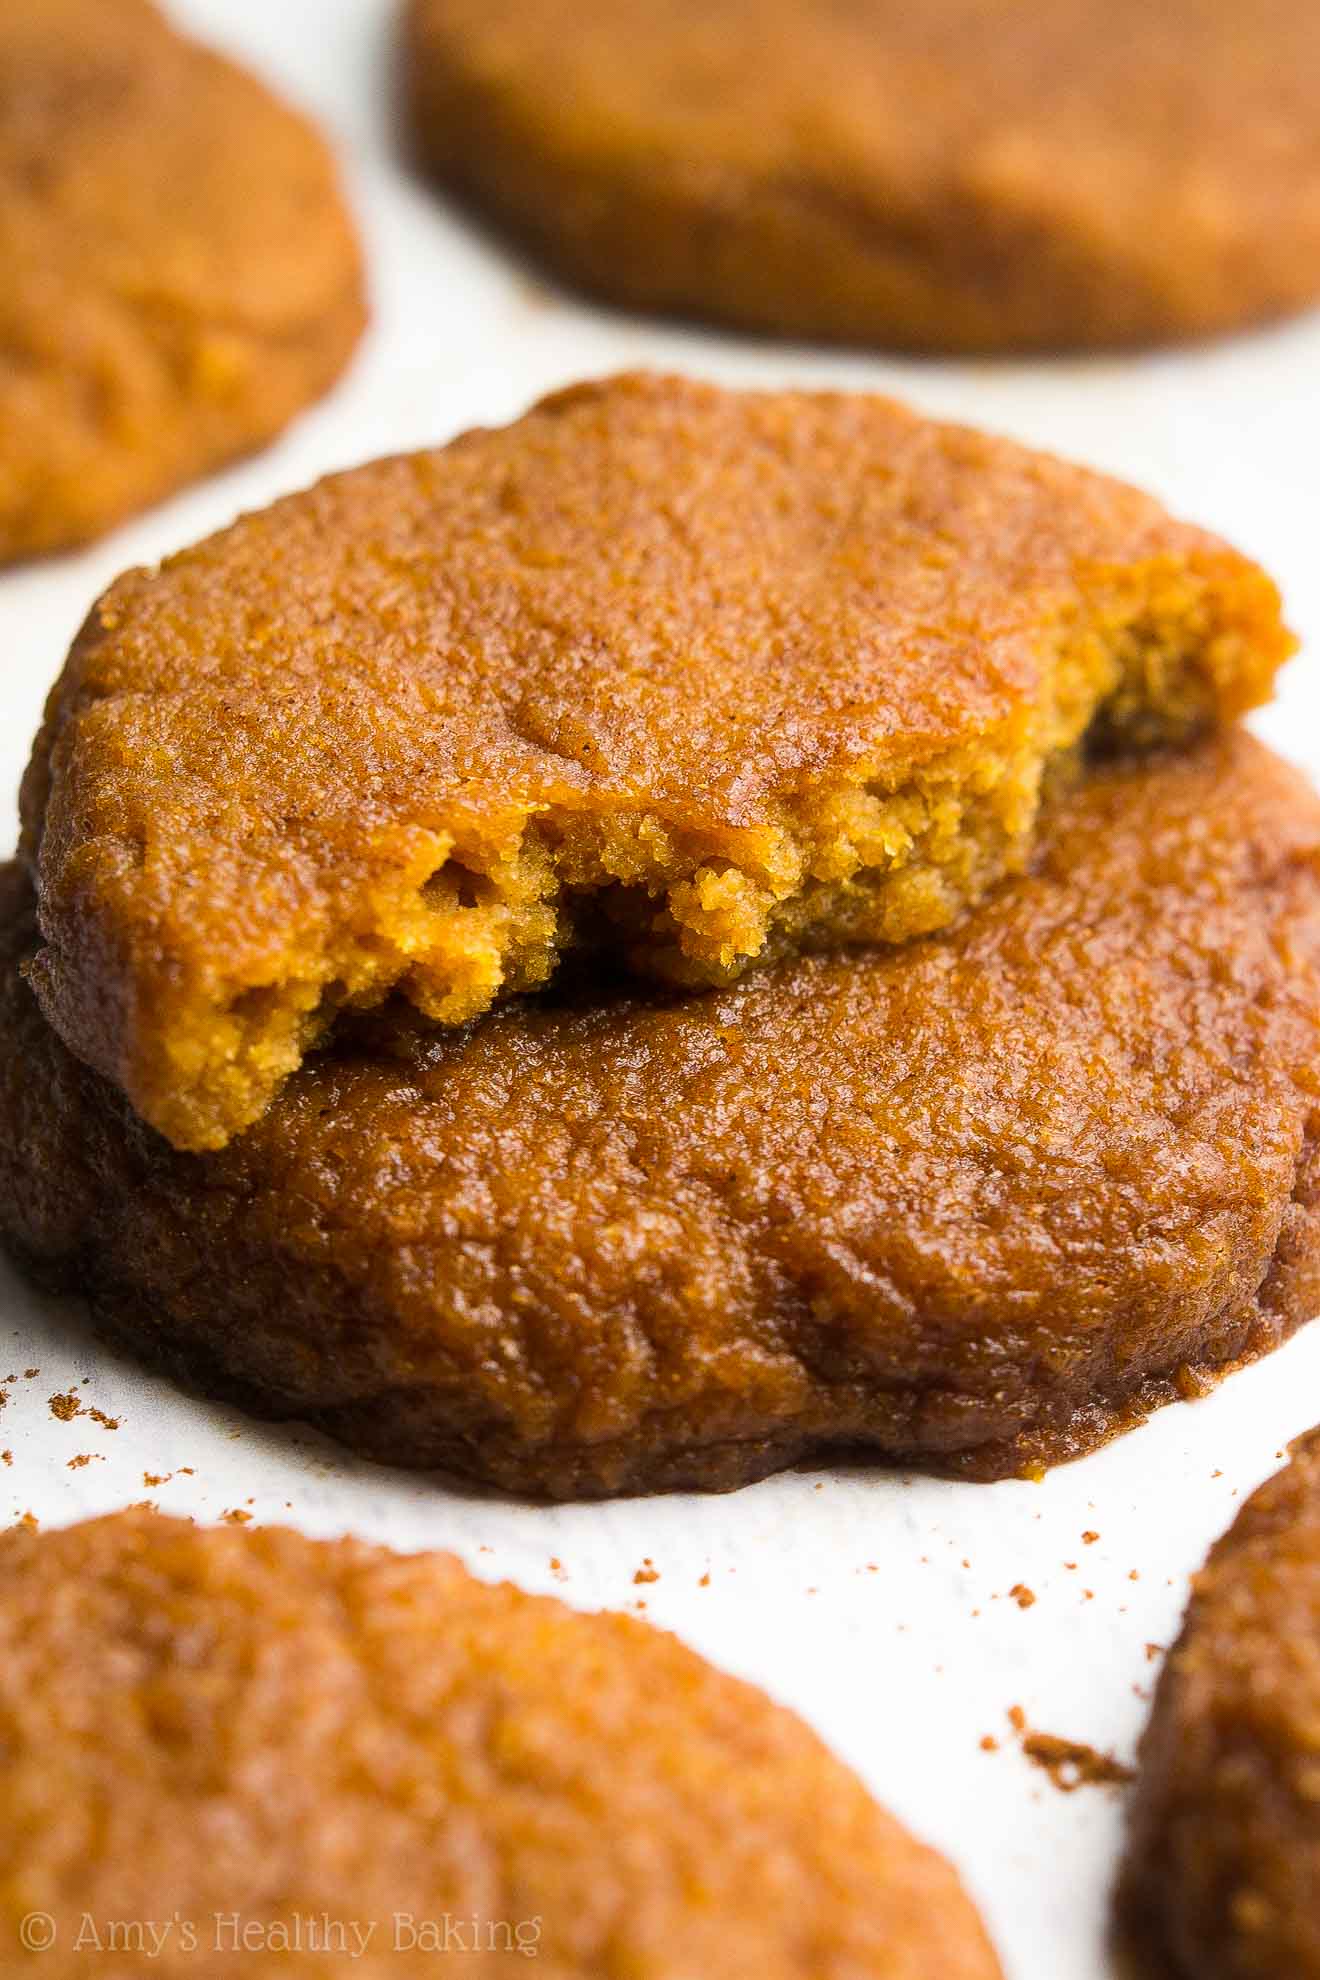
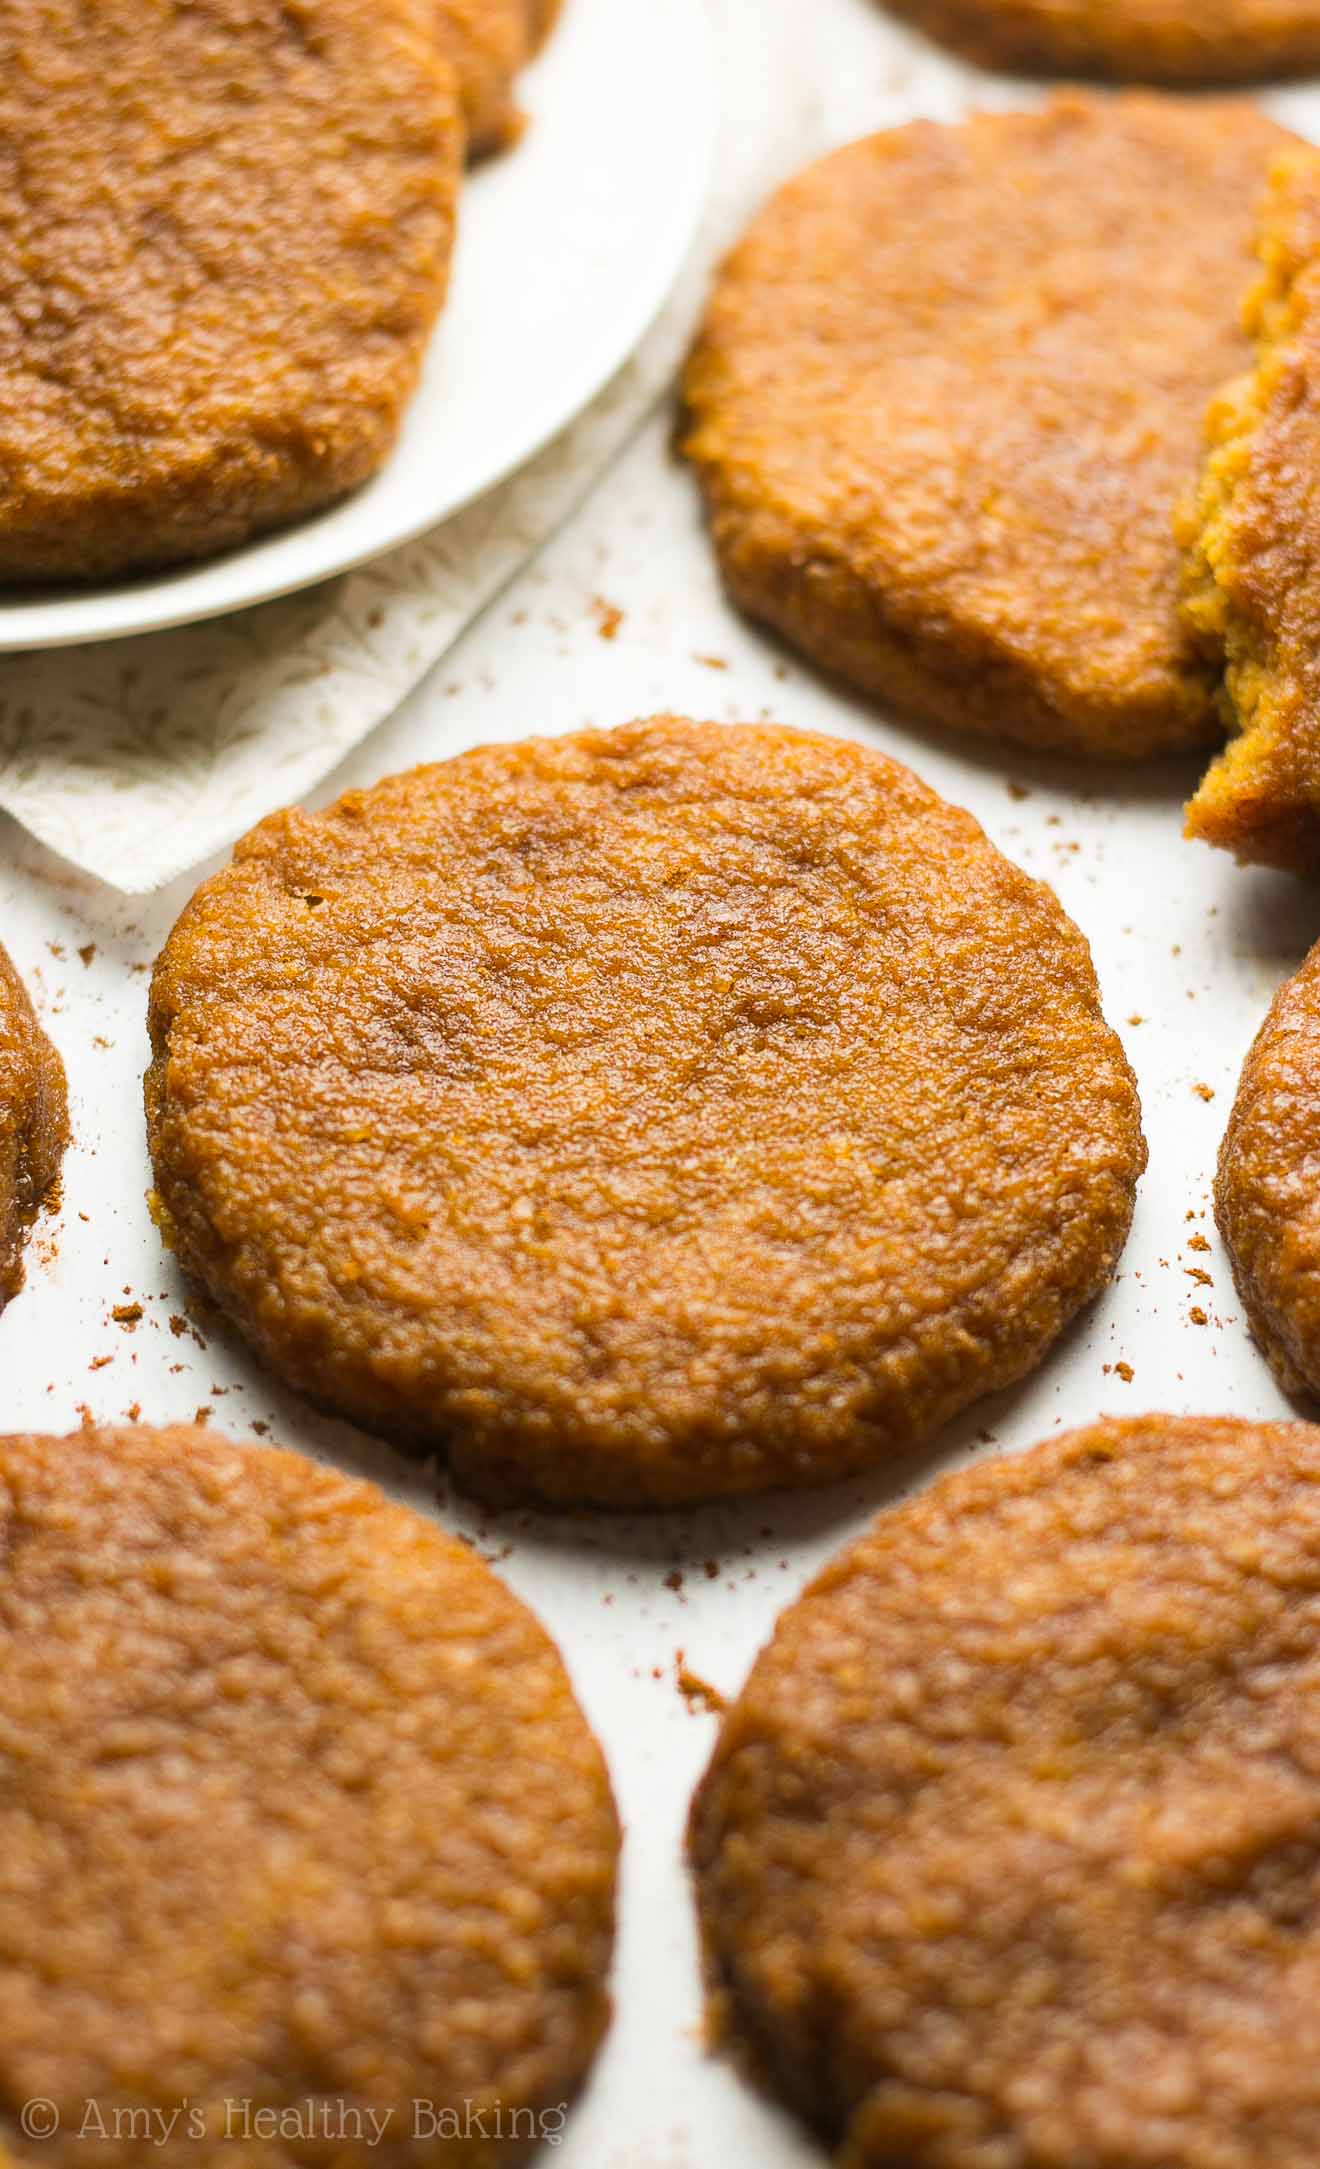
With Thanksgiving quickly approaching (how is it November already?? I feel like it should still be March… I’m not ready for the holidays yet!), I wanted to create a healthier version of those cookies—and with a fun little twist too! The result? These Pumpkin Pie Snickerdoodles! They’re just as soft and chewy as those originals from the Friendsgiving Feast, but they have a sweet cinnamon coating and no butter, eggs, refined flour or sugar!
Ready to start baking? First, you’ll need white whole wheat flour. It sounds like an oxymoron, doesn’t it? White and whole wheat… In the same flour? However, white whole wheat flour earned its name because it’s made by finely grinding a special type of soft white wheat, whereas regular whole wheat flour comes from a heartier variety of red wheat, but they both have the same health benefits (like extra fiber!). White whole wheat flour has a lighter taste and texture, similar to that of all-purpose, which is perfect for letting the pumpkin flavor shine in these cookies!

You’ll also need lots of pumpkin purée. Skip the pumpkin pie mix! That contains refined sugar, which we’re avoiding in this healthier recipe. You just want regular ol’ pumpkin purée. (And if you’re anything like me, you’ve already stocked up and have at least 5 cans hiding in your pantry! The closer we get to Thanksgiving, the more worried I become that the grocery store will run out…)
To sweeten your cookies, you’ll use pure maple syrup. Avoid pancake syrups or sugar-free syrups! Those have corn syrup or artificial ingredients. The only ingredient on the label should be “maple syrup,” and it’s generally sold in thin glass bottles or squat plastic jugs. I’ve also bought it online here for a slightly discounted price!

Because of the pumpkin and the maple syrup, this cookie dough is very wet when you first mix it up, so chilling is mandatory! This helps reduce some of its stickiness, but it’ll still be fairly tacky when it’s time to roll it in the sweet mixture of cinnamon and coconut sugar. So here’s what I do!
♥ Drop it into rounded mounds onto a silicone baking mat using a spoon and small spatula (to make sure the cookies are about the same size!). You could easily skip this part though.
♥ Pick those back up with the spoon and spatula one at a time, and drop each in the bowl of cinnamon + coconut sugar.
♥ Using your fingers, sprinkle some of the coating on top of the exposed cookie dough (so it doesn’t stick to your fingers when you roll it around!).
♥ Make sure the cookie dough is fully covered, carefully pick up (your fingers are fine this time!), place it back on the silicone baking mat, and gently flatten it with your fingers to about half its original height. (The cookies will spread some in the oven, but not too much, so this gives them a spreading “head start!”)
Then place the baking sheet in the oven, set your timer, and…

Soft, chewy, cinnamony, pumpkiny, oh-so-irresistible cookie bliss! ? And when you make your own, remember to snap a picture and share it on Instagram using #amyshealthybaking and tagging @amyshealthybaking IN the photo itself! (That guarantees I’ll see your picture! ?) I’d love to see your snickerdoodles and feature them in my Sunday Spotlight series!
| Pumpkin Pie Snickerdoodles | | Print |
- for the cookies
- 1 cup (120g) white whole wheat flour or gluten-free* flour (measured like this)
- 1 tsp cornstarch
- ¾ tsp baking powder
- 1 tsp ground cinnamon
- ⅛ tsp ground nutmeg
- ⅛ tsp ground ginger
- ⅛ tsp salt
- 2 tbsp (28g) unsalted butter or coconut oil, melted and cooled slightly
- ¾ cup (183g) pumpkin purée, room temperature (NOT pumpkin pie filling)
- 1 tsp vanilla extract
- ½ cup (1620mL) pure maple syrup
- for the coating
- 6 tbsp (72g) coconut sugar
- 1 tsp ground cinnamon
- To prepare the cookie dough, whisk together the flour, cornstarch, baking powder, cinnamon, nutmeg, ginger and salt in a medium bowl. In a separate bowl, whisk together the butter, pumpkin, and vanilla. Stir in the pure maple syrup. Add the flour mixture, stirring just until incorporated. Chill the cookie dough for at least 30 minutes. (If chilling longer than 1 hour, cover the top of the bowl with foil.)
- Preheat the oven to 325°F, and line a baking sheet with a silicone baking mat or parchment paper. To prepare the coating, combine the coconut sugar and cinnamon in a small bowl.
- Using a spoon and spatula, drop the cookie dough into 12 rounded scoops onto the prepared baking sheet. Working with one at a time, pick up each using the spoon and spatula, and drop in the cinnamon sugar mixture. Using your fingers, sprinkle some of the coating on top (to ensure it doesn’t stick to your fingers!) before rolling it around. Once coated, gently pick up the cookie dough and transfer back to the baking sheet. Gently flatten using your fingers to about half of its original height.
- Bake at 325°F for 13-16 minutes. Cool on the baking sheet for at least 10 minutes before turning out onto a wire rack.
For the gluten-free flour, use the following: ¼ cup (30g) millet flour, ¼ cup (30g) tapioca flour, 3 tablespoons (21g) coconut flour, and ¾ teaspoon xanthan gum. Most store-bought gluten-free flour blends will work as well, if measured like this.
Honey or agave may be substituted for the pure maple syrup. Granulated, brown, or coconut sugar may also be substituted in place of the pure maple syrup. However, when made with granulated, brown, or coconut sugar, the cookie dough does not spread while baking, so you will need to flatten the rounded scoops of cookie dough on the baking sheets before placing in the oven. They’re generally done baking in about 13-15 minutes instead.
Granulated or brown sugar may be substituted for the coconut sugar. Truvia may be substituted as well.
The cookie dough will still be sticky when it’s time to roll it in the coating. For more information on my process on how to do this without the cookie dough sticking to your fingers, see my step-by-step instructions in the text of the blog post above.
This cookie dough spreads a little, but not very much. If you prefer wider and thinner cookies, flatten the dough a little more before baking. (Flatten to no less than half of the rounded scoops’ original heights.)
Do NOT overbake these cookies! They’ll turn out cakey instead of chewy if baked for too long.
{gluten-free, vegan, clean eating, low fat, low calorie}
View Nutrition Information
You may also like Amy’s other recipes…
♥ The Ultimate Healthy Soft & Chewy Pumpkin Chocolate Chip Cookies
♥ Pumpkin Cheesecake Oatmeal Cookies
♥ Pumpkin Monster Cookies
♥ Pumpkin Pie Protein Cookies
♥ Pumpkin Pie Chocolate Chip Oatmeal Cookies
♥ The Ultimate Healthy Pumpkin Pie
♥ Pumpkin Cake with Cream Cheese Frosting
♥ Greek Yogurt Pumpkin Chocolate Chip Pound Cake
♥ Skinny Pumpkin Cheesecake Bars
♥ …and the rest of Amy’s pumpkin recipes!

I love snickerdoodles already, but PUMPKIN snickerdoodles?! You know the key to my heart, Amy. 😉 Waiting for the dough to chill is definitely the hardest part!!
You’re such a sweetheart Marina! ♥ And…. I totally agree! 😉
Girl, you had me at the word “pumpkin”! I can’t wait to give these a try! Have an awesome day!
I had a feeling you might like these new pumpkin treats Lynn! 😉 I’m so excited to see your snickerdoodles when you bake them!
Okay, so I made these ones next… 5x the recipe (to use up a whole can of pumpkin, adding just a touch of applesauce to make the measure right), hard red wheat flour (still have some of that left), and butter. I only 3x the recipe of the coating, and thankfully ended up with -just- the right amount for my 67 cookies.
These are pleasant! The texture is not quite a cookie, yet not quite a cake either. The first half I forgot to flatten before cooking, and they certainly didn’t flatten themselves! They don’t -seem- like cookies to me, though they make quite nice dessert bites. In any case, they turned out very nice.
Thank you for sharing!
Marianna
It’s my pleasure! 🙂 I’m so glad you enjoyed these cookies Marianna! Thanks for taking the time to let me know!
Hi, unfortunately I do not have any maple syrup at home. May I ask how I can substitute granulated sugar for the maple syrup?
I really appreciate your interest in my recipe, Hazel! I’ve actually covered this already in the Notes section of the recipe (located directly underneath the Instructions!). I know it can be easy to miss! 🙂 I can’t wait to hear what you think of these snickerdoodles!
Is there some kind of sign to tell when they are baking that it is time to pull the cookies out or they’ll be overdone? I tried a different recipe(healthy pumpkin chocolate chip oatmeal cookies) and cooked for the maximum 14 mins. I think they may be a bit on the cakey side, not chewy; so next time try 12 mins and hope the result is different?
I really appreciate your interest in my recipe! To determine when they’re ready to come out of the oven, I gently press my finger into the center of the cookies. It should feel slightly underdone and not completely firm (but not totally wet and raw either!), with a little bit of give. The heat from the warm baking sheet will continue to cook the cookies as they rest for the 5-10 minutes after removing them from the oven and before transferring them to a wire rack. If you pull them when they’re completely firm, the cookies will often end up cakey, bready, or overdone — but if you pull them when they feel slightly underdone, they’ll turn out soft and chewy! Does that make sense?