
One December during my middle school years, my aunt flew out from Arizona to visit us for the holidays. On her first full day at our house, she suggested that we made gingerbread cookies as an afternoon project, and since Mom usually lacked the patience for baking anything besides boxed mix brownies, my brother and I immediately agreed.
We found a recipe in one of our faded old cookbooks and quickly set to work measuring and mixing together the ingredients. After rolling out the dough and slicing it into fun shapes with our eclectic collection of cookie cutters, everything from candy canes and Santa’s sleigh to Mickey Mouse and the Pillsbury Dough Boy, we popped the trays into the oven to bake.

A couple of hours later, we sat down at the kitchen table to decorate our treats. Instead of mixing up traditional royal icing, we just stirred together milk and powdered sugar in a handful of small bowls, then squirted in a few drops of food coloring to dye them pastel shades of pink, green, yellow, and blue.
When we finished icing the cookies, we arranged them on large dinner plates and safely tucked those away on top of the refrigerator. Our golden retriever could easily jump up on the counters and eat anything in sight!

That evening, I slipped into the kitchen to sneak a cookie before dinner when Mom wasn’t looking. After grabbing a small star, I hastily slid the plate back on top of the fridge and brushed the crumbs off my fingertips, but when Mom opened the refrigerator door a few minutes later to pull out some vegetables…
That plate tumbled down and shattered on the kitchen floor, sending broken pieces of stoneware and cookies into every nook and cranny. Whoops!
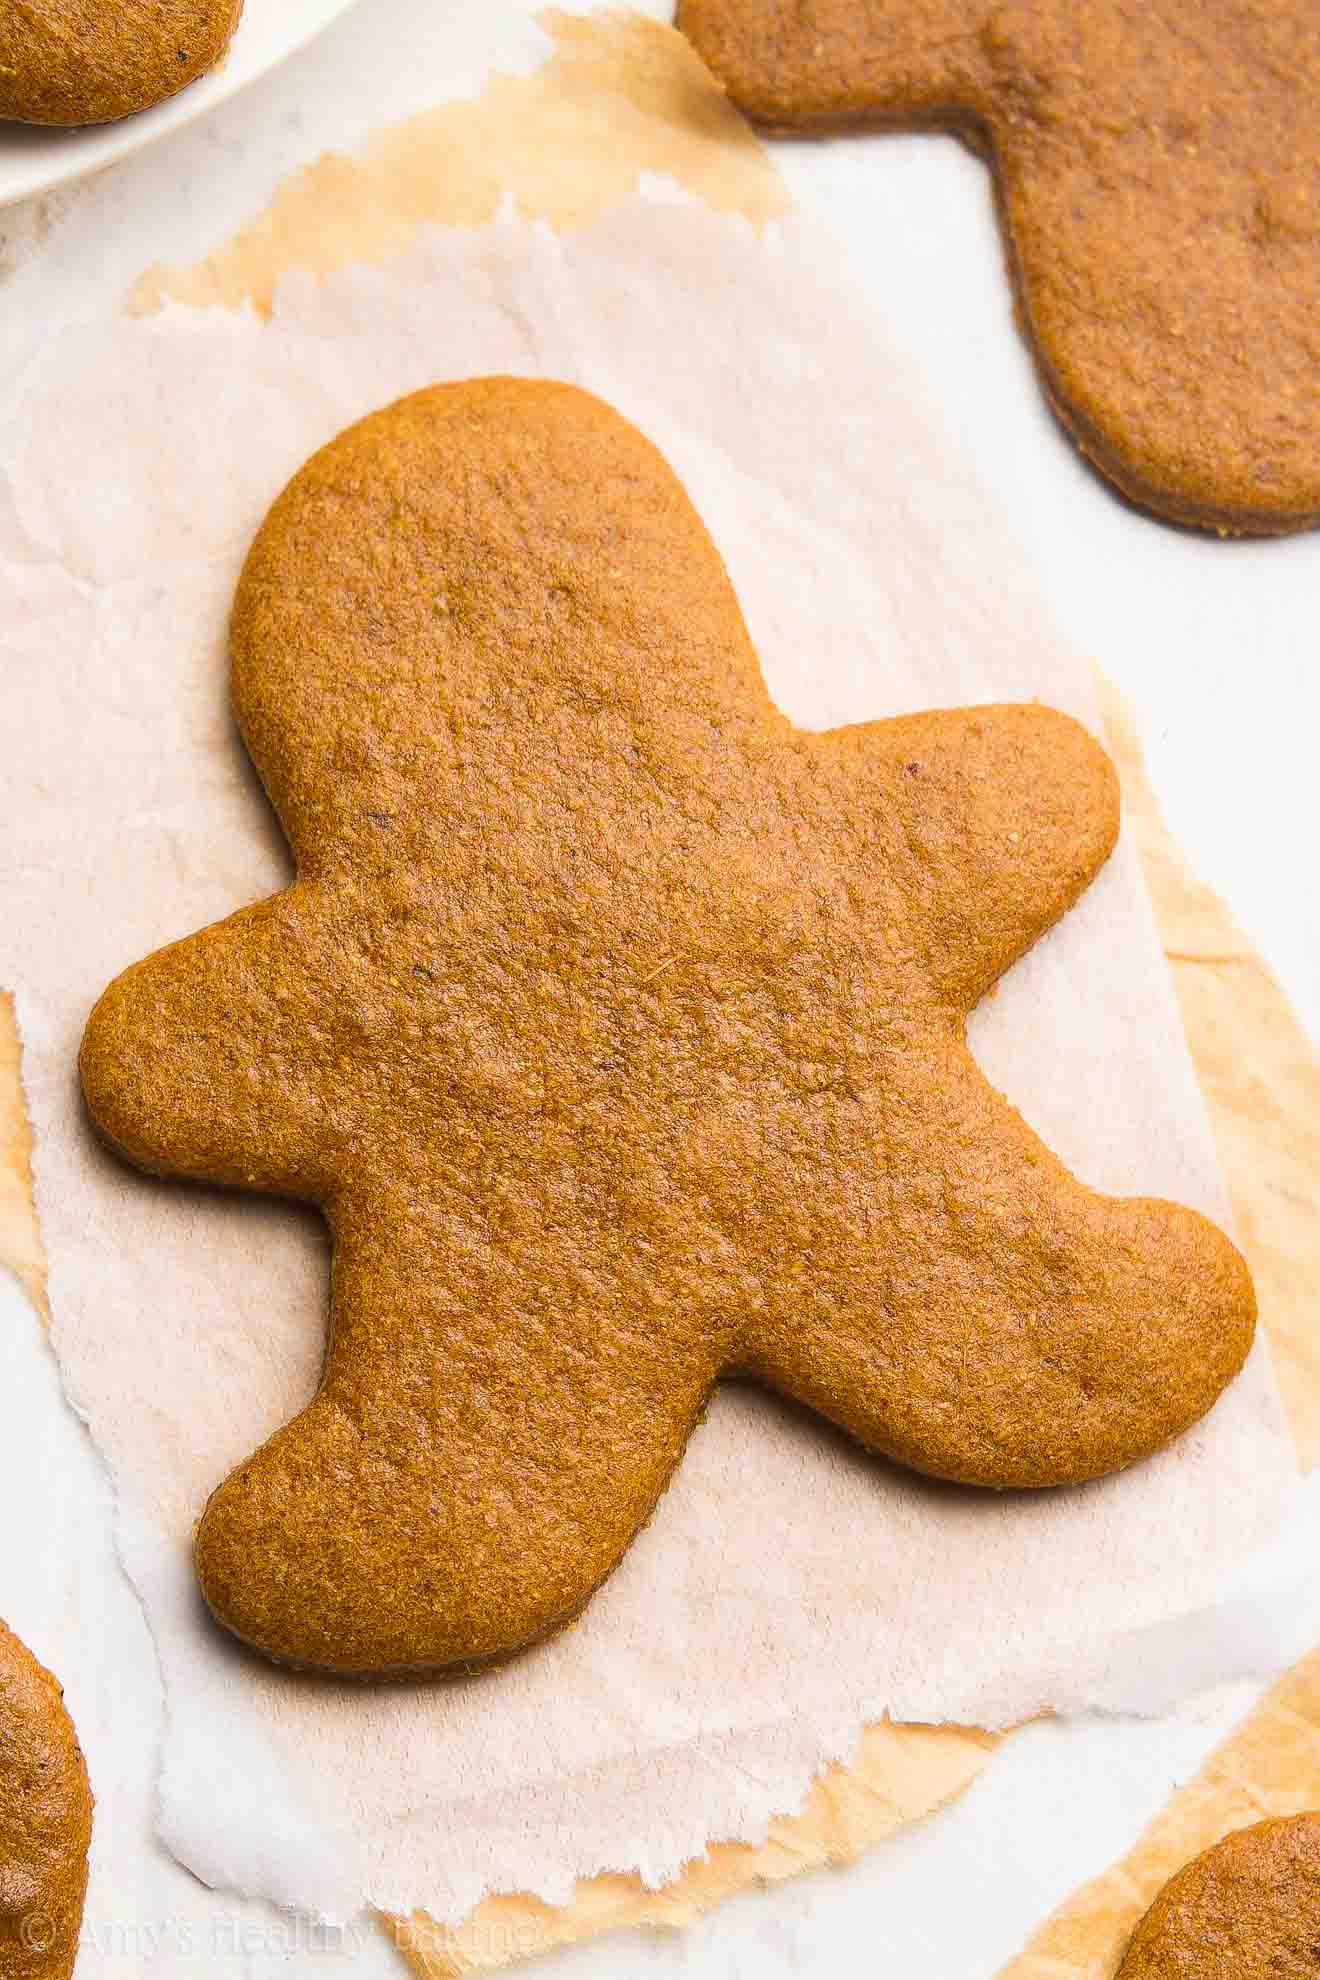
Ever since then, I’ve thought of my aunt and that little refrigerator incident whenever I’ve eaten gingerbread cookies… But since she passed away six years ago, I haven’t actually baked any homemade ones. However, I decided to change that this year, so I set out to create this recipe for the Ultimate Healthy Gingerbread Cookies. They’re full of the same cozy flavors as traditional recipes, but without any butter, refined flour or sugar, they come with none of the guilt. And I know my aunt would’ve loved these!
(And I stashed the leftover cookies on a shelf in the pantry this time, not the top of the fridge!)


KEY INGREDIENTS TO MAKE THE BEST HEALTHY GINGERBREAD COOKIES
To make these healthier gingerbread cookies, you’ll start with white whole wheat flour. That sounds a little contradictory, doesn’t it? Normally white flour and whole wheat flour are two totally different things! However, white whole wheat flour is made by finely grinding a special type of white wheat, whereas regular whole wheat flour comes from a heartier variety of red wheat. This gives white whole wheat flour a lighter taste and texture, similar to all-purpose flour, but it still has the same health benefits as regular whole wheat flour (like extra fiber!).
The gingerbread flavor comes from two main sources: ground ginger and molasses. I’m sure you guessed the first of those ingredients! The molasses provides the deep, rich, cozy undertones, and it’s absolutely crucial when making gingerbread cookies. Don’t skip it! Molasses is inexpensive, shelf-stable, and keeps for ages. This is the kind that I buy, and you can find it at most grocery stores near the honey or maple syrup.
In addition to the molasses, you’ll sweeten these cookies with one of my favorite ingredients: vanilla crème stevia. Stevia is a plant-based, no-calorie sweetener that’s clean eating friendly, and it’s very concentrated. A little goes a long way — you just need 1 teaspoon for this entire batch of cookies! This is the kind that I buy because I love its warm vanilla flavor and don’t notice any strange aftertastes like with some other stevia products. You can find it at many health-oriented grocery stores, but I usually buy mine online here because that’s the cheapest price I’ve found. (And you’ll use it in all of these recipes of mine, too!)


HOW TO MAKE THE BEST HEALTHY GINGERBREAD COOKIES
I have a special trick to share with you about how to easily roll out cookie dough with absolutely NO mess… You’ll roll it out between two large sheets of plastic wrap! With this trick, you don’t need to flour your work surface OR the cookie dough OR the rolling pin. It works like a charm for pie crusts and my sugar cookies, too! (Bonus: Your rolling pin won’t get dirty, so you don’t have to wash it!)
Here’s another pro tip for how to create perfectly shaped cut-out cookies… After pressing down the cookie cutters into the dough, peel the extra dough away from those shapes. (If you pull the cut-out cookie dough away from the extra dough, it usually stretches and turns misshapen!) Then slide a knife underneath the cut-out cookie dough to loosen it from the plastic wrap, and transfer it to your baking sheet. Ta da! Perfectly shaped cookies!
Then after a quick trip to the oven…


Time to pour a glass of milk and enjoy your cookies! Although with how much my family loved these, you may need to bake a second batch to make sure you have enough for Santa on Christmas Eve… 😉
And when you make your own, remember to snap a picture and share it on Instagram using #amyshealthybaking and tagging @amyshealthybaking IN the photo itself! (That guarantees I’ll see your picture! 🙂 ) I’d love to see your ultimate healthy gingerbread cookies!

The Ultimate Healthy Gingerbread Cookies
Ingredients
FOR THE COOKIES
- 1 cup + 6 tbsp (165g) white whole wheat flour (measured like this)
- ¾ tsp cornstarch
- ¼ tsp baking powder
- 1 ½ tsp ground ginger
- ¼ tsp ground cinnamon
- ⅛ tsp ground nutmeg
- ⅛ tsp ground cloves
- ¼ tsp salt
- 2 tbsp (28g) unsalted butter or coconut oil, melted and cooled slightly
- 1 large egg, room temperature
- 1 ½ tsp vanilla extract
- ¼ cup (60mL) molasses (not blackstrap!)
- 1 tsp vanilla crème stevia (see Notes!)
FOR THE ICING (optional)
- 10 tsp confectioners' style erythritol (see Notes!)
- 2 tsp nonfat milk (or adjusted to achieve your desired consistency)
Instructions
- To prepare the cookies, whisk together the flour, cornstarch, baking powder, ginger, cinnamon, nutmeg, cloves, and salt in a medium bowl. In a separate bowl, whisk together the butter, egg, and vanilla extract. Stir in the molasses and vanilla stevia. Add in the flour mixture, stirring just until incorporated. Transfer the dough to the center of a large sheet of plastic wrap, and shape into a 1”-tall rectangle. Cover the top with another large sheet of plastic wrap. Chill the dough for at least 1 hour.
- Preheat the oven to 325°F, and line two baking sheets with silicone baking mats or parchment paper.
- Leaving the cookie dough between the sheets of plastic wrap, roll it out until ⅛” thick. Lightly flour your cookie cutter, and press it into the dough, making sure each shape lies as close to its neighbors as possible to minimize unused dough. Peel the unused dough away from the shapes, and place them onto the prepared baking sheets. Reroll the unused dough, and repeat.
- Bake the cut out cookie dough at 325°F for 8-10 minutes. Cool on the baking sheet for 5 minutes before turning out onto a wire rack to cool completely.
- To prepare the icing, stir together the confectioner’s style erythritol and milk in a small bowl. Spoon into a zip-topped bag, and snip off the corner. Pipe onto the cooled cookies.
Notes
View Nutrition Information + Weight Watchers Points
You may also enjoy Amy’s other recipes…
♡ The Ultimate Healthy Sugar Cookies
♡ Soft-Baked Ginger Cookies
♡ Gingerbread Oatmeal Cookies
♡ Gingerbread Breakfast Cookies
♡ Classic Gingerbread with Maple Glaze
♡ Gingerbread Muffins
♡ Gingerbread Protein Overnight Oats
♡ Baked Gingerbread Donuts with Maple Glaze
♡ …and the rest of Amy’s healthy cookie recipes and healthy holiday recipes!
Note: The recipe video was sponsored by SweetLeaf®. As always, all thoughts, text, photos, videos, and recipes are my own.


My daughters and I made these this evening. They’re good! Not super sweet, but much healthier for you than most Christmas cookies! I might try adding some honey next time to see if I can make them just a bit sweeter. Stevia is unusual in that if you use too much you get a bitter aftertaste, so I think it will need to be something *other* than stevia, but they’re really not bad as they are.
I’m so glad you and your daughters enjoyed these cookies Amy! If you’d like to make them sweeter, then I actually recommend against using honey. That would add a bit too much liquid to the cookie dough, so the cookie dough would end up a bit too sticky to roll out and have a slightly bready or muffin-like texture. If you have something like erythritol, a couple of tablespoons of that would be best! 🙂
Is plain stevia powder ok? And would that be the same quantity?
I really appreciate your interest in my recipe Jaye! What’s the exact brand and powdered stevia product that you’d like to use? Different brands and products often have different sweetness levels, so once I know the exact brand and product, I’ll have a much better idea of what you’ll need to do to use it in this recipe! 🙂
wonderful recipe. Even my toddler declared these to be tasty!
I’m so glad you and your toddler enjoyed these cookies Ginia! Thank you so much for taking the time to let me know! 🙂
Do you have the nutritional information available for these cookies?
Yes! It’s directly underneath the recipe. I know it can be easy to miss that! 🙂 I’d love to hear what you think of these gingerbread cookies if you make them, Bambi!
Amy;
Hi,I am deffinately going to be making your gingerbread cookies in early december after I go buy six ingredients to go make your cookies.Can they be freeze the cookies after they are baked and cooled?how do I go about freezing the gingerbread cookies?
Kim
I’m so honored you decided to try making these Kim! Yes, these cookies freeze really well once they’ve been baked and cooled. For my cookie recipes (and the other ones I suggested to you!), here’s what I do to freeze them: (a) line a baking sheet with foil {just for easy clean up!}; (b) put the cookies {or the slices of loaves / cake!} in a single layer on the foil-lined baking sheet, and make sure they’re not touching; (c) slide the baking sheet into the freezer for 1 hour; and (d) remove the baking sheet from the freezer, transfer the frozen treats into zip-topped bags, and squish all of the air out.
Remember to label your zip-topped bags with the date the treats were frozen (I use a sharpie to do this!), and put them in the freezer. Super easy! Then to thaw, I like to thaw individual treats in the microwave on 30% power or until they’re warmed all the way through.
I’m really excited to hear what you think of these cookies — and any other holiday recipes of mine that you try! 🙂
Hi Amy,
This page is so good and thank you for making healthy desserts, I’ve never used the oven and I don’t want to waste too much ingredients so, which would be the recipe if I want to make only 12 cookies instead of 24?
Thank you
I really appreciate your interest in my recipe Michelle! It’s a bit difficult to make half of this recipe (because it just uses 1 egg, which is a bit hard to split in two! 😉 ). This is still a fairly small batch compared to most gingerbread cookie recipes (they tend to use double the ingredients that I do to make 3 or 4 dozen cookies!), so I think the best thing would actually be to make the recipe as written. However, if you’re completely against that, then you can try using half of all of the ingredients except the egg, and just use the egg white (not the yolk) in your half batch. The cookies might have a slightly different texture and consistency if you do that. 🙂 I’d love to hear what you think of these gingerbread cookies if you try making them!
Thank you so much for the advice!
Anyway, when it says preheat the oven it means I have to turn it on with the baking pan I’ll use inside right? And then what , while I make the mix it’s heating right? So when I finish fixing I put the mixture inside of the already heated pan right?
I’m sorry 🙁
No need to apologize Michelle!! I’m always so happy to help, and I’m incredibly honored that you’d pick my recipe as the first recipe you ever try to bake. 🙂 For preheating the oven, that just means turn it on to the correct temperature in advance. It takes a while (anywhere from 5-15 minutes, depending on your oven!) for the oven to heat up and start maintaining the correct temperature. That’s all you’re trying to do with preheating — get the oven to maintain the temperature the recipe calls for!
When preheating, you do not put the baking sheet inside of the oven. You want that to be room temperature! Otherwise, there’s a chance that your cookies will bake unevenly (and a much greater chance of you burning yourself when you try to transfer the cookie dough onto the baking sheet! 😉 ). So unless a recipe explicitly states that the baking pan needs to be in the oven while preheating, “preheat” only refers to the oven — not any of the baking pans, dishes, bowls, etc. Does that make sense? 🙂
Thanks so much!!
It’s my pleasure, Michelle! I’m always happy to help. 🙂 Let me know if you have any other questions!
Just, after preheating the oven stays on right ?
Yes! Turn the oven on, set it to 325°F, and leave it on that temperature until you’ve finished baking all of your cookies. Then you can turn it off! (And during the winter months, I like to leave the oven door open after I’ve turned it off so the “leftover” heat warms up my house!) 🙂